Table of Contents
Introduction
Uploading and activating DGs through the DG builder is very convenient when testing DGs on your local machine.
Generally this method saves the developer time.
Configuring the Database Connection
First check that the database details are correct or this will not work.
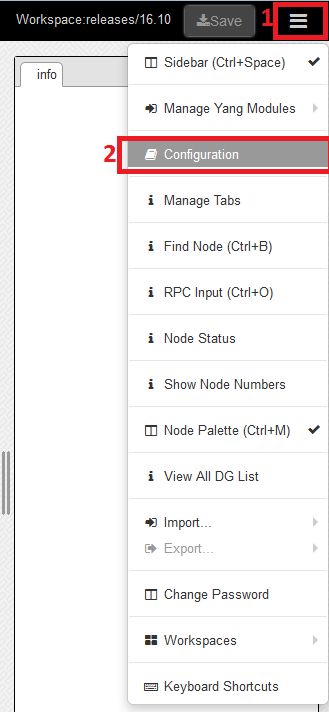
- In the top right of your screen click on the icon (labeled with a red 1 in the screenshot) to open the drop down menu
- Then click configuration (labeled with ared 2 in the screenshot)
Ensure that the database details are correct.

If you made changes click save at the bottom of the window.
Uploading the XML
- First click on the tan square (labeled with a red 1) to open the pop-up menu.
- Then click on upload XML (labeled with a red 2)


Activating the DG
Directly after clicking "upload XML" the popup below is seen. Click on "View DG List".


Rows representing each row in the database will appear.
If no other graphs are in the database you will have a single row.
Click activate on the row you wish to activate.
If you have multiple rows take note of which version you want to activate.

