...
If you want to edit this key pair in the future, create a text file containing a short phrase, called a "passphrase". Copy and paste this passphrase into the "Key passphrase" and "Confirm passphrase" lines, then select "Save public key" and choose a filename (e.g. public.txt); also "Save private key" and choose another filename (e.g. private.ppk). Since you ran puttygen as Administrator, the files are visible to Windows Explorer.
...
This action not only loads private.ppk into pageant, but also starts pageant if it is not already running. You will be prompted for the passphrase that you entered into puttygen when you created the key. If successful, pageant will load the key without further interaction.
| Panel | ||
|---|---|---|
| ||
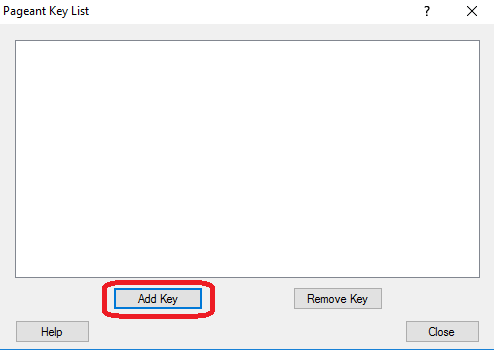
You can right-click on this icon to perform actions with pageant, including "View Keys" (which brings up a dialog box that allows you to add or remove keys.)
The "Add Key" button offers another way to enter your private key into pegeant: after clicking on "Add Key", select the file containing your private key (for example, |

...
We recommend using SSH, in which case you need to register your private key in your account settings on the Gerrit host. However, if you are using a Virtual Private Network (VPN), you will require the HTTPS method, since most VPNs won't allow an ssh connection.
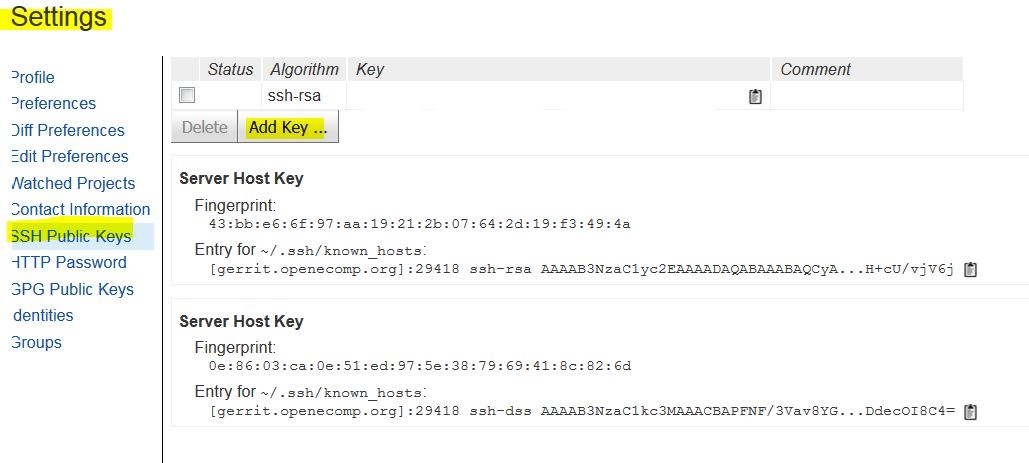
SSH Connection (Recommended)
Log in to the Gerrit host https://gerrit.openecomp.org/, pull down the menu under your user name (at the extreme top right of the browser window), click on "Settings" and select "SSH Public Keys". Enter the private PuTTY public PuTTY key you generated above (by copying and pasting the entire contents of the file public.txt, in our example.)
HTTPS Connection (Alternate)
...
Regenerating a password will most likely solve the connectivity issue. SometimeSometimes, the Gerrit interface on HTTPS might be temporarily faulty, so retries might be needed.
Cloning the Repository by Using the Command Line
...
.
...
Installing the Gerrit plugin in IntelliJ
Open File -> Settings -> Plugins of IntelliJ, and click on the Browse repositories... button.
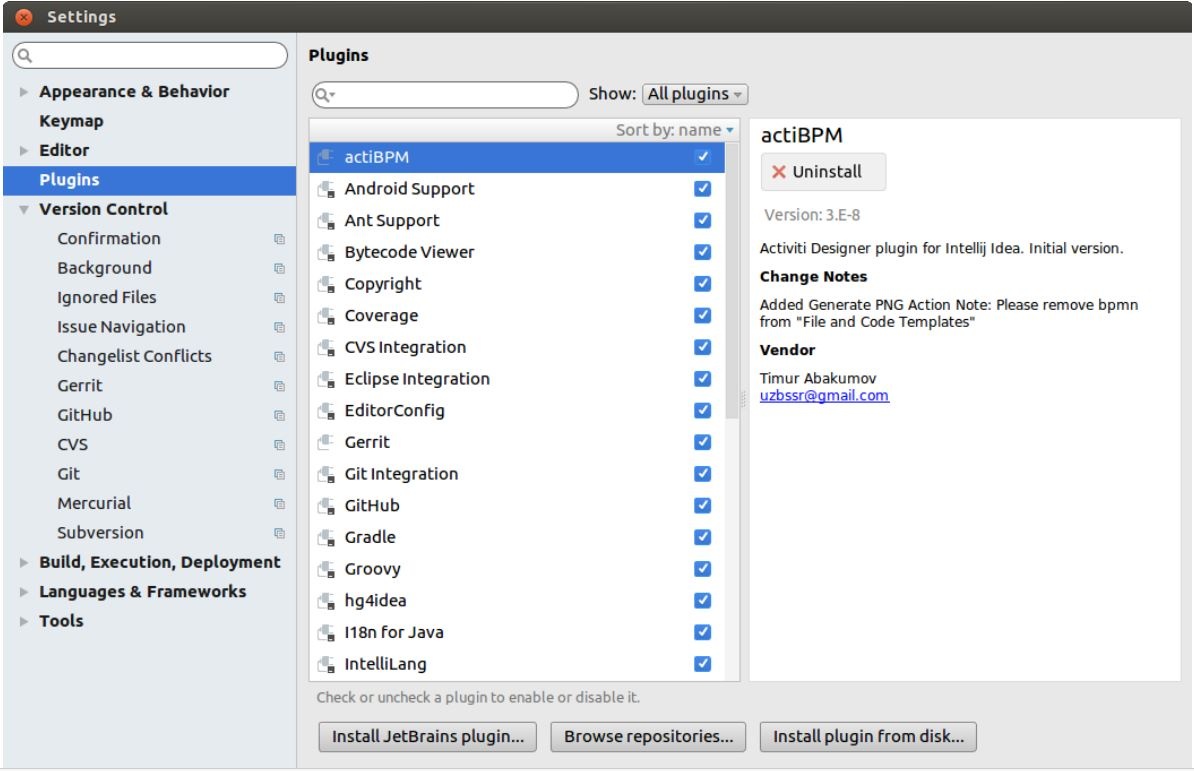
In the new window, search for Gerrit, click Install to install the plugin, and finally restart IntelliJ.

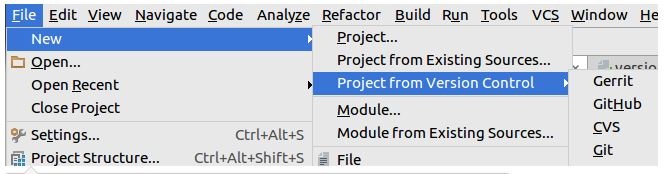
To verify whether the Gerrit plugin is installed successfully, you can click File -> New -> Project from Version Control and verify whether Gerrit is present.
Working with a Proxy
For people working with a proxy, you might have proxy issues connecting to Linux Foundation website. To avoid the connection issue, you shall define the proxy setting for both IntelliJ and Git.
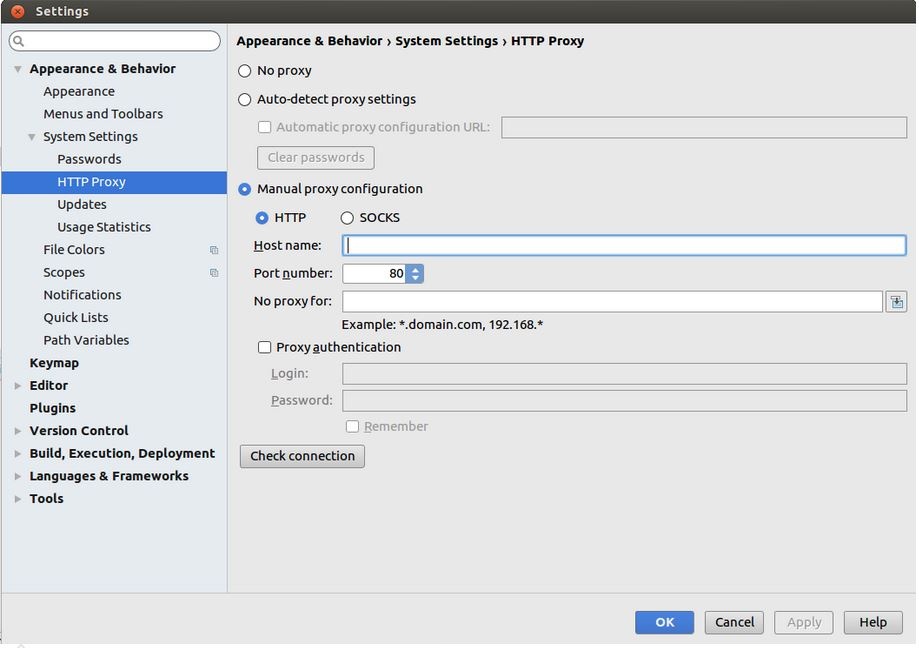
To configure the proxy settings in IntelliJ, click File -> Settings -> Appearance & Behavior -> System Settings -> HTTP Proxy, enter the correct proxy settings and click Apply. In case of Manual proxy configuration, while entering the Host name, there is no need to write http:// in front of the URL. For example, if the proxy value is http://one.proxy.com, you shall putone.proxy.com as the Host name.
To configure the proxy settings for Git, play the following command:
git config --global https.proxy https://<proxy username>:<proxy password>@<proxy url>
git config --global http.proxy http://<proxy username>:<proxy password>@<proxy url>
Note: while entering proxy username, sometimes it may require to add the domain name in front.