| Table of Contents |
|---|
Pre-requisite
The supported versions are as follows:
| ONAP Release | Rancher | Kubernetes | Helm | Kubectl | Docker |
|---|---|---|---|---|---|
| Amsterdam | 1.6.10 | 1.7.7 | 2.3.0 | 1.7.7 | 1.12.x |
This is the amsterdam branch which has diffrent rancher/helm/kubernetes/docker version levels - for master use the latest defined in ONAP on Kubernetes#Registeryourhost
...
Helm Client: https://storage.googleapis.com/kubernetes-helm/helm-v2.1https://storage.googleapis.com/kubernetes-helm/helm-v2.3.0-linux-amd64.tar.gz3-linux-amd64.tar.gz
| Code Block |
|---|
wget https://storage.googleapis.com/kubernetes-helm/helm-v2.13.30-linux-amd64.tar.gz tar -zxvf helm-v2.13.30-linux-amd64.tar.gz sudo mv linux-amd64/helm /usr/local/bin/helm |
...
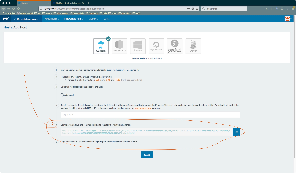
- Create an environment
- Default → Managed Environments
- Click Add Environment
- Fill in the Name and the Description
- Select Kubernetes as Environment Template
- Click Create
- Create an API key: API → Keys
- Click Add Account API Key
- Fill in the Name and the Description
- Click Create
- Backup the Access Key and the Secret Key
- Retrieve your environment ID
- Navigate to the previously created environment
In the browser URL, you should see the following, containing your <env-id>
Code Block http://<rancher-vm-ip>:8080/env/<env-id>/kubernetes/dashboard
Create the Kubernetes host on OpenStack.
Using Rancher API
Make sure to fill in the placeholder as follow:{API_ACCESS_KEY}: The API KEY created in the previous step
{API_SECRET_KEY}: The API Secret created in the previous step
{OPENSTACK_INSTANCE}: The OpenStack Instance Name to give to your K8S VM
{OPENSTACK_IP}: The IP of your OpenStack deployment
{RANCHER_IP}: The IP of the Rancher VM created previously
{K8S_FLAVOR}: The Flavor to use for the kubernetes VM. Recommanded specs:VCPUs 8 RAM 64Go Taille 100Go Swap 16Go I added some swap because in ONAP, most of the app are not always active, most of them are idle, so it's fine to let the host store dirty page in the swap memory.
{UBUNTU_1604}: The Ubuntu 16.04 image
{PRIVATE_NETWORK_NAME}: a private network
{OPENSTACK_TENANT_NAME}: Openstack tenant
{OPENSTACK_USERNAME}: Openstack username
{OPENSTACK_PASSWORD}: OpenStack passwordCode Block curl -u "{API_ACCESS_KEY}:{API_SECRET_KEY}" \ -X POST \ -H 'Accept: application/json' \ -H 'Content-Type: application/json' \ -d '{ "hostname":"{OPENSTACK_INSTANCE}", "engineInstallUrl":"wget https://raw.githubusercontent.com/rancher/install-docker/master/1.12.6.sh", "openstackConfig":{ "authUrl":"http://{OPENSTACK_IP}:5000/v3", "domainName":"Default", "endpointType":"adminURL", "flavorName":"{K8S_FLAVOR}", "imageName":"{UBUNTU_1604}", "netName":"{PRIVATE_NETWORK_NAME}", "password":"{OPENSTACK_PASSWORD}", "sshUser":"ubuntu", "tenantName":"{OPENSTACK_TENANT_NAME}", "username":"{OPENSTACK_USERNAME}"} }' \ 'http://{RANCHER_IP}:8080/v2-beta/projects/{ENVIRONMENT_ID}/hosts/'- Doing it manually
- Create a VM in your VIM with the appropriate specs (see point above)
Provision it with docker: You can find the proper version of Docker to install here (for Rancher 1.6): http://rancher.com/docs/rancher/v1.6/en/hosts/#supported-docker-versions
- Go in Rancher, Infrastructure → Hosts and click the button Add Host. "Copy, paste, and run the command below to register the host with Rancher:”
- Let's wait a few minutes until it's ready.
- Get your kubectl config
- Click Kubernetes → CLI
- Click Generate Config
Copy/Paste in your host, under
Code Block ~/.kube/config
If you have multiple Kubernetes environments, you can give it a different name, instead of config. Then reference all your kubectl config in your bash_profile as follow
Code Block KUBECONFIG=\ /Users/adetalhouet/.kube/k8s.adetalhouet1.env:\ /Users/adetalhouet/.kube/k8s.adetalhouet2.env:\ /Users/adetalhouet/.kube/k8s.adetalhouet3.env export KUBECONFIG
Install kubectl
Code Block curl -LO https://storage.googleapis.com/kubernetes-release/release/v1.8.0/bin/linux/amd64/kubectl chmod +x ./kubectl sudo mv ./kubectl /usr/local/bin/kubectl
Make your kubectl use this new environment
Code Block kubectl config use-context <rancher-environment-name>
After a little bit, your environment should be ready. To verify, use the following command
Code Block $ kubectl get pods --all-namespaces NAMESPACE NAME READY STATUS RESTARTS AGE kube-system heapster-4285517626-4dst0 1/1 Running 0 4m kube-system kube-dns-638003847-lx9f2 3/3 Running 0 4m kube-system kubernetes-dashboard-716739405-f0kgq 1/1 Running 0 4m kube-system monitoring-grafana-2360823841-0hm22 1/1 Running 0 4m kube-system monitoring-influxdb-2323019309-4mh1k 1/1 Running 0 4m kube-system tiller-deploy-737598192-8nb31 1/1 Running 0 4m
...