...
The first issue is that the current ONAP master tagged versino version of the checkstyle does not work with Eclipse Oxygen/Photon (and maybe other versions) because of the "curly bracket" issue. There is a fix on the way but it's not here yet. The current tagged version of oparent we are using in Policy is 1.2.1.
...
- Preferences->Checkstyle
- Click "New"
- Select "External Configuration File"
- Give it a name eg ONAP
- Point at the file eg: /home/liam/git/onap<your_git_folder>/oparent/checkstyle/src/main/resources/onap-checkstyle/onap-java-style.xmlxml
(assuming you have downloaded the oparent repo) - Click OK
- Select "ONAP" configuration and click "Set as Default"
- Select "Apply and Close"
...
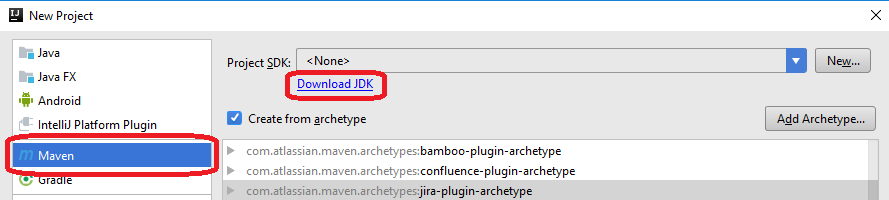
When you start your first IntelliJ project, you will need to specify the Java Software Development Kit (SDK) as the project's. If you do not have the Java SDK installed on your machine, you can download it from within IntelliJ by selecting Maven as the New Project type and clicking on "Download SDK": (Or, visit http://www.oracle.com/technetwork/java/javase/downloads/index.html).
Installing the Gerrit plugin in IntelliJ
Open File -> Settings -> Plugins of IntelliJ, and click on the Browse repositories... button.
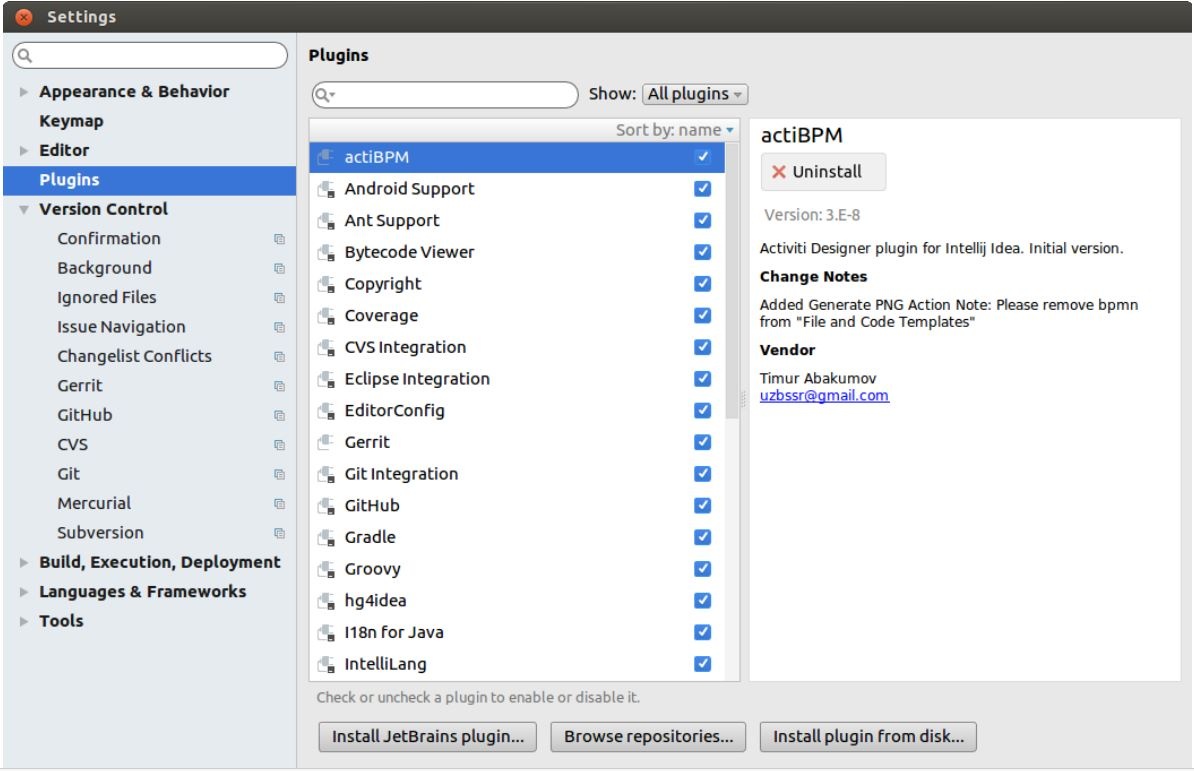
In the new window, search for Gerrit, click Install to install the plugin, and finally restart IntelliJ.

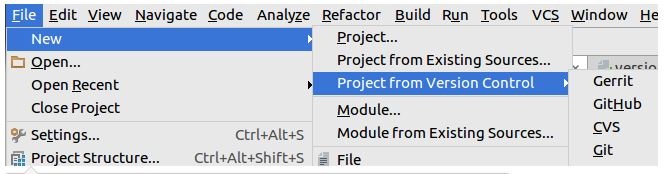
To verify whether the Gerrit plugin is installed successfully, you can click File -> New -> Project from Version Control and verify whether Gerrit is present.
Configure ONAP checkstyle for IntelliJ
ONAP is using google java style as mentioned in ONAP java style. Import intellij-java-google-style.xml in intelliJ settings→code style→java and modify the following items,
Tabs and Indents→Indent ( from 2 to 4)
Wrapping and Braces → hard wrap at ( 120)
...
Install useful plugins
Install SonarLint to check for SonarQube violations and CheckStyle-IDEA to apply checkstyle code formatting
Configure ONAP code formatting checkstyle for IntelliJ
ONAP is using google java style as mentioned in ONAP java style. Import intellij-java-google-style.xml in intelliJ settings→code style→java and modify the following items,
Tabs and Indents→Indent ( from 2 to 4)
Wrapping and Braces → hard wrap at ( 120)
SO Project: Method above won't work, install plugin Eclipse Code Formatter and configure it with the corresponding xml file (so/project-configs/code-tools/onap-eclipse-format.xml)
Configure ONAP copyright for IntelliJ
You can create copyright profile to auto-generate the copyright text. e.g, add the following text to new profile,
| Code Block | |
|---|---|
|
Configure ONAP copyright for IntelliJ
You can create copyright profile to auto-generate the copyright text. e.g, add the following text to new profile,
| Code Block | ||
|---|---|---|
| ||
============LICENSE_START=======================================================
 Copyright (C) $today.year <organization name>
 ================================================================================
 Licensed under the Apache License, Version 2.0 (the "License");
 you may not use this file except in compliance with the License.
 You may obtain a copy of the License at

       http://www.apache.org/licenses/LICENSE-2.0
 Unless required by applicable law or agreed to in writing, software
 distributed under the License is distributed on an "AS IS" BASIS,
 WITHOUT WARRANTIES OR CONDITIONS OF ANY KIND, either express or implied.
 See the License for the specific language governing permissions and
 limitations under the License.

 SPDX-License-Identifier: Apache-2.0
============LICENSE_END========================================================= |
Set up SonarLint towards ONAP
To bind your projects to the ONAP Sonar server, follow the instructions below. Your projects should be imported in to Eclipse before this.
- Right click on the project and select "SonarLint -> Bind to SonarQube or SonarCloud...".
- Select "sonarcloud" and press "Next".
- Click "Generate Token"
- A browser opens and you are taken to a Sonarcloud login page
- Login with an appropriate account from the list presented, most likely your GitHub account
- You are now directed to a sonarcloud token generation page
- Enter a name for your token and click "Generate"
- Copy the token hex string that is generated from the browser and paste it into the "Token" field in Eclipse and click "Next"
- In the "Organization" field, enter the string "onap" and press "Next"
- The Connection name "SonarCloud/onap" should be found by the system, click "Next"
- The connection should be successfully created, click "Finish"
- Press "Add...".
- Select the projects you want to add and press "OK".
- Press "Next".
- Start typing the name of your project, and it should appear in a list box where it should be selected.
- Press "Finish".
Other Tools
The component you are working on may require additional tool installations, see the relevant section under Development Guides.
...