...
The installer lets you choose the experimental 'difftool'; either choice will work. Continue with the installation dialogs until the installation is complete.
Install Python on Windows (optional)
Not all components require Python for development. See the documentation for your component in the Development Guides section.
Download Python version 2.7.10:
...
Continue with the installation until it is completed.
Set up git review and Configure git
Run Git Bash as Administrator (for example, in Windows 10, use the Windows menu, scroll to the Git directory, right-click on Git-bash, and select "Run as administrator":
...
Copy/paste the known_hosts entries listed, into a file named known_hosts under your .ssh profile (something like C:\Users\<my-id>\.ssh) (if known_hosts does not exist, create it).
Installing IntelliJ Community Edition and the Java SDK on Windows
If you are using IntelliJ to do Java compilations, download the IntelliJ installation image from https://www.jetbrains.com/idea/. The installation dialog gives you the opportunity to associated IntelliJ with file type .java, among others. Installation takes several minutes.
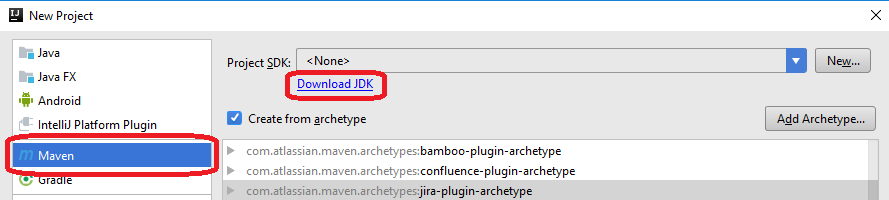
When you start your first IntelliJ project, you will need to specify the Java Software Development Kit (SDK) as the project's. If you do not have the Java SDK installed on your machine, you can download it from within IntelliJ by selecting Maven as the New Project type and clicking on "Download SDK": (Or, visit http://www.oracle.com/technetwork/java/javase/downloads/index.html).
Installing the Gerrit plugin in IntelliJ
Open File -> Settings -> Plugins of IntelliJ, and click on the Browse repositories... button.
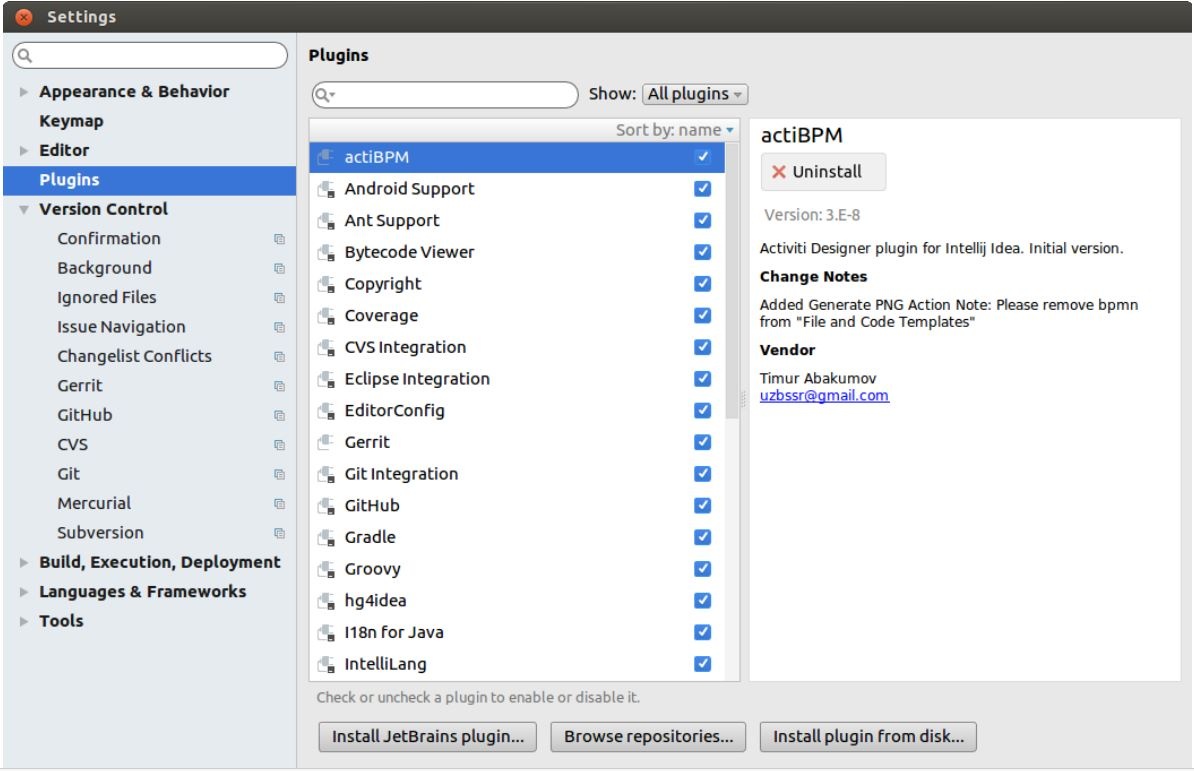
In the new window, search for Gerrit, click Install to install the plugin, and finally restart IntelliJ.

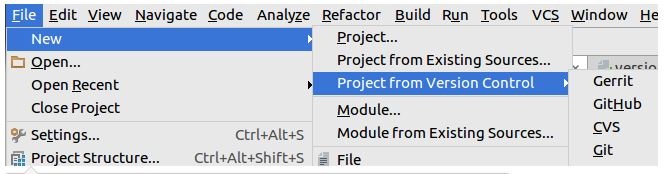
To verify whether the Gerrit plugin is installed successfully, you can click File -> New -> Project from Version Control and verify whether Gerrit is present.
Other Tools
The component you are working on may require additional tool installations, see the relevant section under Development Guides.
Selecting a connection method
...
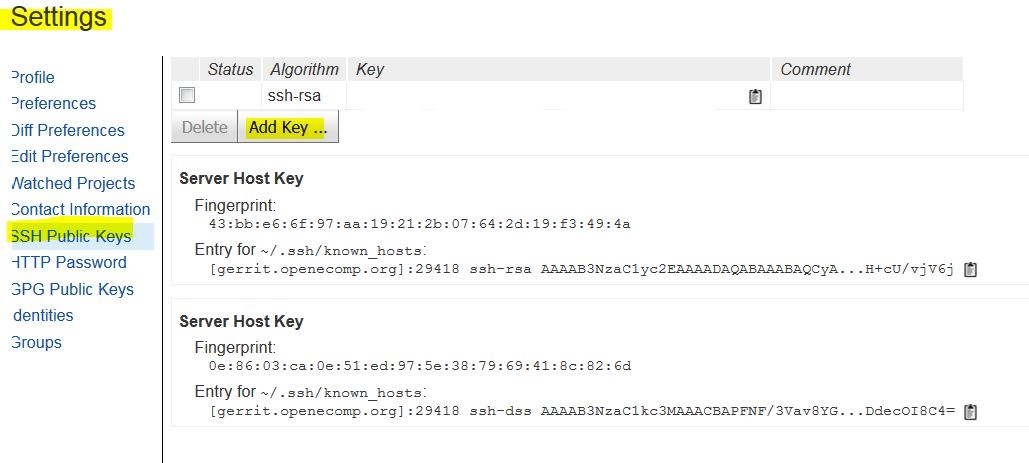
Log in to the Gerrit host https://gerrit.openecomp.org/, pull down the menu under your user name (at the extreme top right of the browser window), click on "Settings" and select "SSH Public Keys". Enter the public PuTTY public PuTTY key you generated above (by copying and pasting the entire contents of the file public.txt, in our example above.)
HTTPS Connection (Alternate)
...
Regenerating a password will most likely solve the connectivity issue. Sometimes, the Gerrit interface on HTTPS might be temporarily faulty, so retries might be needed.
Installing the Gerrit plugin in IntelliJ
...
.
In the new window, search for Gerrit, click Install to install the plugin, and finally restart IntelliJ.
To verify whether the Gerrit plugin is installed successfully, you can click File -> New -> Project from Version Control and verify whether Gerrit is present.
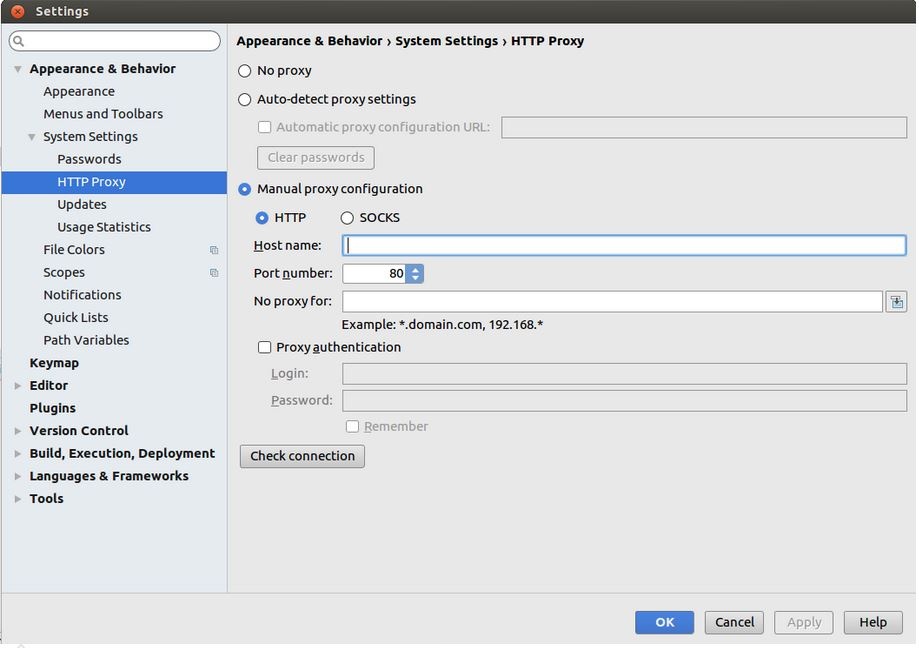
Working with a Proxy
For
...
developers working with a proxy, you might have proxy issues connecting to Linux Foundation website. To avoid the connection issue, you
...
must define the proxy setting for both IntelliJ and Git.
To configure the proxy settings in IntelliJ, click File -> Settings -> Appearance & Behavior -> System Settings -> HTTP Proxy, enter the correct proxy settings and click Apply. In case of Manual proxy configuration, while entering the Host name, there is no need to write http:// in front of the URL. For example, if the proxy value
...
is http://one.proxy.com, you
...
would put one.proxy.com as the Host name.
To configure the proxy settings for Git, play the following command:
git config --global https.proxy https://<proxy username>:<proxy password>@<proxy url> git config --global http.proxy http://<proxy username>:<proxy password>@<proxy url>Note: while entering the proxy username, sometimes it may require to add the domain name in front.