Deprecation Notice
With DCAE transformation to Helm feature, Dashboard (along with Cloudify and other platform handlers) has been deprecated since Istanbul release and not deployed under ONAP/DCAE
Overview
DCAE Dashboard is a web application that addresses the needs of DCAE users and Ops users in ONAP to do the following:
- Upload and deploy application blueprints to docker VMs and kubernetes cluster
- Check system health via Consul
Starting with the Dashboard
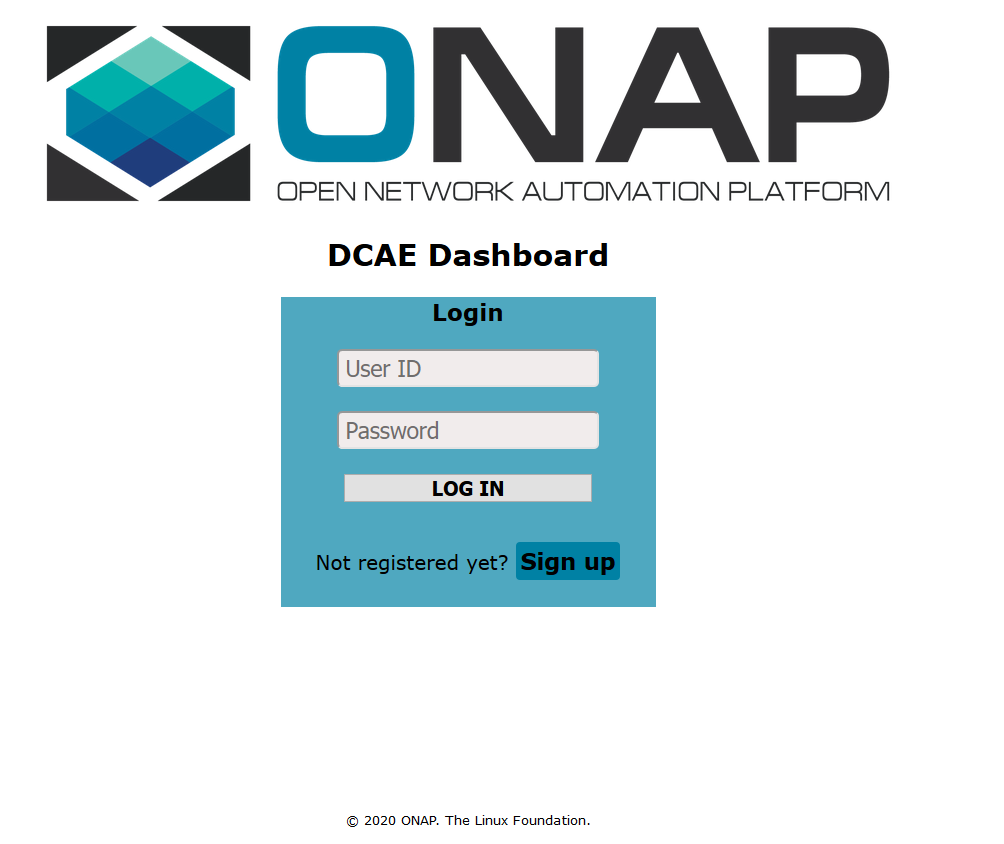
Type in the application login URL in a web browser. The Login page should appear.
Note: DCAE dashboard is not integrated with Portal, UI can be accessed via https://<k8sworkerIP>:30418/ccsdk-app/login_external.htm.
The default credentials to access the DCAE Dashboard are below
Login: su1234
Password: fusion
If you are a first time user, then click on the Sign up button. Fill the Sign up FORM and submit to register for an account. Upon a successful login by providing valid login credentials, the user's dashboard(Home) screen is displayed. The header navigation bar contains menu links and a user profile section in the top right corner. The collapsible left sidebar contains all the application menus, each item (except "Home") can be expanded into sub-items by clicking on the item.
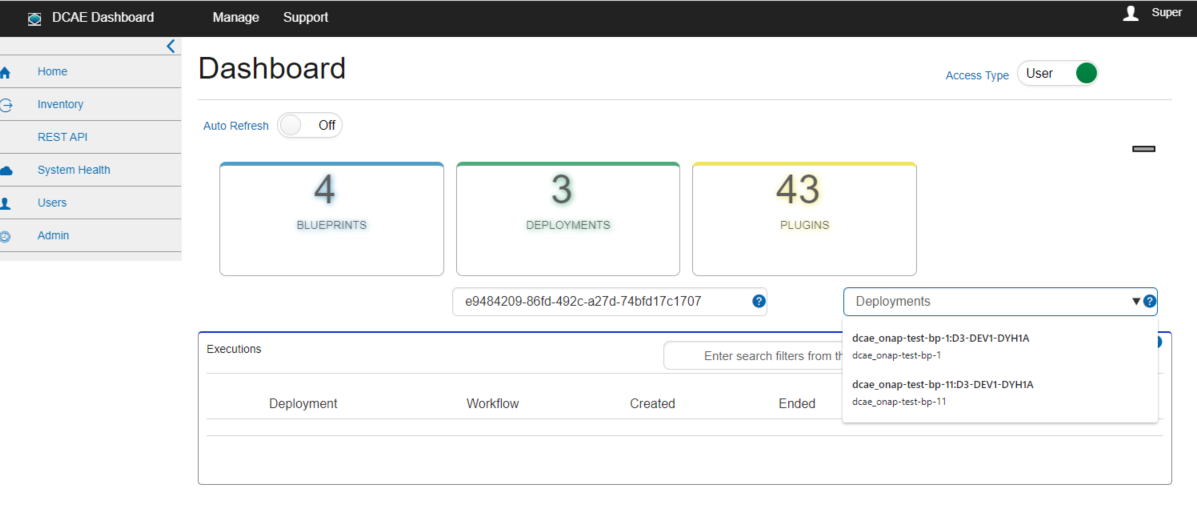
User Dashboard contents appear in the panel to the right of the left navigation menu. By default(initial view), the screen displays tiles containing count of blueprints and count of deployments owned by the signed-in user. The count of plugins uploaded to Cloudify Orchestrator is also shown in the Plugins tile. Each tile is clickable and will navigate control to the individual screens that display detailed information about the items. There is a switch at the top to toggle between user level or user role group access for the dashboard contents. By switching access type to Group, the aggregate count of inventory items at user group (role) level are shown on the dashboard.

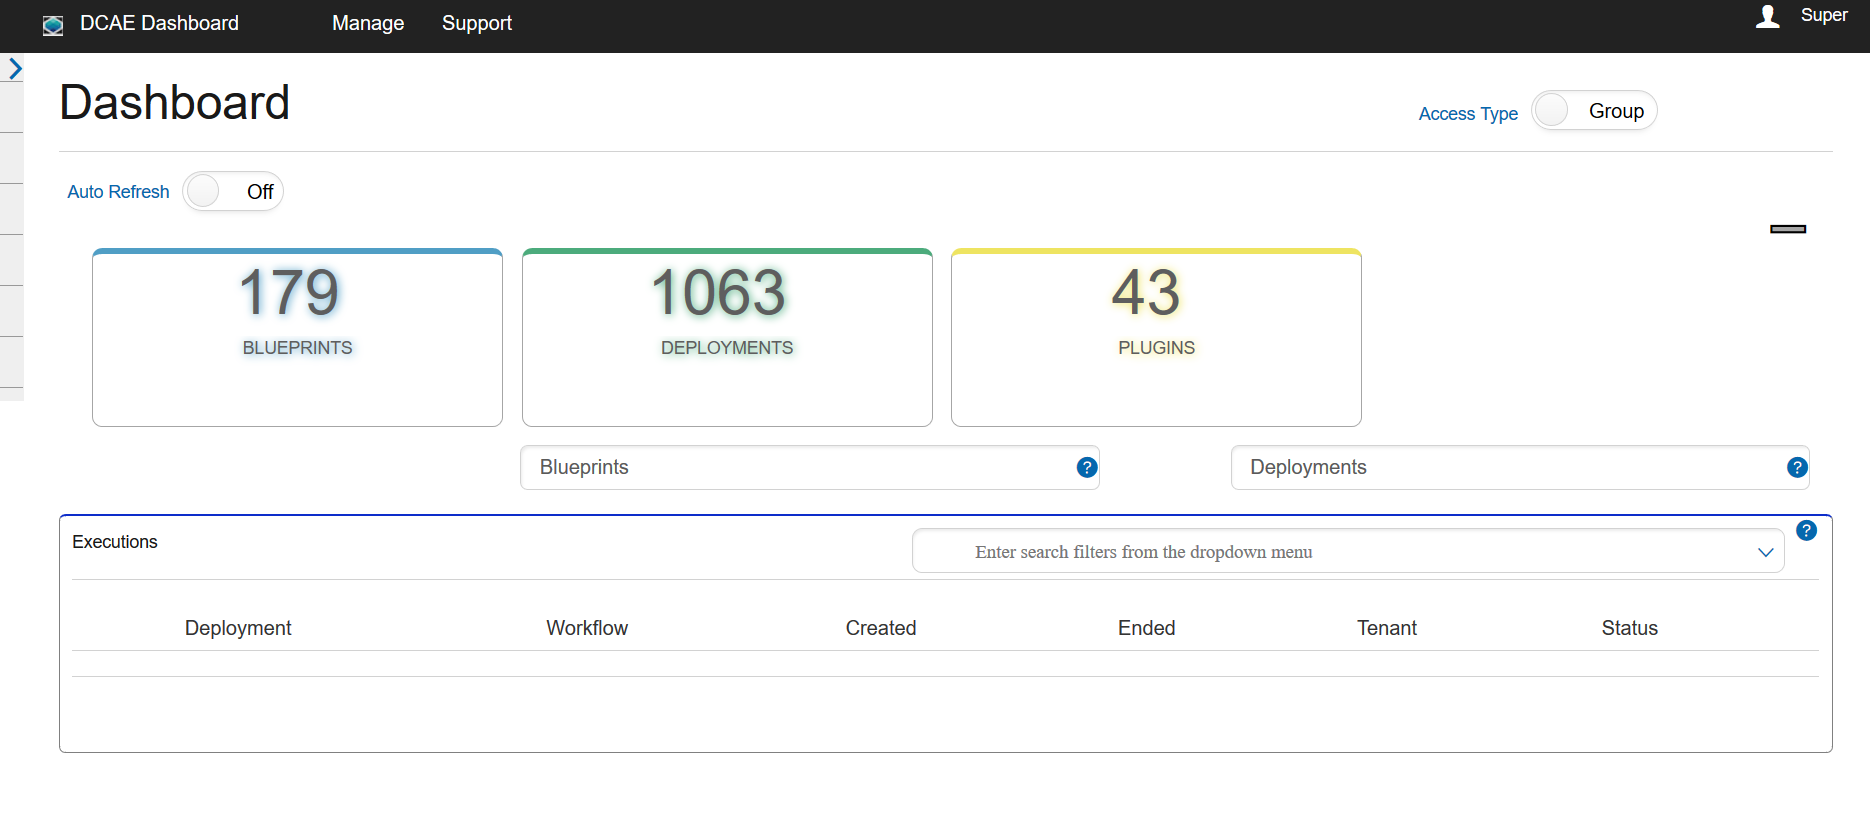
Auto Refresh switch lets user automatically reload the dashboard at regular intervals.
An autocomplete list of blueprints lets a user find a specific blueprint and trigger a deployments list query. Upon selecting a blueprint item, a query is triggered to find associated deployments for the selected blueprint. Similarly upon selecting a specific deployment entity, any matching execution workflows are queried and displayed in the executions data grid. By default the user dashboard shows currently active executions that are happening in Cloudify.


Working with blueprints and deployments
Searching/Filtering Blueprints
- Click on the "Inventory" menu item, which will expand to show sub-items. Select the "Blueprints" sub-item
A "Blueprints" screen appears, which displays blueprints retrieved from Inventory. By default, a blueprint owner filter is applied to display items where owner is the signed in user. By deselecting the "My Blueprints" checkbox, all blueprints belonging to the role group will be displayed.

2.You can search for blueprints based on their name. Type the name of the blueprint you wish to work with in the search box at the top right hand of the screen and press 'enter' or click the magnifying glass icon to look for it. 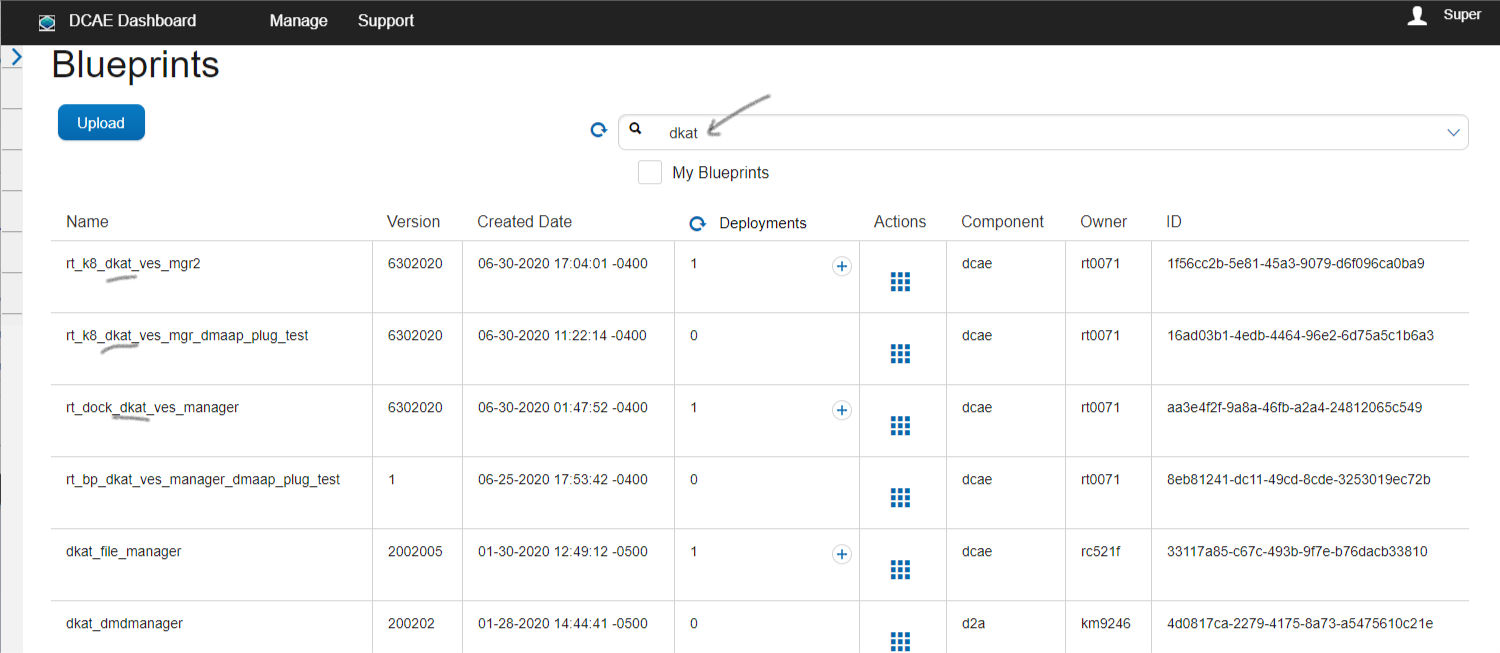
3. You can use search filters by clicking on the down arrow at the right end of the search box. Filter by blueprint and owner is available. Once finished, click the magnifying glass at the bottom of the advanced filters box or press "enter".


4. Lookup deployments mapped to a blueprint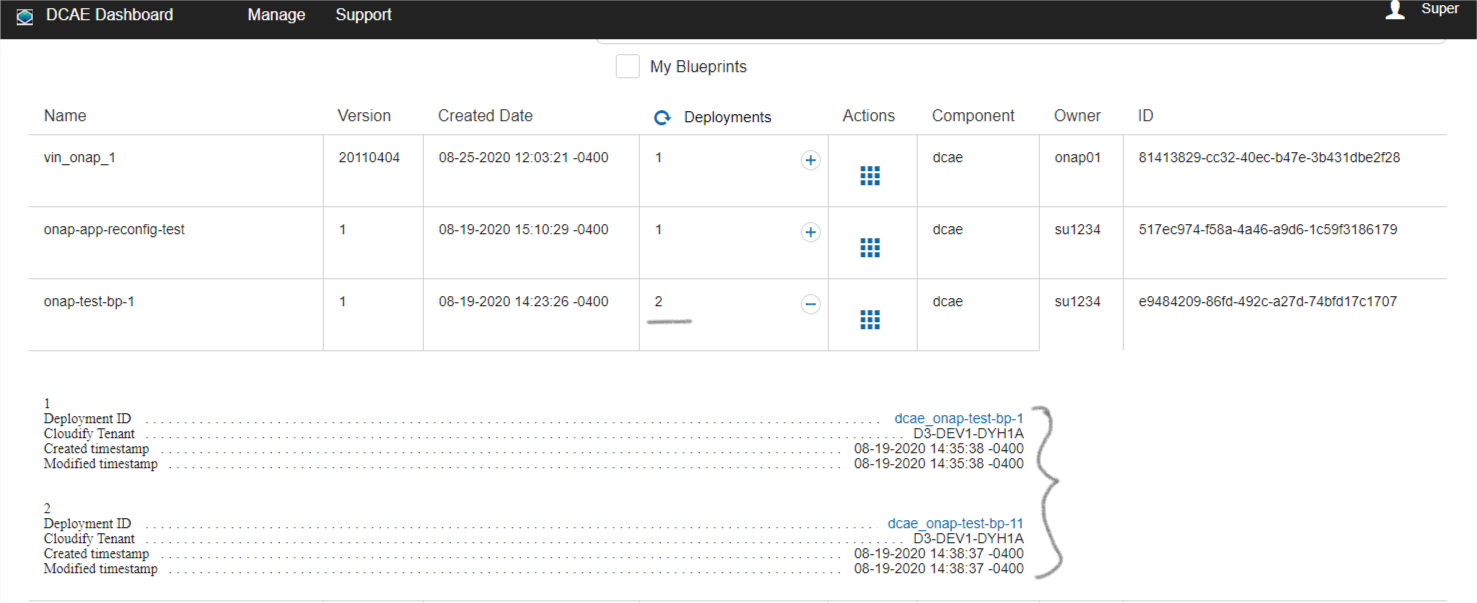
Creating Blueprints
- A user can create a new blueprint either from scratch or by uploading an existing file. To do this, select the "Blueprints" sub-menu
Once the existing set of blueprints appear on the screen, click on the "Upload" Button
- In the "Upload Blueprint" pop-up, fill out all the fields. Provide the name and version # for the blueprint -- hints on nomenclature are available by clicking on the input field help icon (question mark symbol). A blueprint file can be either "dragged and dropped" from the user's own directory or it can be created from scratch. When finished, press "Save".
Note: Import Data function is not supported and will be removed later.
- Allow the Blueprints screen to reload and then check that the blueprint you created is in the table.
Viewing/Exporting Blueprints
Navigate to the Blueprints screen via the sidebar menu
On the Blueprints screen, click on the Actions button icon (More actions) for the blueprint you wish to work with. A number of choices are indicated in a pop-up: View, Export, Update, Deploy and Delete.
- Choose "View" to display the contents of the blueprint

Deploying Blueprints
- Navigate to the Blueprints screen via the sidebar menu.
On the Blueprints screen, click on the Actions button icon (More actions) for the blueprint you wish to work with and select "Deploy"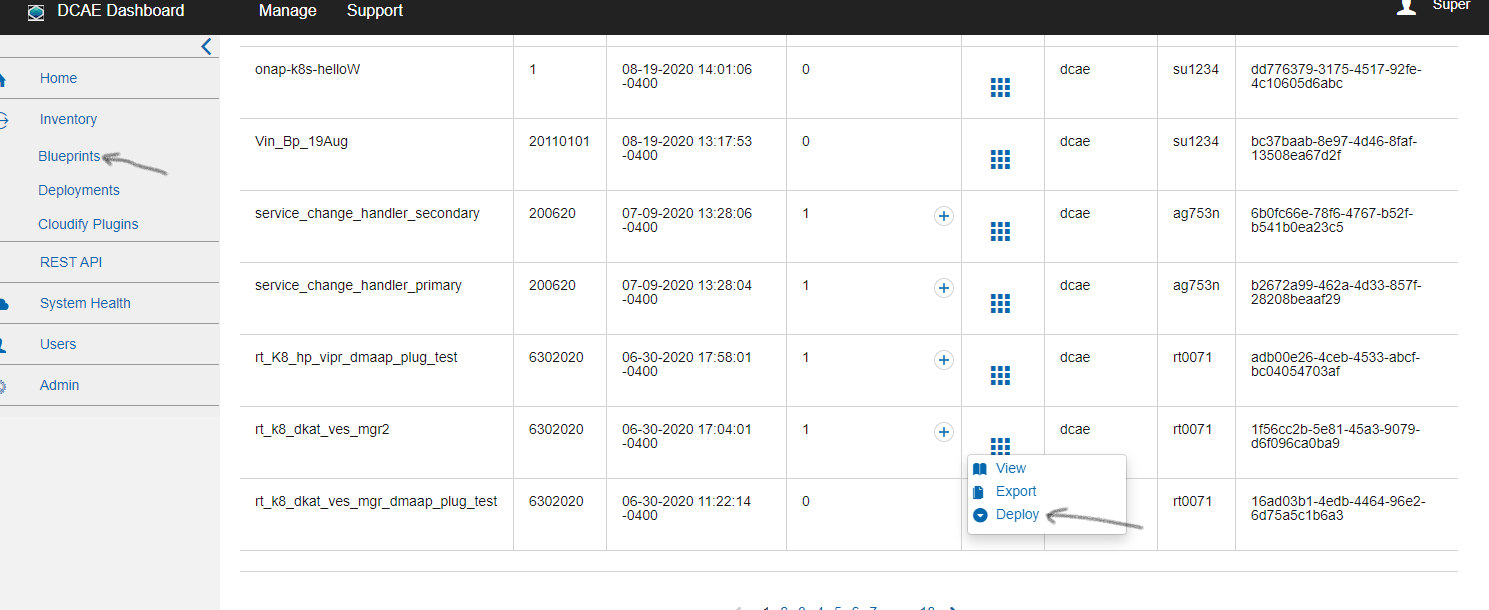
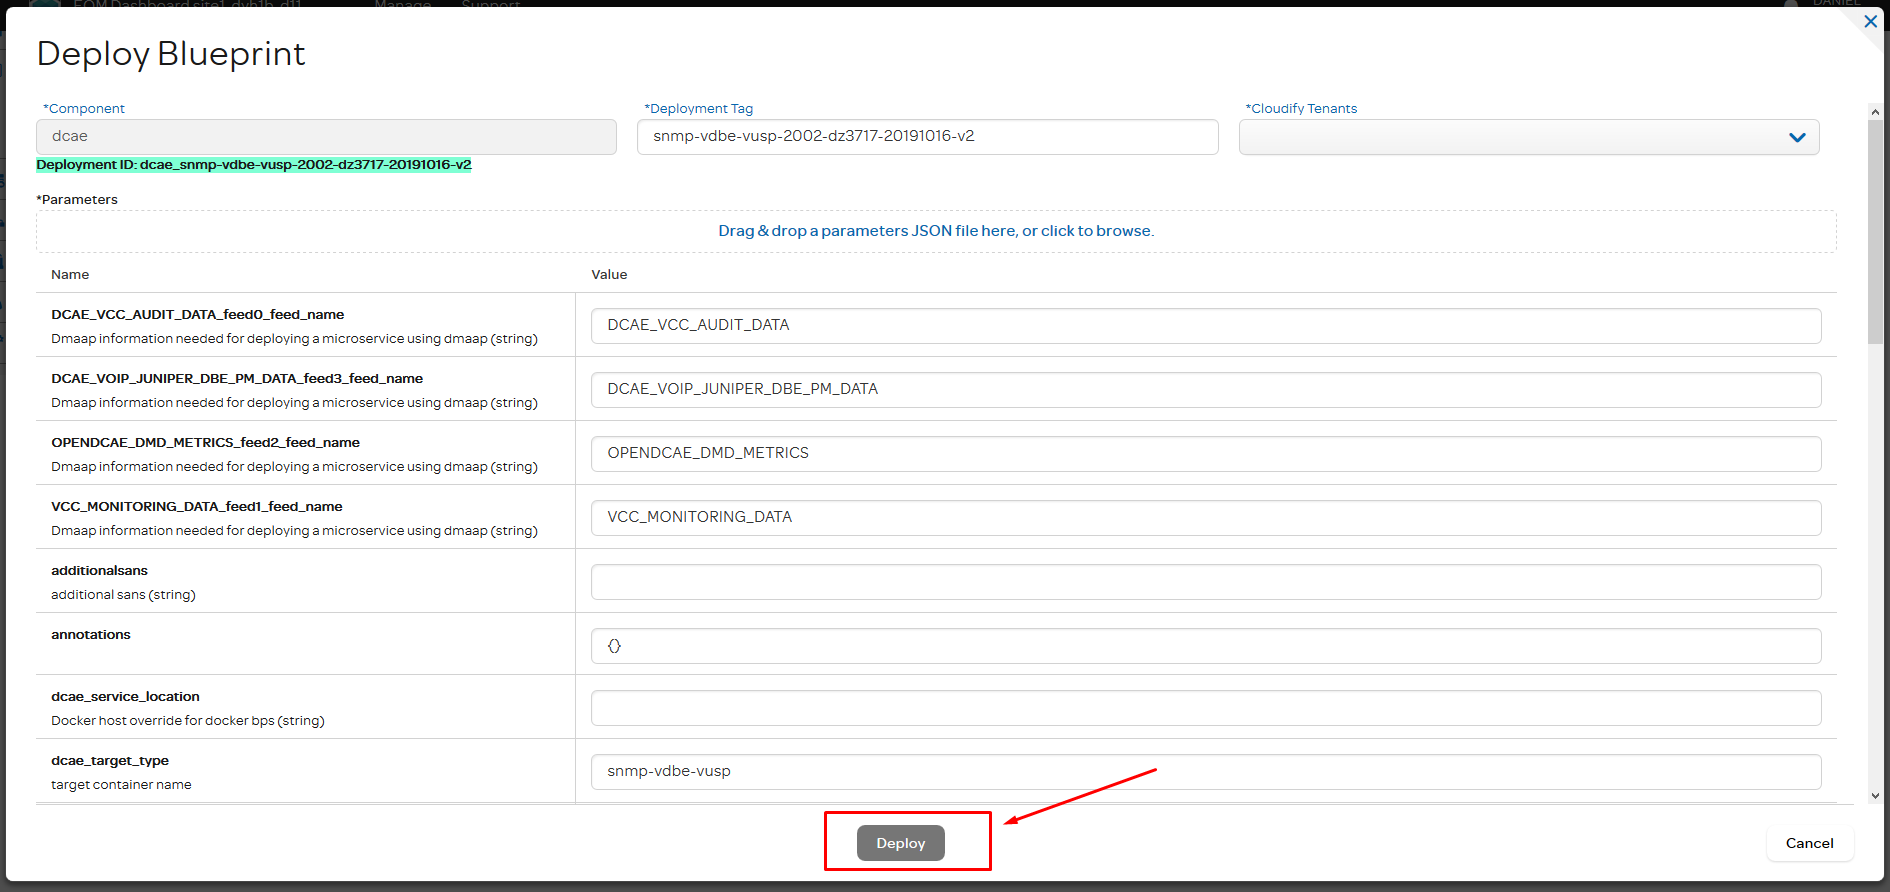
- On the "Deploy Blueprint" pop-up, fill in all the fields. There are two ways to supply the input parameters for the blueprint: one is to drag and drop a parameters file; the other is to manually fill in the name-value pairs. When finished, press the "Deploy" button at the bottom.
- Navigate to the Deployments screen via the sidebar menu and check that the blueprint deployed is listed on the screen

Searching/Filtering Deployments
- Navigate to the Deployments screen via the sidebar menu.
- By default, deployment owner filter and application cache filters are applied to display items where owner is the signed in user. Data is fetched from the application cache store. By deselecting the "My Deployments" checkbox, all deployments belonging to the role group will be displayed. By deselecting "Cache" checkbox, cache is bypassed and data is fetched from Cloudify Maanger. "Tenant" filter can be applied to restrict the query per tenant partition. Upon selecting "Tenant" checkbox, the tenants list dropdown appears.
- You can search for Deployments by an ID. Enter the ID and press 'Enter' or click the magnifying glass icon.
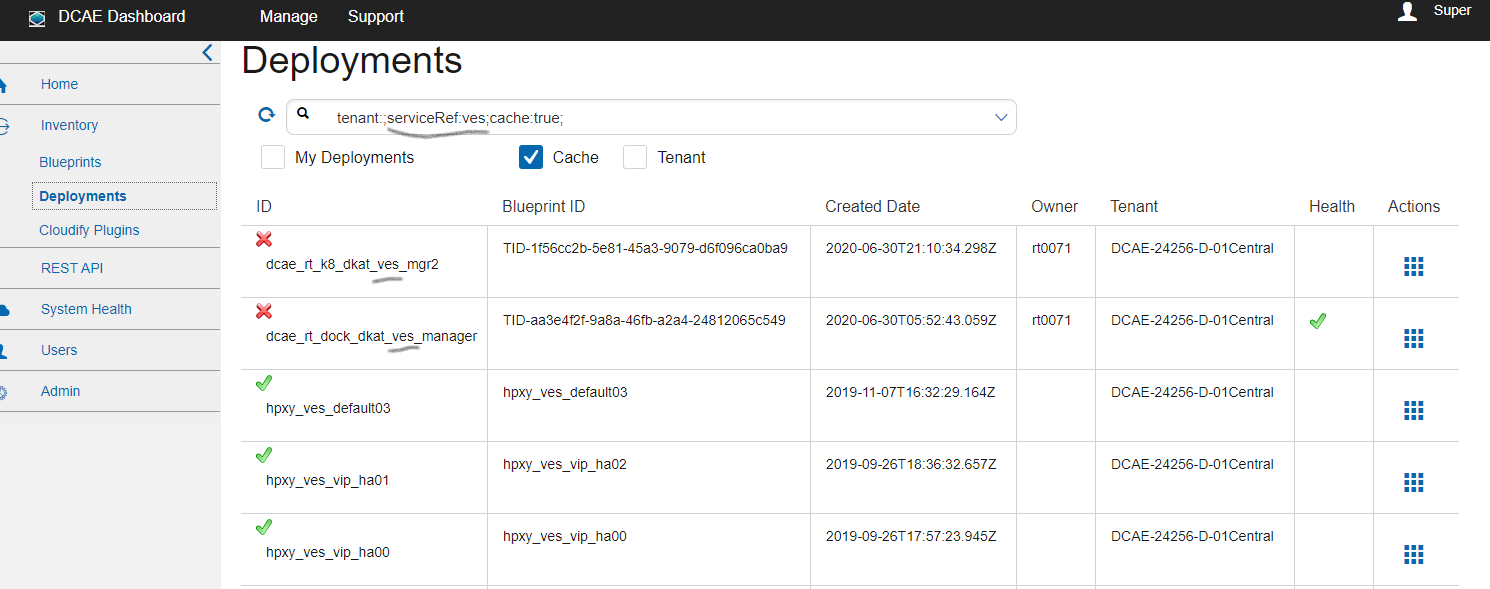
- If you wish to make an advanced search, select the "Tenant" checkbox, select a tenant from the tenants list, click the down arrow at the right end of the input field to expand the advanced search filters. Here you can filter by deployment IDs, owners, (installation) Status, Helm chart deployment. Once finished, click the magnifying glass at the bottom of the advanced filters box.

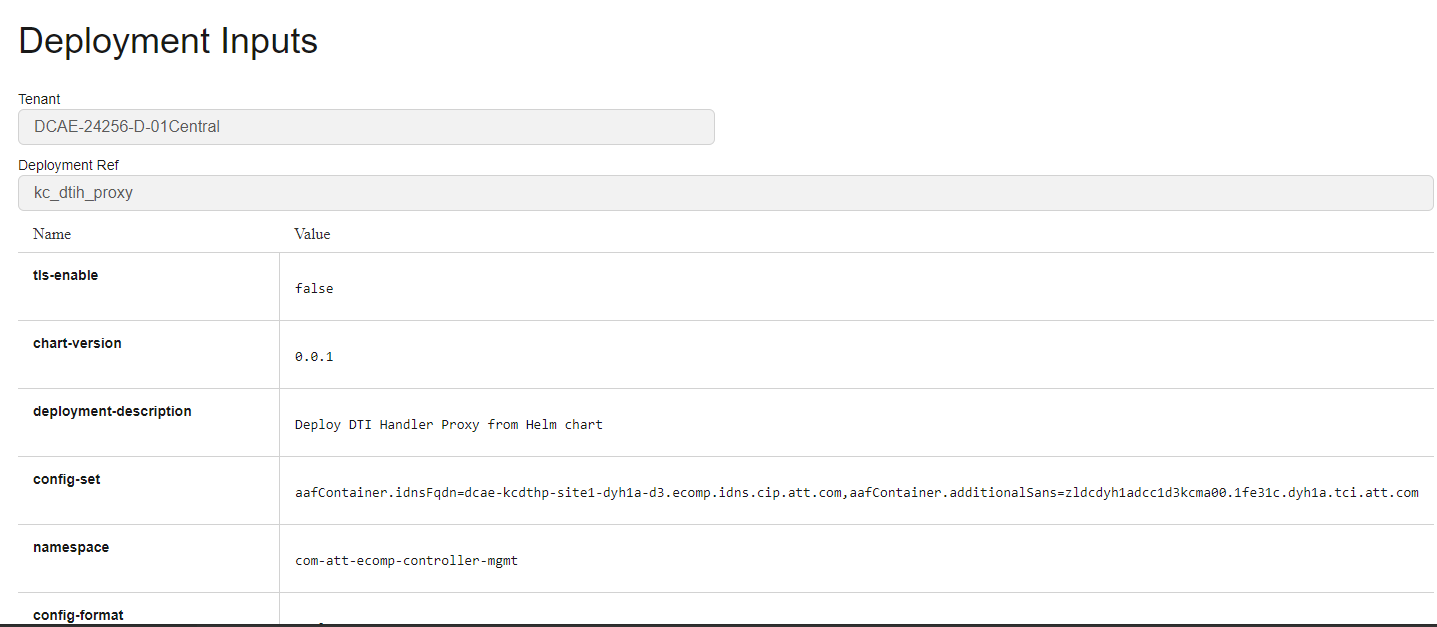
Viewing Blueprint, Inputs, Executions
- Navigate to the Deployments screen on the left hand menu
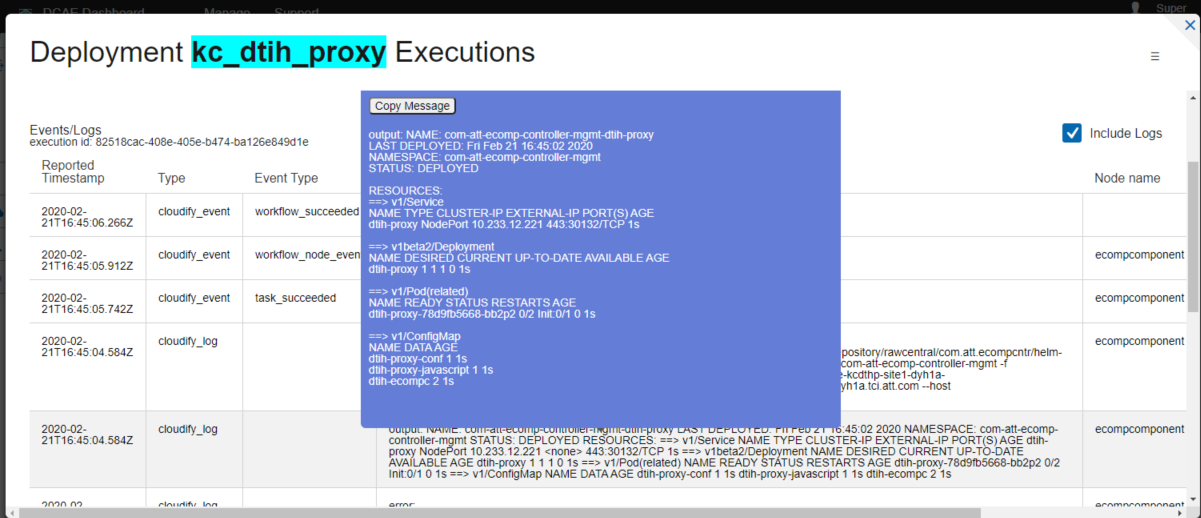
On the deployments table screen, click on the "Actions" button icon for the deployment you wish to manage.


Undeploying Deployments
- Navigate to the Deployments screen on the left hand menu
- On the deployments table screen, click on the "Actions" button icon for the deployment you wish to uninstall. Click on Undeploy.

- On the confirmation popup, confirm the tenant is correct and select "Undeploy" when ready to undeploy

Helm Status, Upgrade, Rollback
- Navigate to the Deployments screen on the left hand menu
- Ensure that the deployment is a helm deployment
On the deployments table screen, click on the "Actions" button icon for the deployment you wish to perform helm operations on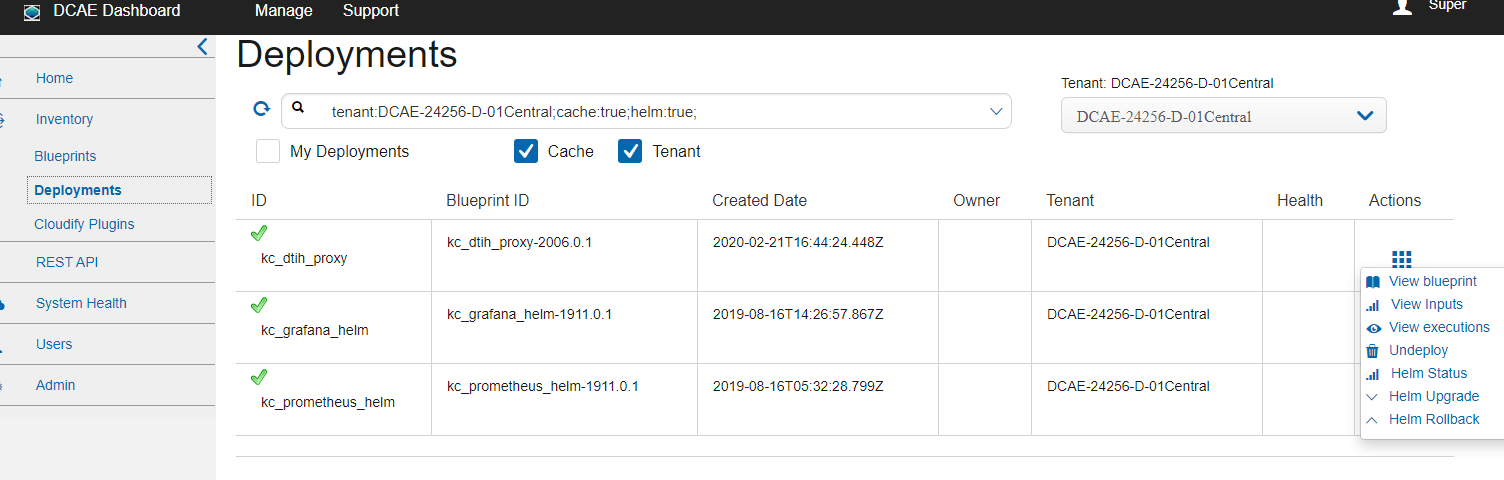
Helm Status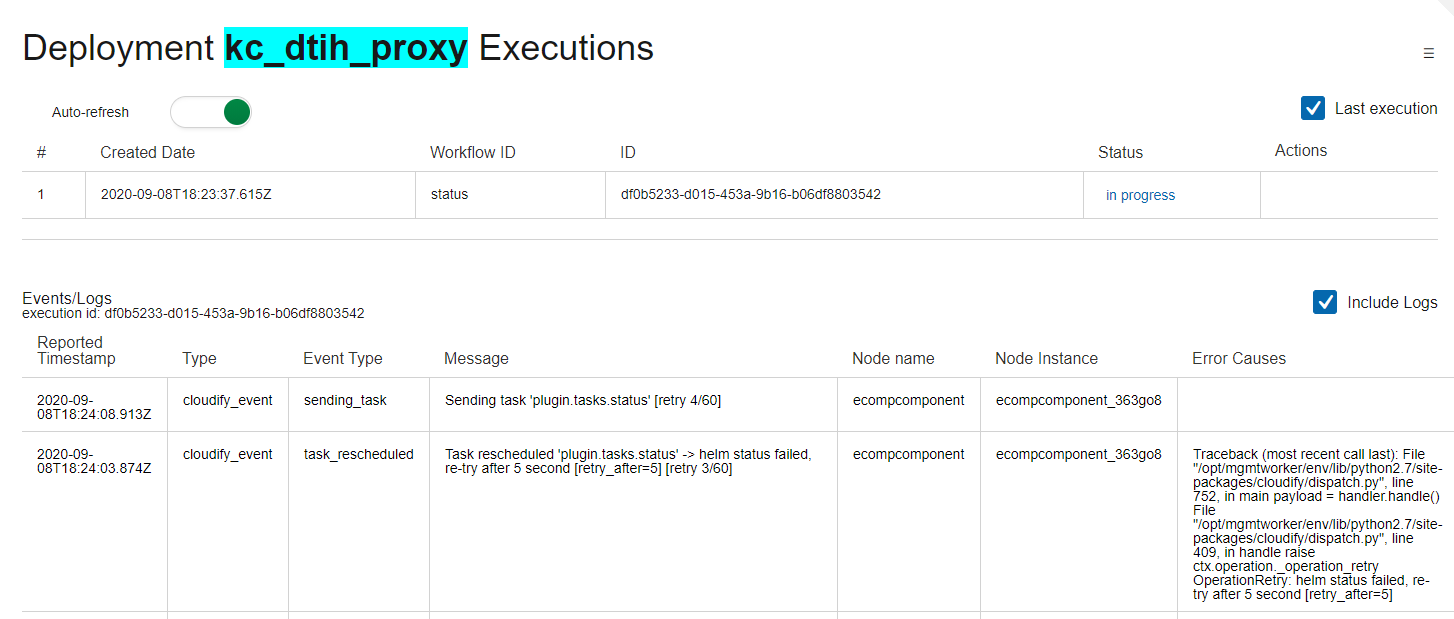
Helm Upgrade

Helm Rollback

Checking system health
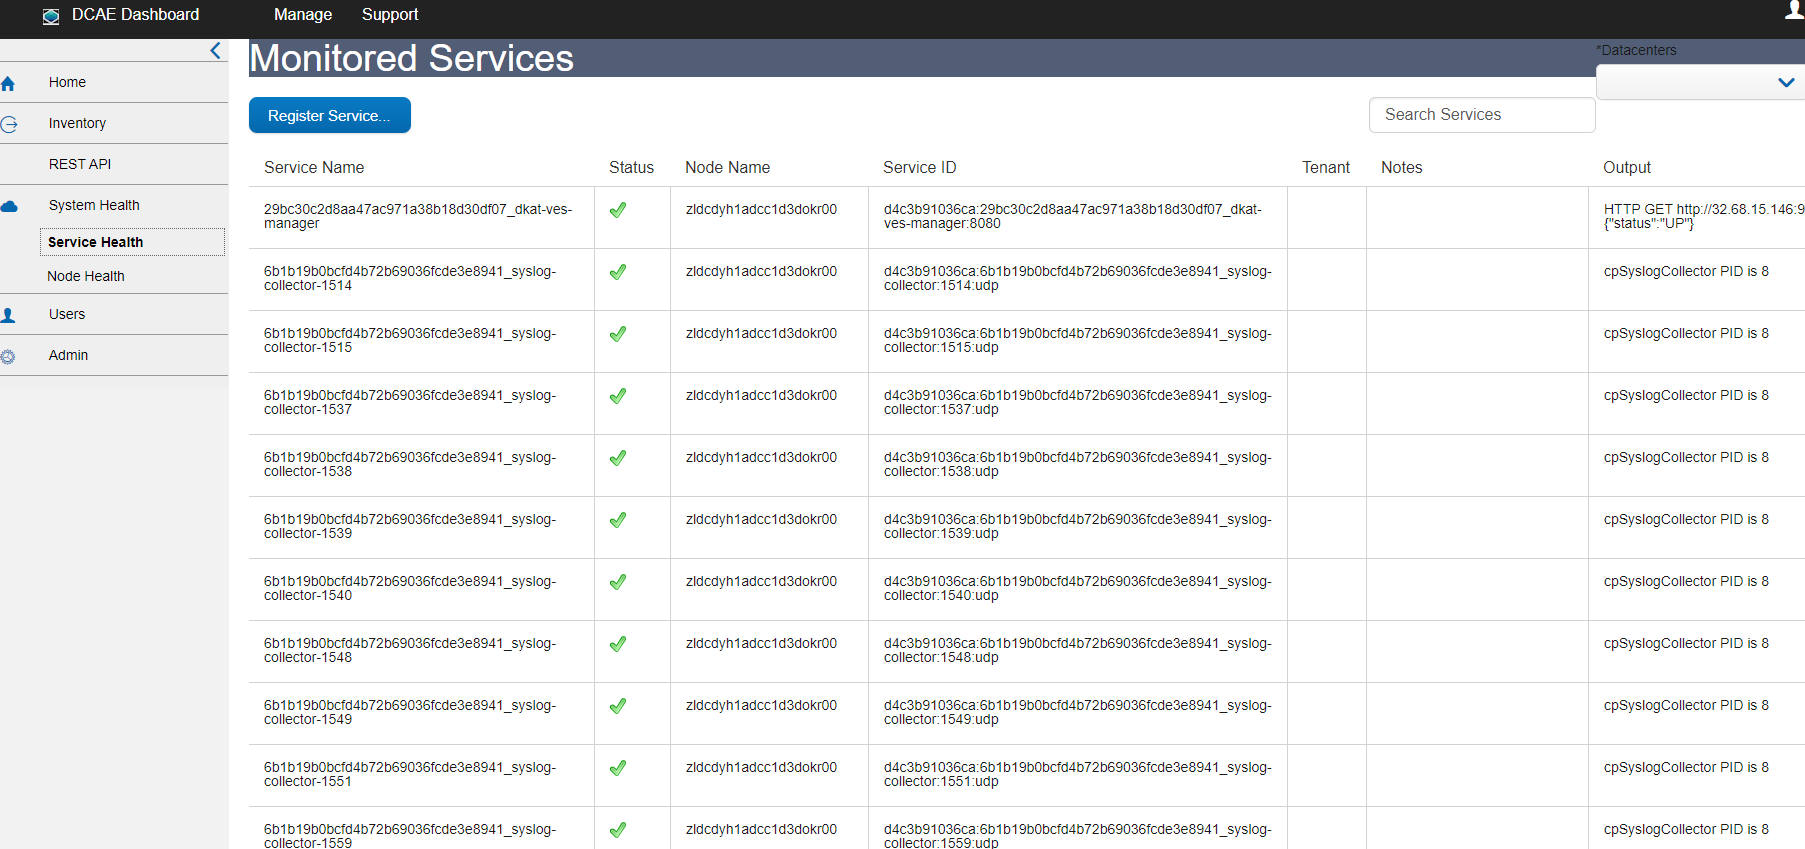
Viewing Service Health
- Navigate to the Service Health screen on the sidebar menu
Node Health
Viewing Node Health
- Navigate to the Node Health screen on the sidebar menu
