...
To create your linux foundation account, go to Linux Foundation Identity page, and select I need to create a Linux Foundation ID, the following page will be shown:

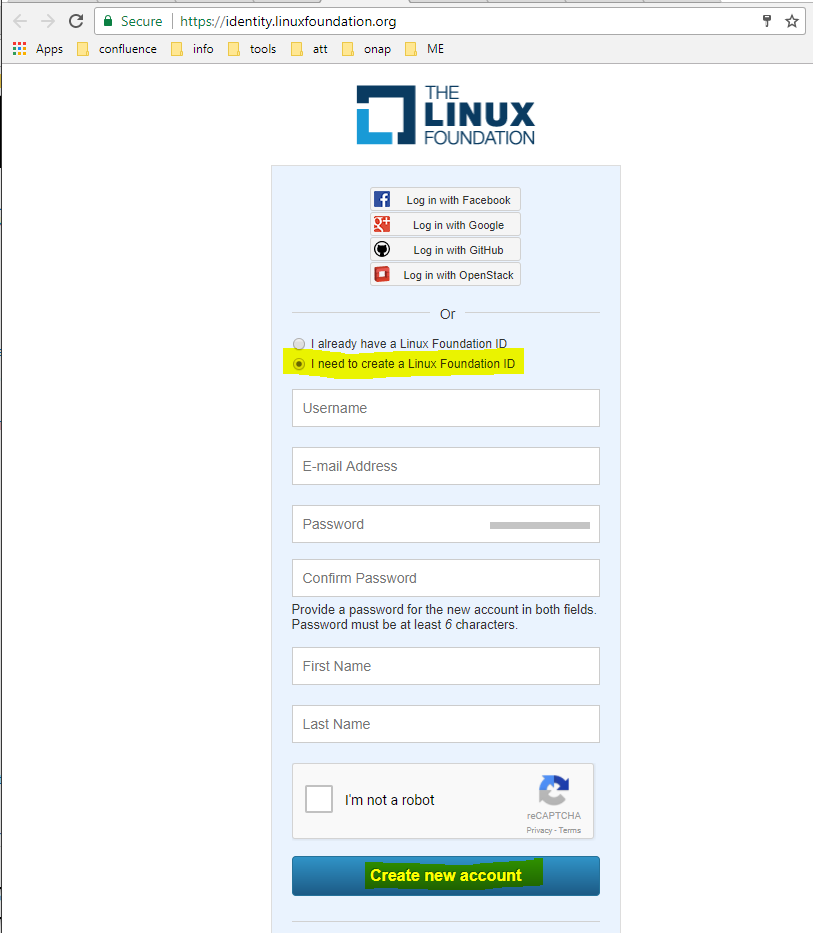
Filling the information and click on Create new account to proceed account creation.
...
Get Project list by entering the project key name in the Filter, for example sdnc, this list of projects under sdnc will be shown as below:

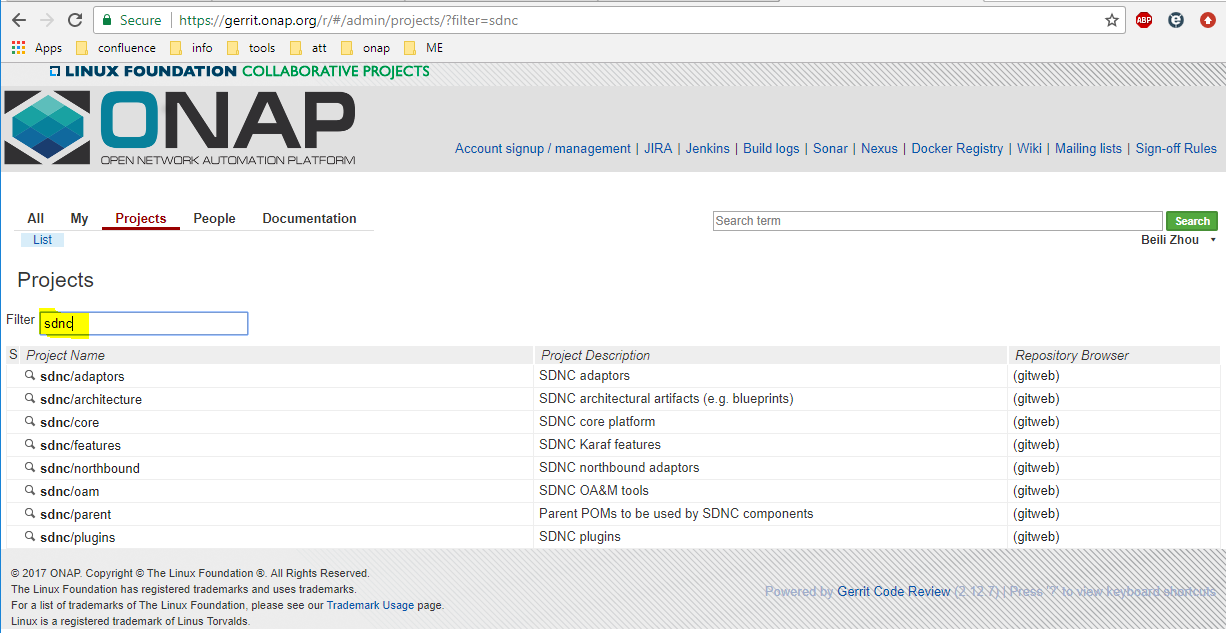
Click on the wanted project from the list, the General page of the selected project will be shown. the following is the General page of sdnc/adaptors:


Now click on Clone with commit-msg hook, then click on http, then click on the notepad icon.


The git clone command for the selected project is now copied into your clipboard. You do paste to use it at where-ever you want to.
...
ONAP code can also be viewed from gerrit web site as below (sdnc/adaptors project is used as the example here):


To view the coce through gerrit client, first follow steps in Get git command from ONAP gerrit to get the Projects list page.
...
In the project list page, click on the gitweb under the Repository Browser column of your project row.


The master branch's summary page will be shown up. Click on the tree option.


Now, the repo details page will be shown and you can view the code in master branch from there.
...
In the project list page, click the project under the Project Name column. (using sdnc/adaptors project as example here)


It takes you to the project General page, click on the Branches option.


The project page will be switched to Branches page. Check out the Branch Name column, click the gitweb on the same row of the desired branch.


The project Summary page of the selected branch will be shown up. Click on the tree option.


Now, the repo details page will be shown and you can view the code in master branch from there.
...
In your interlliJ, Select View -> Tool Windows -> Maven Project

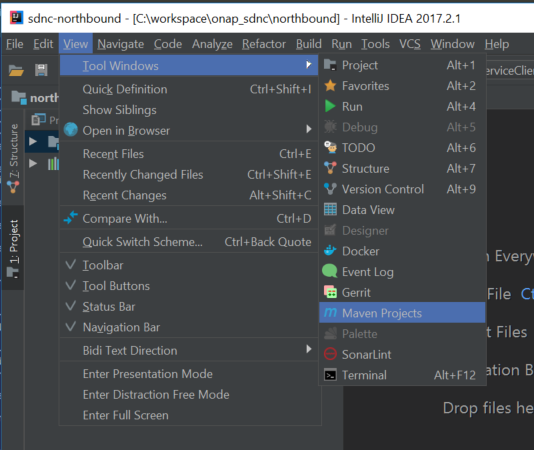
The maven project will shown on the right side of your intelliJ window.


Click the Maven Settings wrench to bring up the Settings window:

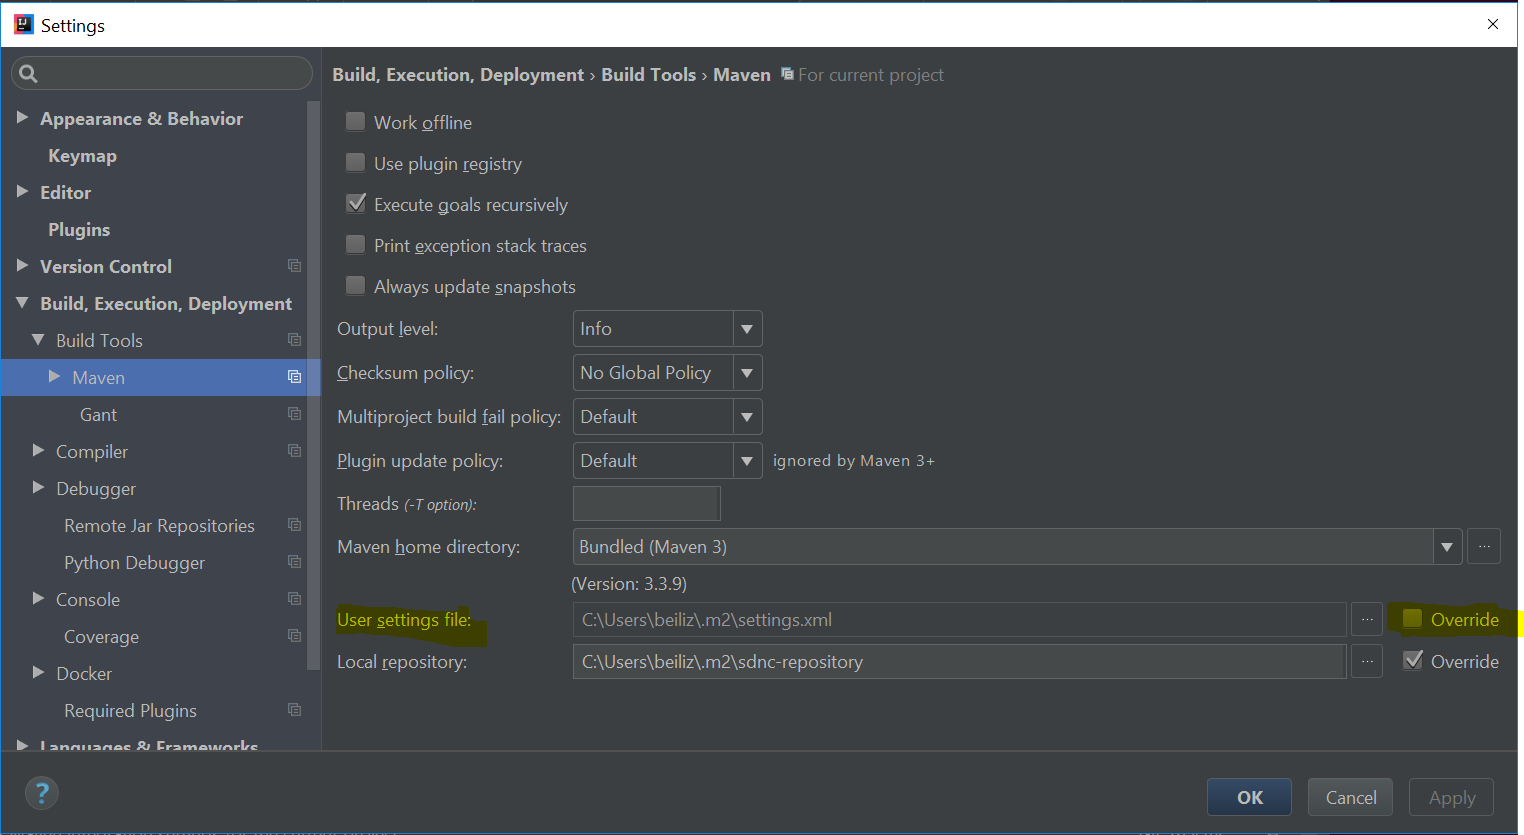
Select the Override of the User settings file, add the settings.xml file full path, the Apply button will be enabled. click on Apply to apply the change.
...
From interlliJ Maven Projects window, find the module marked with (root), expand it by clicking on the triange on the left side or double clicking the text. It will then show two folders : Lifecycle and Plugins. Use the same way to expand the Lifecycle folder, the build options are now shown:


To run the build, double click the Install or select install and then click on the Run Maven Build triange icon.
...
In anywhere of this class editor, do Ctrl+Shift+T or right click to bring up right click menu, then select Go To, then Test in the cascaded menu:


This will bring up the Choose Test for... window as below.
Choose Create New Test... for creating brand new JUnit Test, or just choose the test class to go to the existing tests.


When Create New Test... is selected, the Create Test window will be brough up:

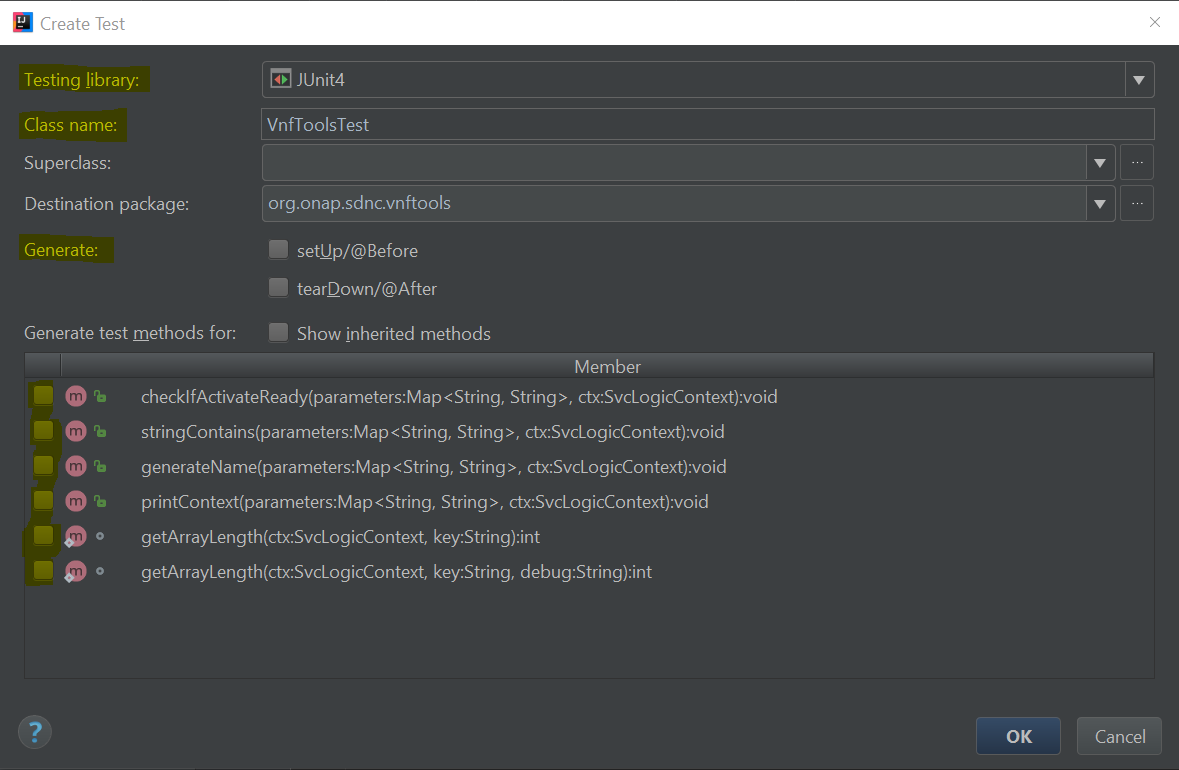
The test Class name is automatically generated and shown in the window. Ensure the Testing library is selected with JUnit4.
...
Click the Add button in the Reviewers section, to add reviewers (who is going to review your code) and committers (who is going to review your code as well as approve and commit your code).


Note:
- The ONAP Jobbuilder will be added automatically within one or two minutes after the review created, and a verfiy build will also be automatically triggered for your review in ONAP jenkins server.
- The committer can be found from Software Defined Newtork Controller secion in Resources and Repositories page.
...
| Steps | Command | Notes |
|---|---|---|
| 1 | git commit --amend | update the comment as desired |
| 2 | git log --shortstat | validate your commit now has the updated comments, as well as the Change-Id as the one in the gerrit review |
| 3 | git review | push the changed comment to the review again. Once the command is completed, go to your review, you will see
|


How to Update the Code in a Review
...
| Steps | command | notes |
|---|---|---|
| 1 | git commit -sam "my updated code" | To create a new commit with your updated code |
| 2 | git log --shortstat | you will see the most 2 recent commits are from
|
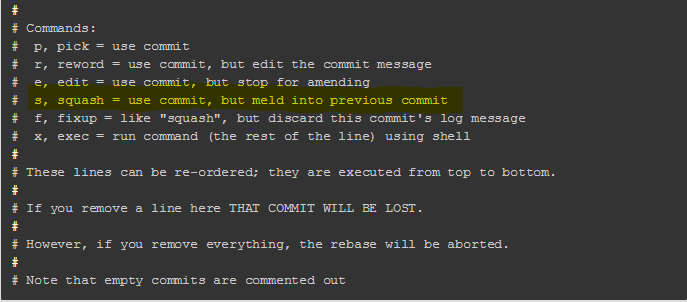
| 3 | git rebase -i HEAD~2 | To run rebase interactively for the most recent 2 commits In the interactive mode, it will bring up the text which contains pick for your last 2 commits along with the following content:
Do the following:
Once this command is completed, 2 commits will be merged into 1 commit. |
| 4 | git log --shortstat | you will see there's only 1 commit which replaces the 2 commit you have seen in step 2. validate your commit has the Change-Id as the one in the gerrit review |
| 5 | git review | push the changed comment to the review again. Once the command is completed, go to your review, you will see
|


| Anchor | ||||
|---|---|---|---|---|
|
...
To find all of your changes, you can type in "is:closed(owner:self)" in the Search field at Gerrit self dashboard, then click on the Search button.


Deployment
Deploying a Minimal ONAP SDN-C Environment
...
Port forwarding can also be configured in the Virtual Box Gui. Here is an example
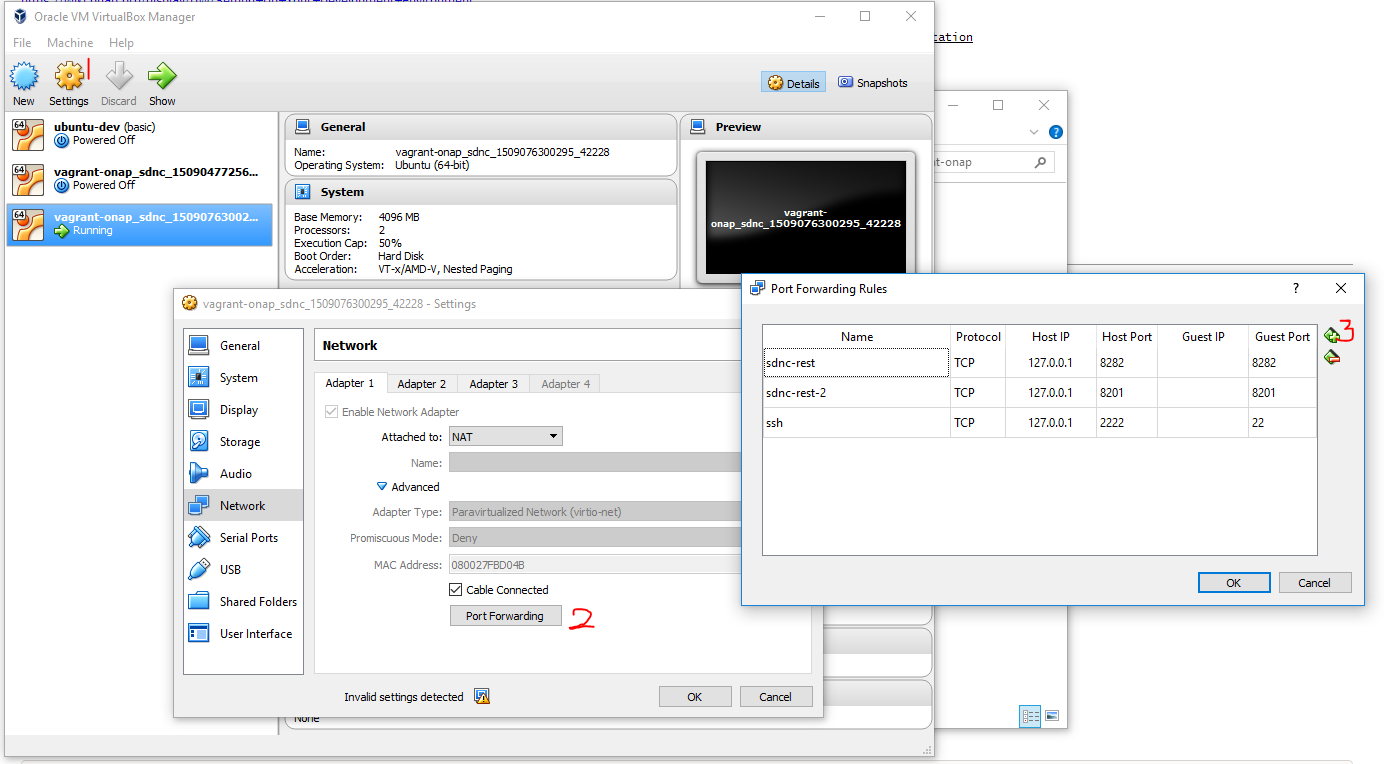
ssh to the Guess OS
...
| Code Block |
|---|
...
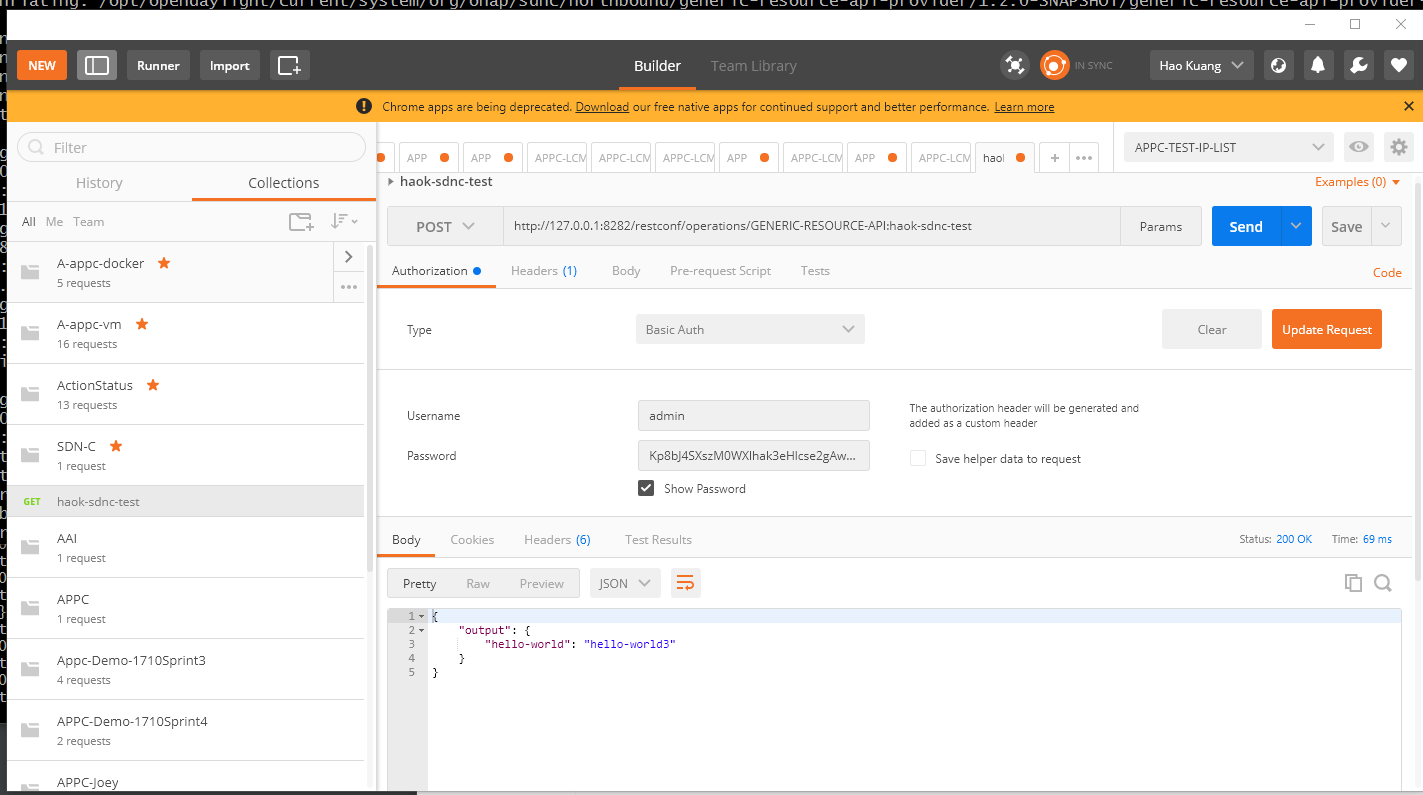
rpc haok-sdnc-test {
output {
leaf hello-world {
type string;
mandatory true;
}
}
}
... |

Use Maven to Build Project
...
It takes a miniute to restart the karaf platform which really depends on the performance of your host machine.

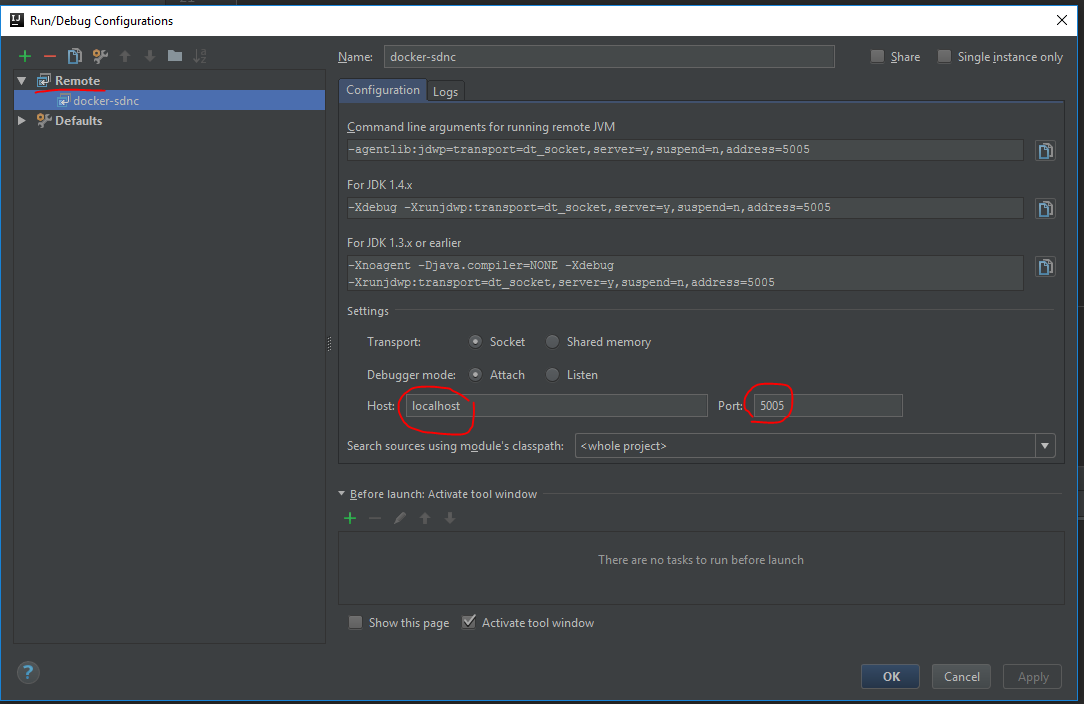
Remote Debugging
...
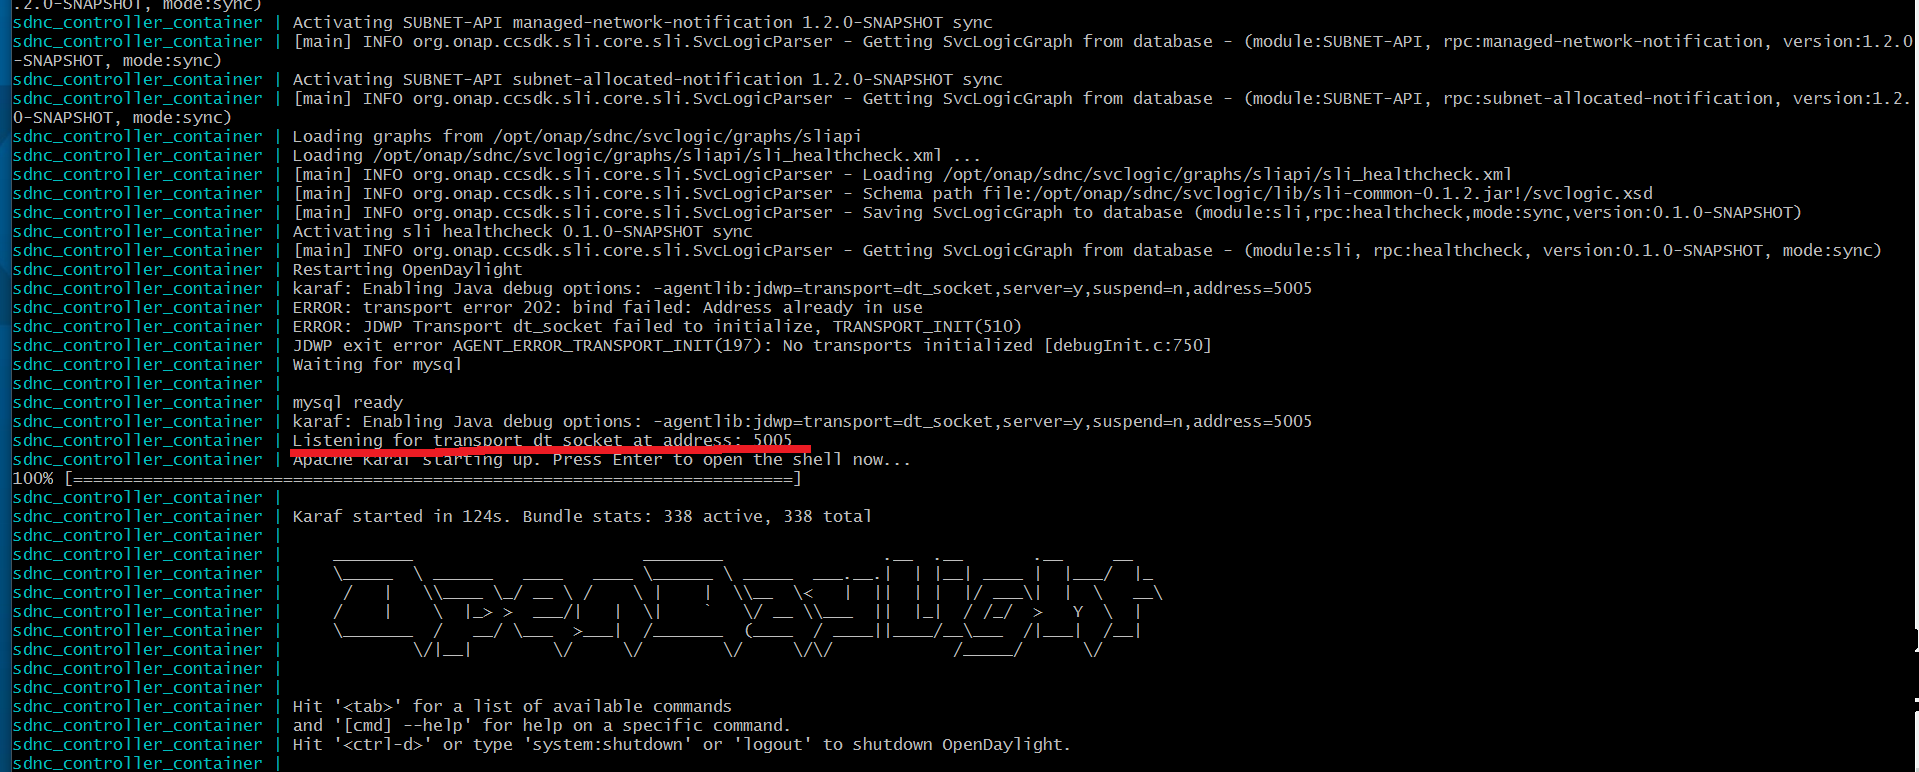
After the docker instances fully started, you should see the karaf log information below with 5005 port open.

Use Remote debug in IDE