| Table of Contents | ||
|---|---|---|
|
Setting
...
Up Your Development Environment
Start by following the page You can set up the SDN-C IDE by following instructions from Setting Up Your Development Environment.
Downloading the Source Code
Creating Your Linux Foundation Account
If you already have a Linux Foundation account, you can skip this section.
You will need linux foundation account to submit code change to ONAP projects repos. If you only want to read the code, you can skip this step.
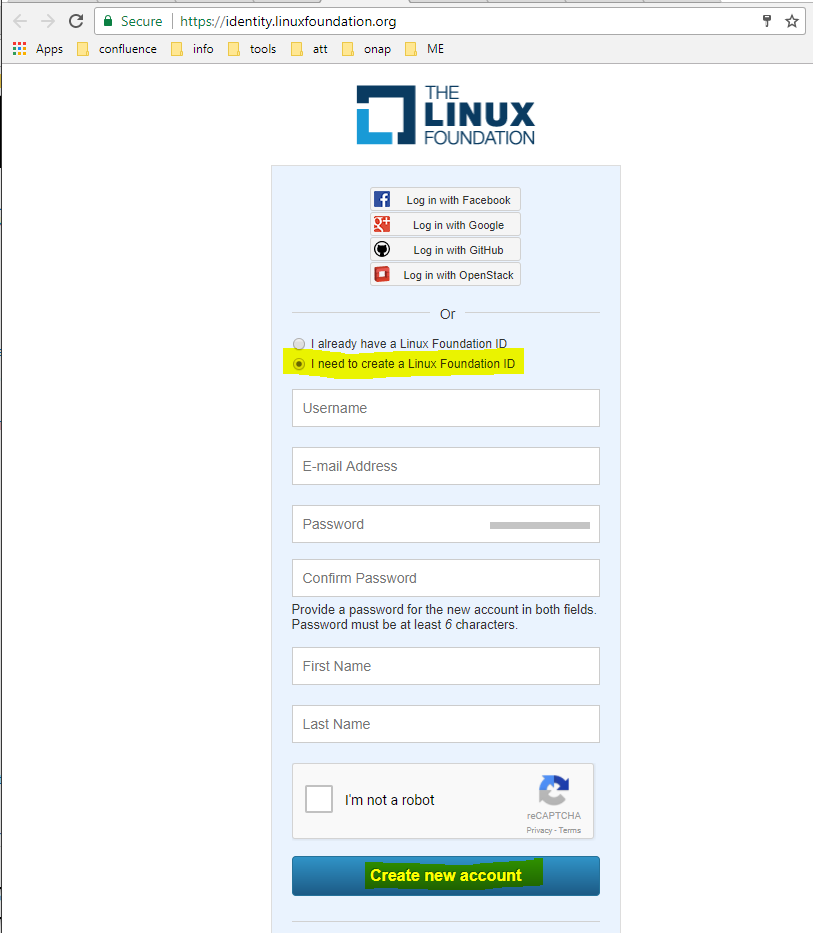
To create your linux foundation account, go to Linux Foundation Identity page, and select I need to create a Linux Foundation ID, the following page will be shown:
...
this covers items such as signing up for a linux foundation account, configuring git, installing gerrit and IDE recommendations.
Downloading the Source Code
Downloading SDN-C Projects
...
| Anchor | ||||
|---|---|---|---|---|
|
The below instructions explain how to clone a repository from gerrit with the commit message hook included and it will be configured to use HTTPS. SSH is still the recommended protocol, these instructions serve as a workaround for users behind restrictive networking rules.
If you have worked on other projects in gerrit and are already familiar with cloning from gerrit you can ignore these instructions!
| Info | ||
|---|---|---|
| ||
This should have been done as part of IDE setting up following "Setting Up Your Development Environment. Just in case you have missed it" and is only needed if you are behind a proxy and plan to use HTTP. If behind proxy, ensure git config has set http.proxy and https.proxy NVPs, check with the following command:
if not no http/https proxies exist add the them with the following commands:
here's an example:
|
...
Following instruction from Maven Example settings.xml section of Setting Up Your Development Environment page to get your settingsettings.xml file.
| Info | ||
|---|---|---|
| ||
If behind proxy,
|
Configure settings file in IntelliJ
If you are going to do compiling in your compile with intelliJ, follow steps in this section to configure settings.xml file in your interlliJintelliJ.
If you did not make your Maven Project by default shown, do the following:
In your interlliJintelliJ, Select View -> Tool Windows -> Maven Project
...
The maven project will shown on the right side of your the intelliJ window.

Click the Maven Settings wrench to bring up the Settings window:
...
Projects Build Order
The SDN-C projects repos repositories should be built in the following order:
...
mvn clean install -s <the settings.xml file with full path>
Build Within
...
IntelliJ
From interlliJ intelliJ Maven Projects window, find the module marked with (root), expand it by clicking on the triange triangle on the left side or double clicking the text. It will then show two folders : Lifecycle and Plugins. Use the same way to expand the Lifecycle folder, the build options are now shown:
...
To run the build, double click the Install or select install and then click on the Run Maven Build triange triangle icon.
To do clean, double click the clean or select clean and then click on the Run Maven Build triange triangle icon.
Tips
Skip Maven Javadoc Build
...
When Create New Test... is selected, the Create Test window will be brough brought up:
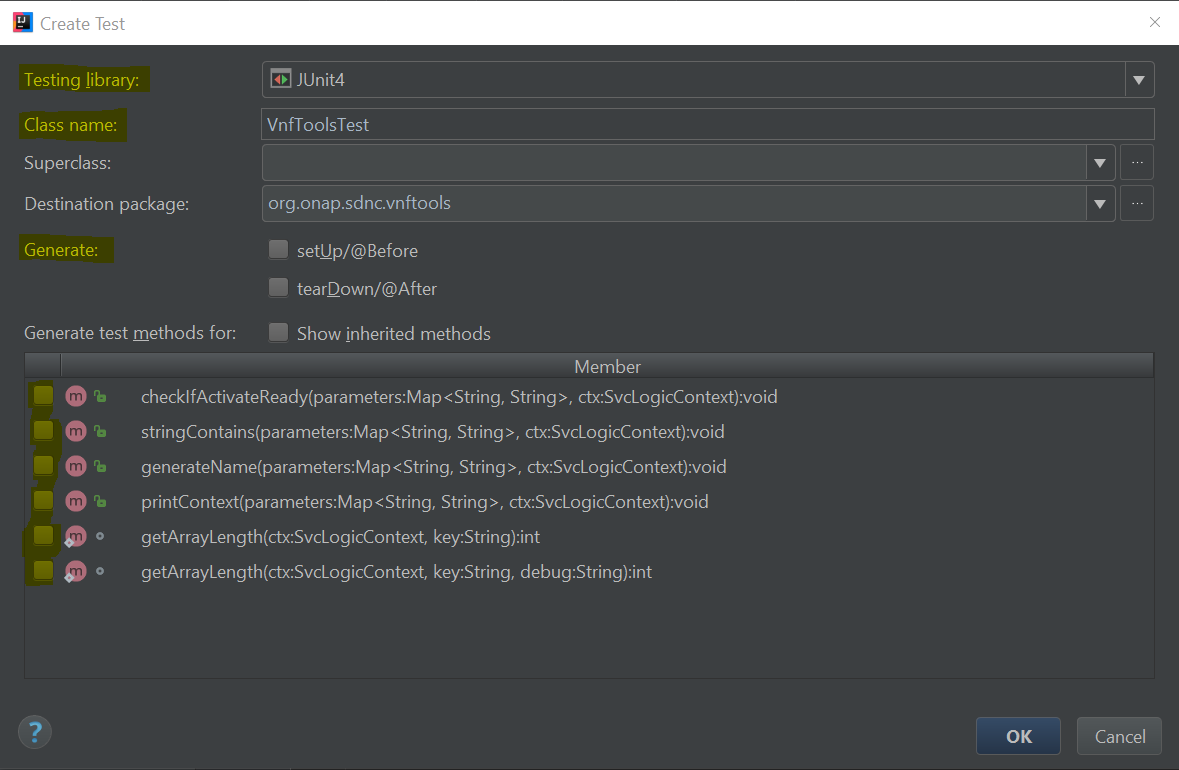
The test Class name is automatically generated and shown in the window. Ensure the Testing library is selected with JUnit4.
...
If the Junit and mockito dependencies are not in the module and its parent pom file, add them to the module's pom.xml file as the following. A sample snippet is below:
| Info | ||||
|---|---|---|---|---|
| ||||
<dependency> |
...
To commit code to ONAP, you must have git-review installed. The steps in this section only need to be done one time, except the Tips ![]() . This should have been done already during Setting Up Your Development Environment.
. This should have been done already during Setting Up Your Development Environment.
On Linux
run the following command to check if git-review is installed as part of your OS image.
...
[3] ONAP SDC setup: Using Vagrant-Onap for local deployment of SDC project - WIP!!!#OnapforlocaldeploymentofSDCproject-WIP!!!-InitialSetup
[4] Virtualbox Download link: https://www.virtualbox.org/wiki/Linux_Downloads
...