...
- Once the screen is filled in, select "Next"
- It will then prompt you for the branches to select. Choose: 2.0.0-ONAP, R3workingbranch, and Master. "master" and Click "Next".
- You will then be prompted to select a local directory on your machine into which the model should be loaded. It can be any location you want, and not necessarily the workspace you are using for Eclipse/Papyrus projects. As an "initial branch", select "R3workingbranchmaster". Select the option "Import all existing Eclipse projects...". Your screen at this point should look like this:


- Note: In order for the above process to work, you may have to exit your corporate VPN.
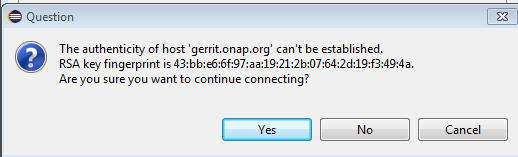
- Select "finish". For a first time, you may get the following message. Select "Yes".
...
- The cloning process should complete, and the repository should be created on your local machine. If you encounter errors, contact the ONAP model administrator to get help.
- The view below shows an example of the newly created repository which has been opened up down to the level of the "Local" folder. Note: You should have the R3workingbranch "master" branch only showing up as your "Local".


Viewing the Model in Papyrus
- Once you have successfully cloned the ONAP model, you can now view it in Papyrus. Go to the Papyrus perspective by selecting "Window->Perspective→Open Perspective→ Other" on the top of your screen and then select "Papyrus". Or, again you can go to "Quick Access" and select the icon that looks like a bird:

- This perspective should show a "Project Explorer" on the left side of the screen.
- You should see your newly created Eclipse/Papyrus project in the "Project Explorer" on the left side of the screen.
 (ignore the question mark, it shouldn't be there)
- The text in light brown is telling you that your project is in the modelspec repository you just created, in the branch "R3workingbranchmaster".
- The model actually resides in the "papyrus" folder, in "modelspec". If you open up the papyrus folder and then the ONAP Information Model folder, you will see:
...

- Here is a description of what you have in the ONAP Information Model. Each of the "green birds" represent a Papyrus model. Aside from the Profiles, you have the overall "model" that is composed of "sub-models". Each of the "sub-models" has a model editor that is responsible for editing the model and uploading the changes into Gerrit/Git. Note: two people can not be editing a "sub-model" without clearly communicated coordination, otherwise "model conflicts" arise.
- GenDoc - This is where the GenDoc templates reside for creating an output of the model in Word
- StyleSheets - These are CSS stylesheets to use when formatting the model Owner: Jessie Jewitt
- Common - The common submodel of the model (where artifacts used by multiple sub-models are stored) Owner: Kevin Skaggs
- Infrastructure - The infrastructure submodel where the multi-cloud artifacts are stored Owner: Arun Gupta
- model - This is the "umbrella" ONAP model that contains all the submodels Owner Owner: Jessie Jewitt
- Nf - Network Function submodel Owner: Jessie Jewitt
- Ns - Network Service submodel Owner: Chuyi Guo
- OpenModel_Profile.profile- Contains IISOMI stereotypes Owner: Jessie Jewitt OpenModel_Profile.profile- Contains IISOMI stereotypes
- Party - The party submodel for party related artifacts Owner: Jessie Jewitt Currently inactiveParty
- Pnf - The party submodel for party related artifacts Pnf submodel where PNFD resides Currently inactive Owner: Jessie Jewitt
- Resource - The resource submodel for resource related artifacts Owner: Jessie JewittChuyi Guo
- Service - The service submodel for service related artifacts Owner: Jessie JewittKevin Skaggs
- Vnf - The Vnf submodel for Vnf specific artifacts Owner: Kevin Skaggs
- To see the entire model, double-click on "model". The model will open up in the model explorer which is on the left side of the screen in the center:
...

- The icon with the triangle saying "model" represents the entire ONAP model. The icons with a little arrow coming out of a circle represent the sub-models.
- Open up any sub-model like you would a folder, and you will see something like the following (in this example it is the Vnf sub-model)

- Each sub-model has the following types of packages
- Associations - Contains all associations used in diagrams.
- Diagrams - Contains UML diagrams
- Interfaces - Contains Component, Interface, and Operation artifacts (usually empty for now)
- ObjectClasses - Contains all class definitions
- TypeDefinitions - Contains all DataTypes and Enumerations.
- Start viewing the model by selecting any diagram, i.e. in the Vnf → Diagrams package.
- Here's a little trick for seeing the associated artifacts in the diagram. In the model explorer bar you will see two arrows opposing each other. Select that double-arrow option:
...
- Only approved model editors can update the working branch in Gerrit.
- To be a model editor you must undergo Papyrus training and attend the weekly Papyrus modeling sessions.
- Once you have finished making your model changes, make sure you "save" them in Papyrus, by selecting "File→ Save", or select the file icon.
- Next, you will need to go to the "Git" perspective to select the files you have changed and prepare them for uploading to Gerrit
- Once in the Git Perspective, select the repository where you have changed the files.

- Select the "Git Staging" tab in the lower right hand portion of your screen.
- You will see the files that you have changed in the "Unstaged changes". Note: If there is a file there that you did not intend to change, right-click on that file and select "Replace with HEAD revision". That will revert any unwanted changes you may have made.
- Select the files that you did change, right-click and select "Add to index", Or, as a shortcut, you can select the little green "plus" sign that will add the files for you:
- Once in the Git Perspective, select the repository where you have changed the files.


- Once they have been added, they will show up in the "Staged Changes"
- Next you will need to prepare to "Commit and Push" your changes. Position your cursor in the "Commit Message" window
- Add a commit message indicating the change you have done, i.e. "Added new diagram to service model" then carriage return twice so that you will have a blank line after your message.
- You can then optionally add a more detailed message about the change.
- Next, you will have to associate the change to a JIRA ticket. Add on the line after the blank line: Issue-ID: MODELING-104
- Note that there is a blank between ":" and "M". The JIRA ticket MODELING-104 is a general ticket for changes to the working branch.
- Note that Git will generate a "Change id" for you, so you don't need to manually add one.
- Then you will need to "Sign-off" on the change by selecting the "Sign-off" button. This is the "Pen" icon next to the "Commit Message". Select that icon
...