...
Now let’s access the Nifi (DCAE designer) UI - http://10.12.7.116/nifi

a) Get the artifacts to test and onboard.
...
These jars should now be available for you to use in the nifi UI as processors.

3. Design & Distribution Flow
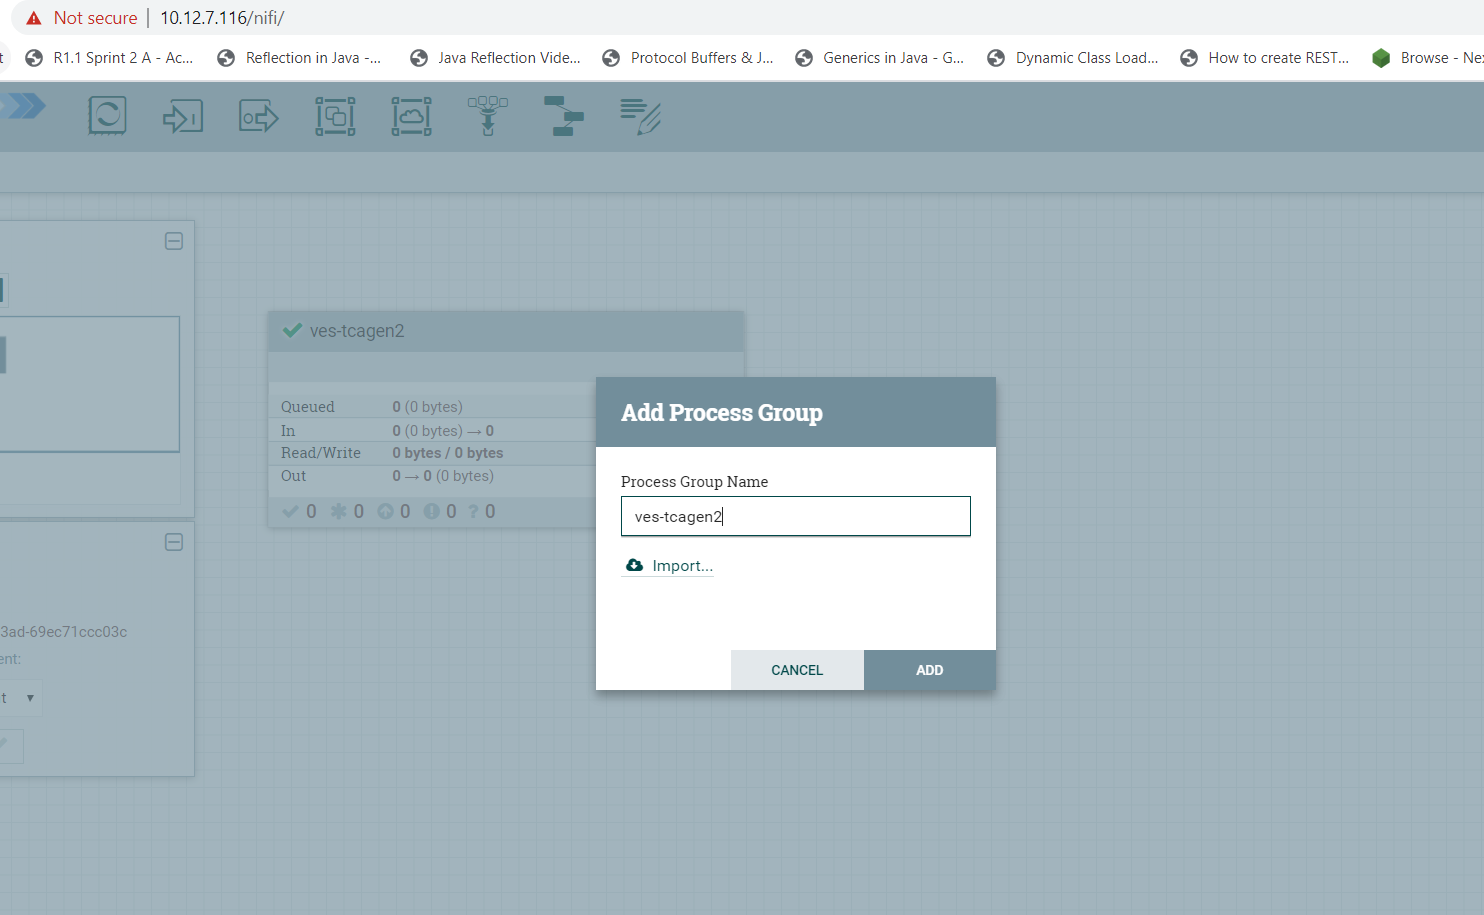
To start creating flows, we need to create a process group first. The name of the process group will be the name of the flow. Drag and Drop on the canvas, the ‘Processor Group’ icon from the DCAE Designer bar on the top.
a) Configure Nifi Registry url
...
Add a registry client. The Registry client url will be http://dcaemod-nifi-registry:18080

Now enter the process group by double clicking it,
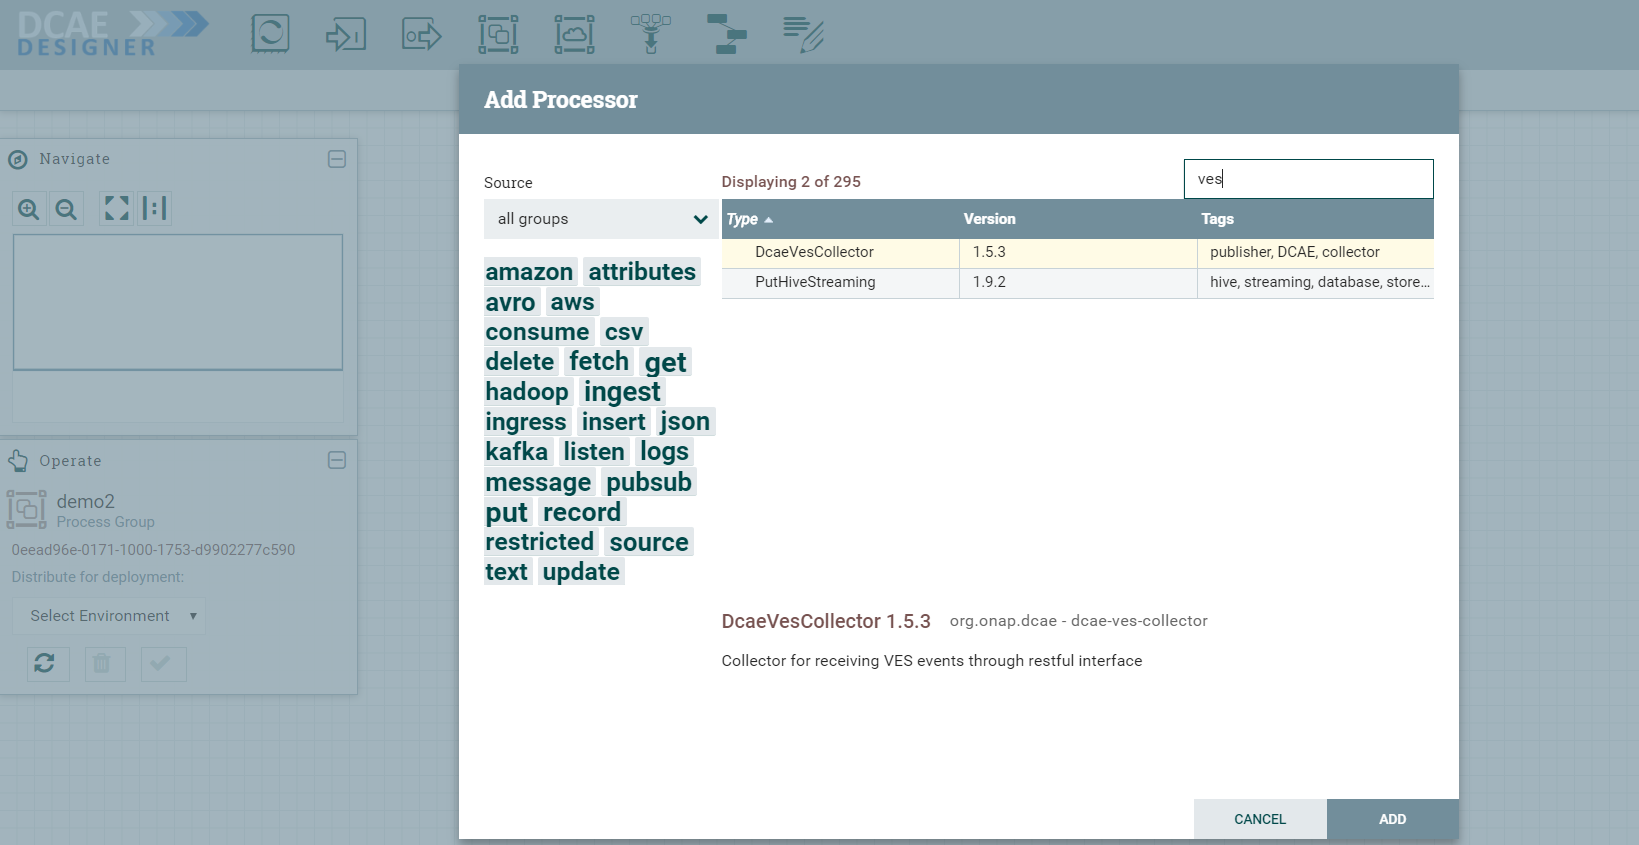
You can now drag and drop on the canvas ‘Processor’ icon from the top DCAE Designer tab. You can search for a particular component in the search box that appears when you attempt to drag the ‘Processor’ icon to the canvas.
If the Nifi registry linking worked, you should see the “Import” button when you try to add a Processor or Process group to the Nifi canvas, like so-
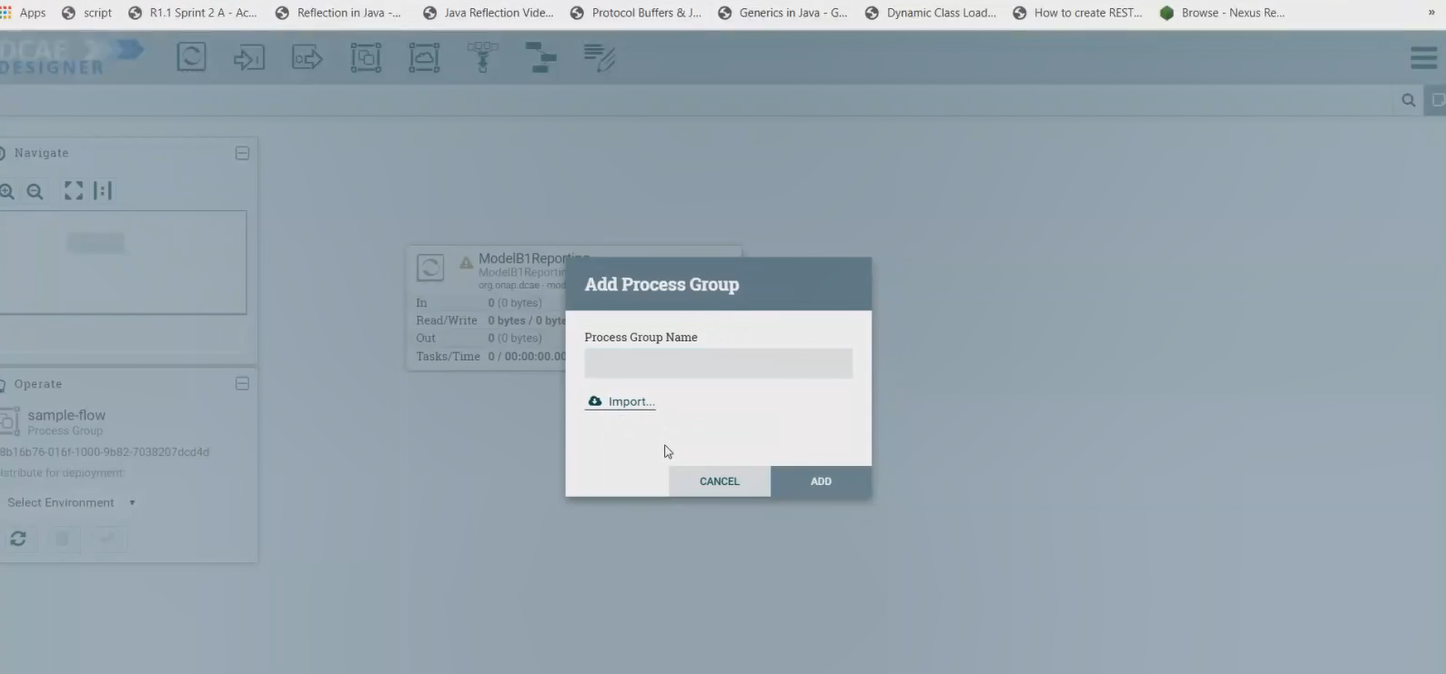
By clicking on the import button, we can import already created saved and version controlled flows from the Nifi registry, if they are present.

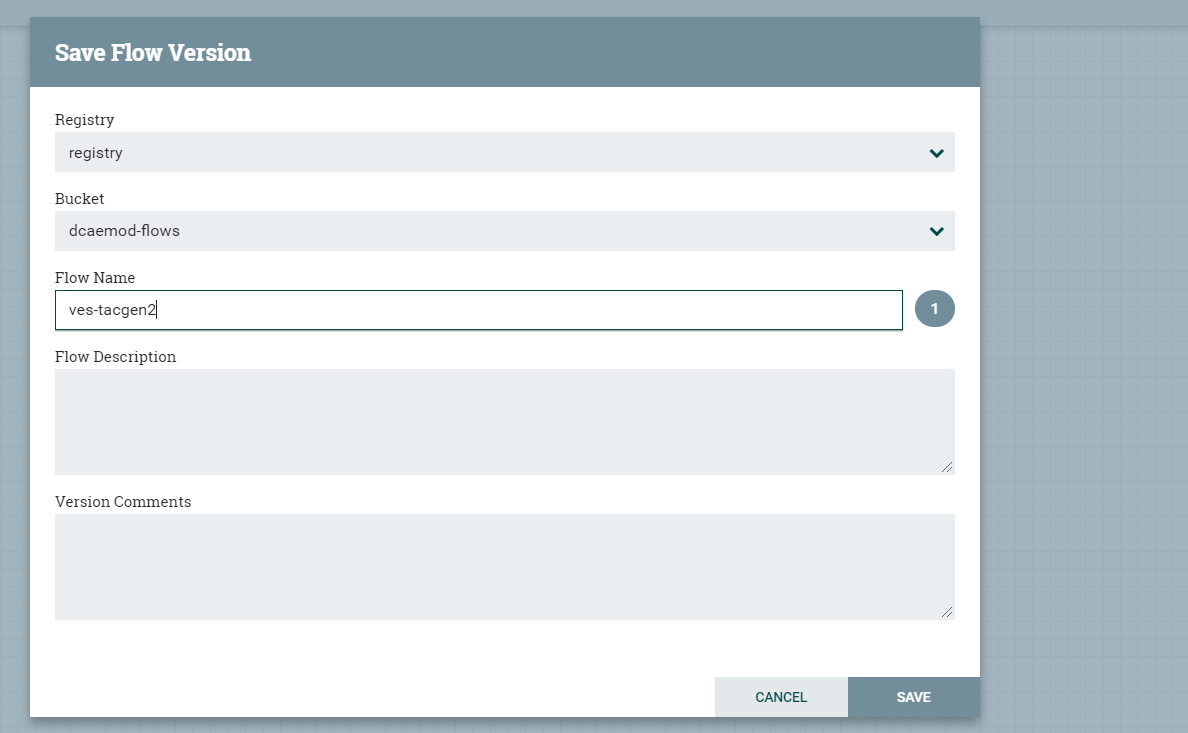
We can save created flows by version controlling them like so starting with a 'right click' anywhere on the canvas-

Ideally you would name the flow and process group the same, because functionally they are similar.
When the flow is checked in, the bar at the bottom shows a green checkmark

Note: Even if you move a component around on the canvas, and its position on the canvas changes, it is recognized as a change, and it will have to recommitted.
...
DcaeVesCollector connects to DockerTcagen2.


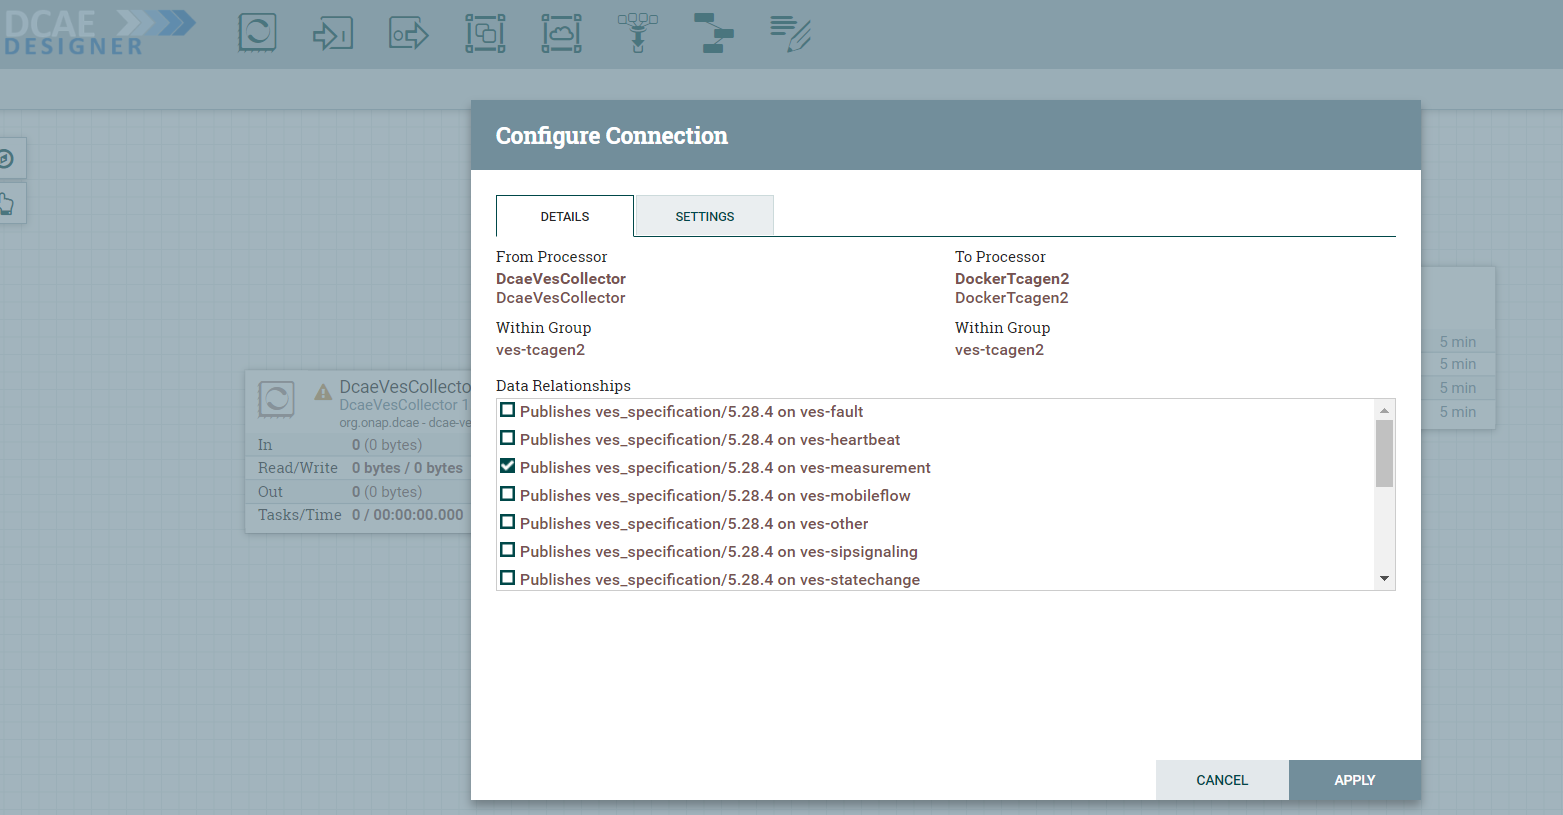
Along the way you need to also provide topic names in the settings section. These can be arbitrary names.

To recap, see how DcaeVesCollector connects to DockerTcagen2. Look at the connection relationships. Currently there is no way to validate these relationships. Notice how it is required to name the topics by going to Settings.
The complete flow after joining our components looks like so

c) Add distribution target which will be the runtime api url
Once we have the desired flow checked in, we can go ahead and set the distribution target in the controller settings

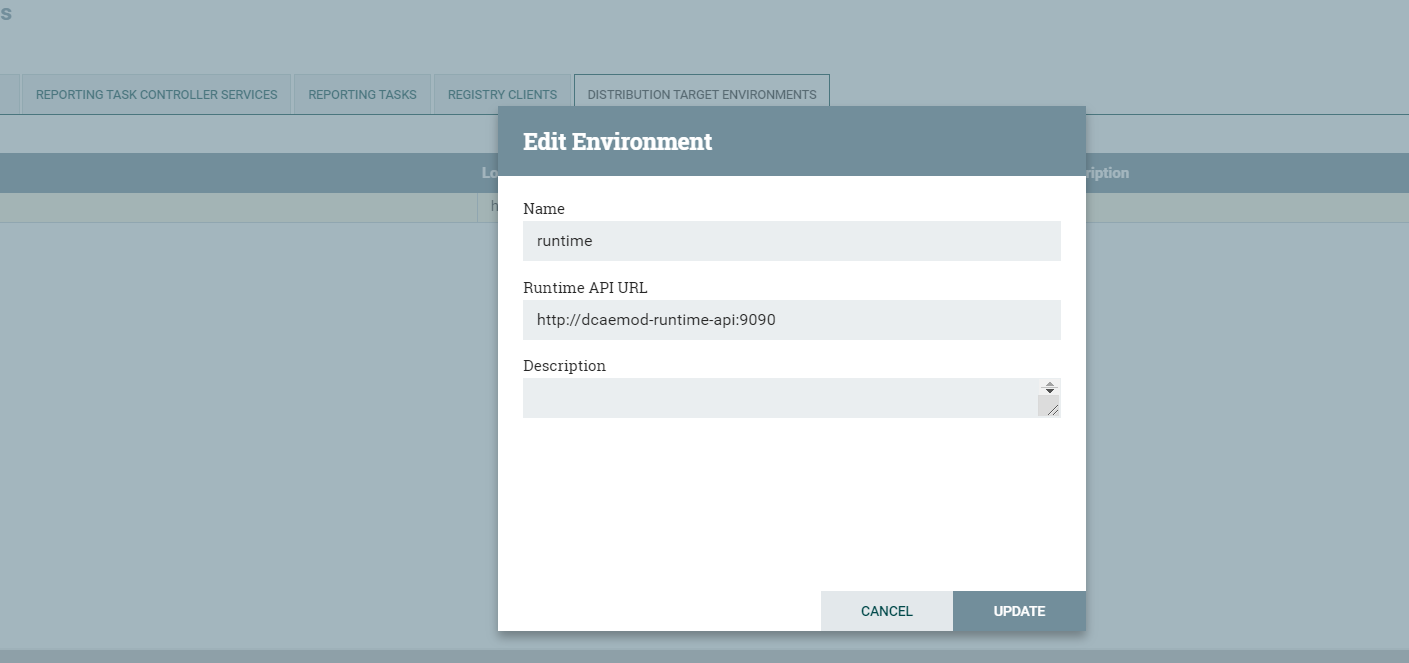
Distribution target URL will be http://dcaemod-runtime-api:9090
...
If the flow was submitted successfully to the runtime api, you should get a pop up a success message like so -

At this step, the design was packaged and sent to Runtime api.
...
You should see the generated artifact/ blueprint in the DCAE Dashboard dashboard at https://10.12.7.116:30418/ccsdk-app/login_external.htm in our deployment. The name for each component will be appended by the flow name followed by underscore followed by the component’s name.

The credentials to access the DCAE Dashboard are
...
The generated Blueprint can be viewed.


Finally, the generated Blueprint can be deployed.