Preparation
Install ONAP
Make sure that you've installed ONAP R1 (Amsterdam) release. For installation instructions, please refer ONAP Installation in Vanilla OpenStack.
Make sure that all components pass health check when you do the following:
- ssh to the robot vm, run '/opt/ete.sh health'
You will need to update your /etc/hosts so that you can access the ONAP Portal in your browser. You may also want to add IP addresses of so, sdnc, aai, etc so that you can easily ssh to those VMs. Below is a sample just for your reference:
10.12.5.159 aai-inst2
10.12.5.162 portal
10.12.5.162 portal.api.simpledemo.onap.org
10.12.5.173 dns-server
10.12.5.178 aai
10.12.5.178 aai.api.simpledemo.onap.org

10.12.5.178 aai1
10.12.5.183 dcaecdap00
10.12.5.184 multi-service
10.12.5.189 sdc
10.12.5.189 sdc.api.simpledemo.onap.org
10.12.5.194 robot
10.12.5.2 so
10.12.5.204 dmaap
10.12.5.207 appc
10.12.5.208 dcae-bootstrap
10.12.5.211 dcaeorcl00
10.12.5.214 sdnc
10.12.5.219 dcaecdap02
10.12.5.224 dcaecnsl02
10.12.5.225 dcaecnsl00
10.12.5.227 dcaedokp00
10.12.5.229 dcaecnsl01
10.12.5.238 dcaepgvm00
10.12.5.239 dcaedoks00
10.12.5.241 dcaecdap03
10.12.5.247 dcaecdap04
10.12.5.248 dcaecdap05
10.12.5.249 dcaecdap06
10.12.5.38 policy
10.12.5.38 policy.api.simpledemo.onap.org
10.12.5.48 vid
10.12.5.48 vid.api.simpledemo.onap.org
10.12.5.51 clamp
10.12.5.62 dcaecdap01
You can try to login to the portal at http://portal.api.simpledemo.onap.org using as one of the following roles. The password is demo123456 for all the users.
| User | Role |
|---|---|
| demo | Operator |
| cs0008 | DESIGNER |
| jm0007 | TESTER |
| op0001 | OPS |
| gv0001 | GOVERNOR |
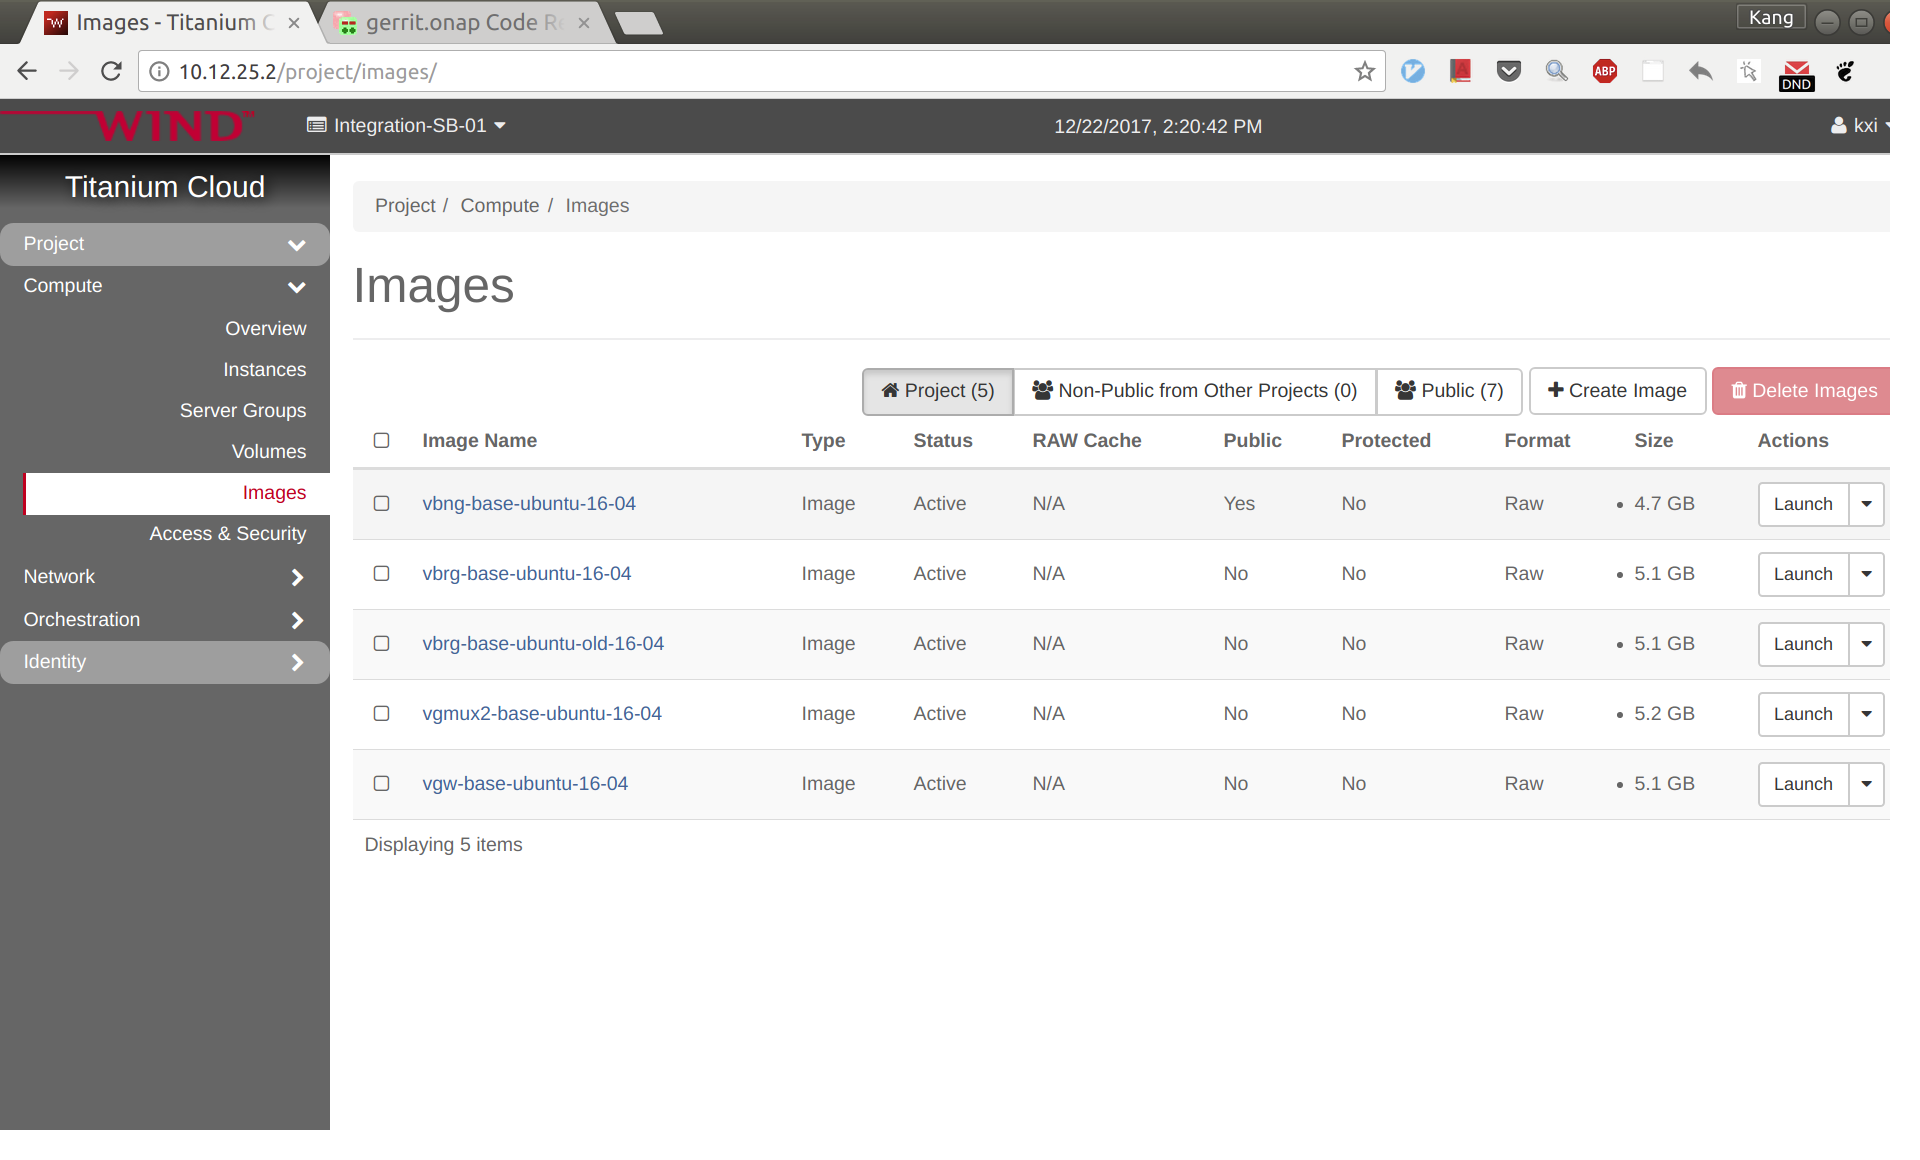
Create images for vBRG, vBNG, vGMUX, and vG
Follow the following instructions to build an image for each VNF and save them in your Openstack: ONAP vCPE VPP-based VNF Installation and Usage Information
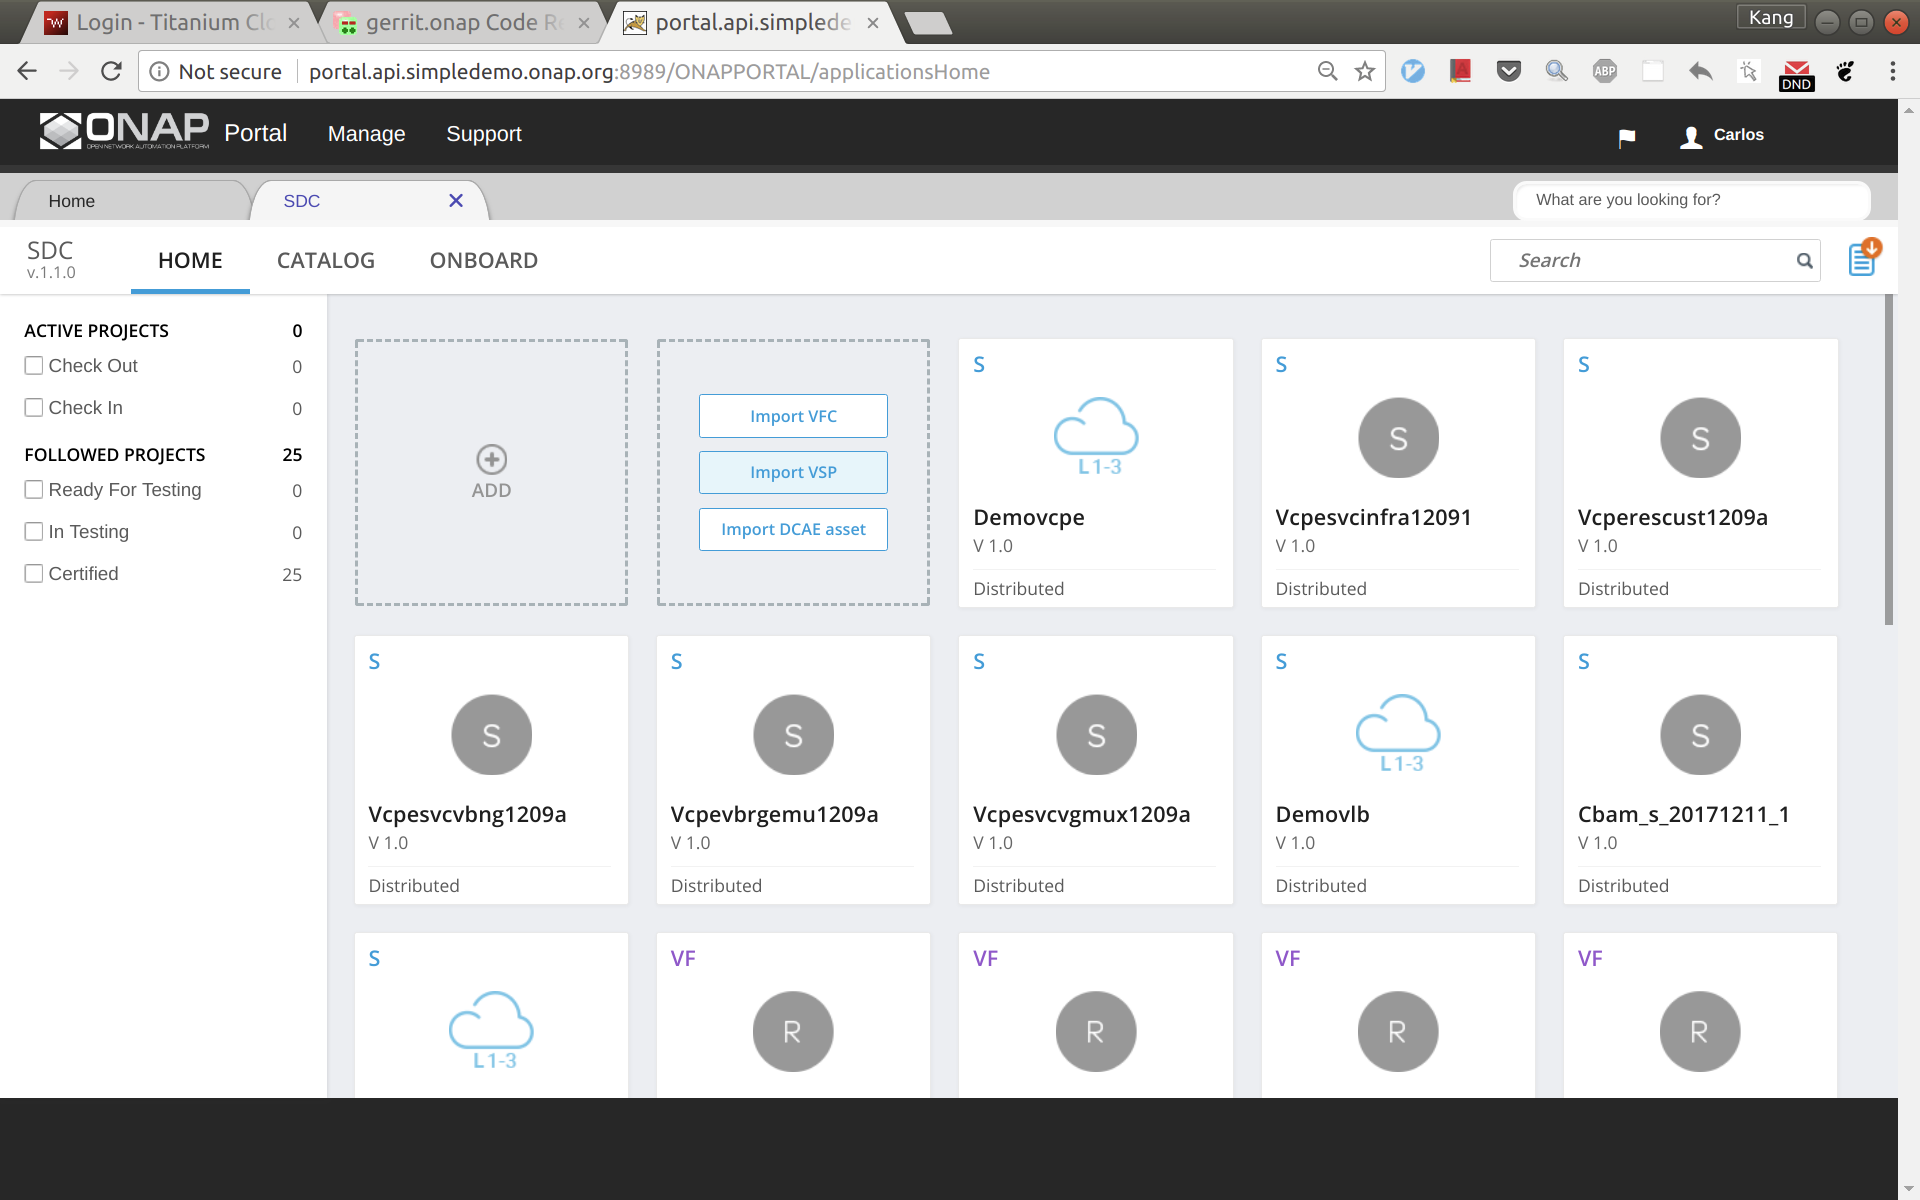
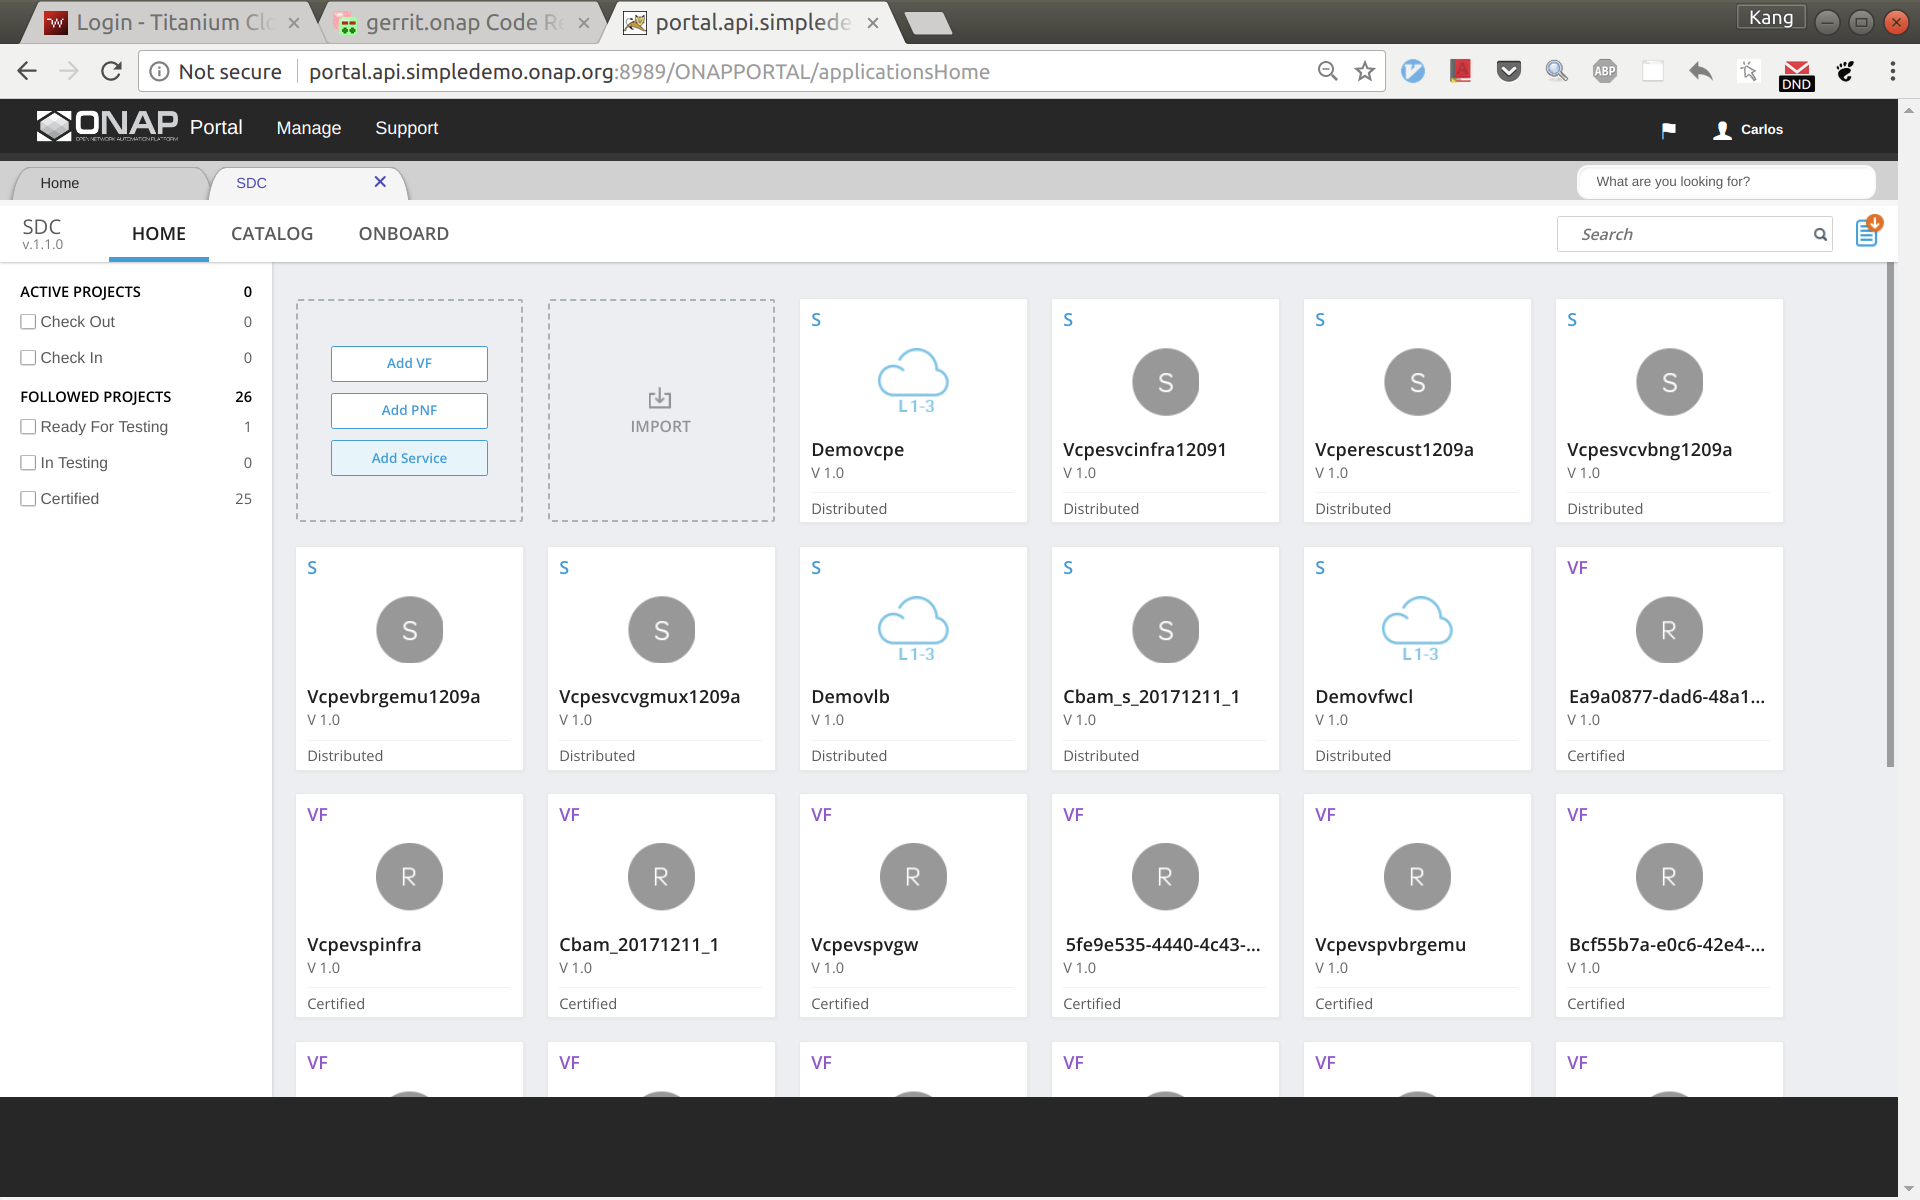
To avoid unexpected mistakes, you may want to give each image a meaningful name and also be careful when mixing upper case and lower case characters. After this you should see images like below.
VNF Onboarding
Create license model in SDC
Log in to SDC portal as designer. Create a license that will be used by the subsequent steps. The detailed steps are here: Creating a Licensing Model
Prepare HEAT templates
vCPE uses five VNFs: Infra, vBRG, vBNG, vGMUX, and vG, which are described using five HEAT templates. For each HEAT template, you will need to fill the env file with appropriate parameters. The HEAT templates can be obtained from gerrit: [demo.git] / heat / vCPE /
Note that for each VNF, the env file name and yaml file name are associated together by file MANIFEST.json. If for any reason you change the env anf yaml file names, please remember to change MANIFEST.json accordingly.
For each VNF, compress the three env, yaml, and json files into a zip package, which will be used for onboarding. If you want to get the zip packages I used for reference, download them here: infra-sb01.zip, vbng-sb01.zip, vbrg-sb01.zip, vgmux-sb01.zip, vgw-sb01.zip.
VNF onboarding in SDC
Onboard the VNFs in SDC one by one. The process is the same for all VNFs. The suggested names for the VNFs are given below (all lower case). The suffix can be a date plus a sequence letter, e.g., 1222a.
- vcpevsp_infra_[suffix]
- vcpevsp_vbrg_[suffix]
- vcpevsp_vbng_[suffix]
- vcpevsp_vgmux_[suffix]
- vcpevsp_vgw_[suffix]
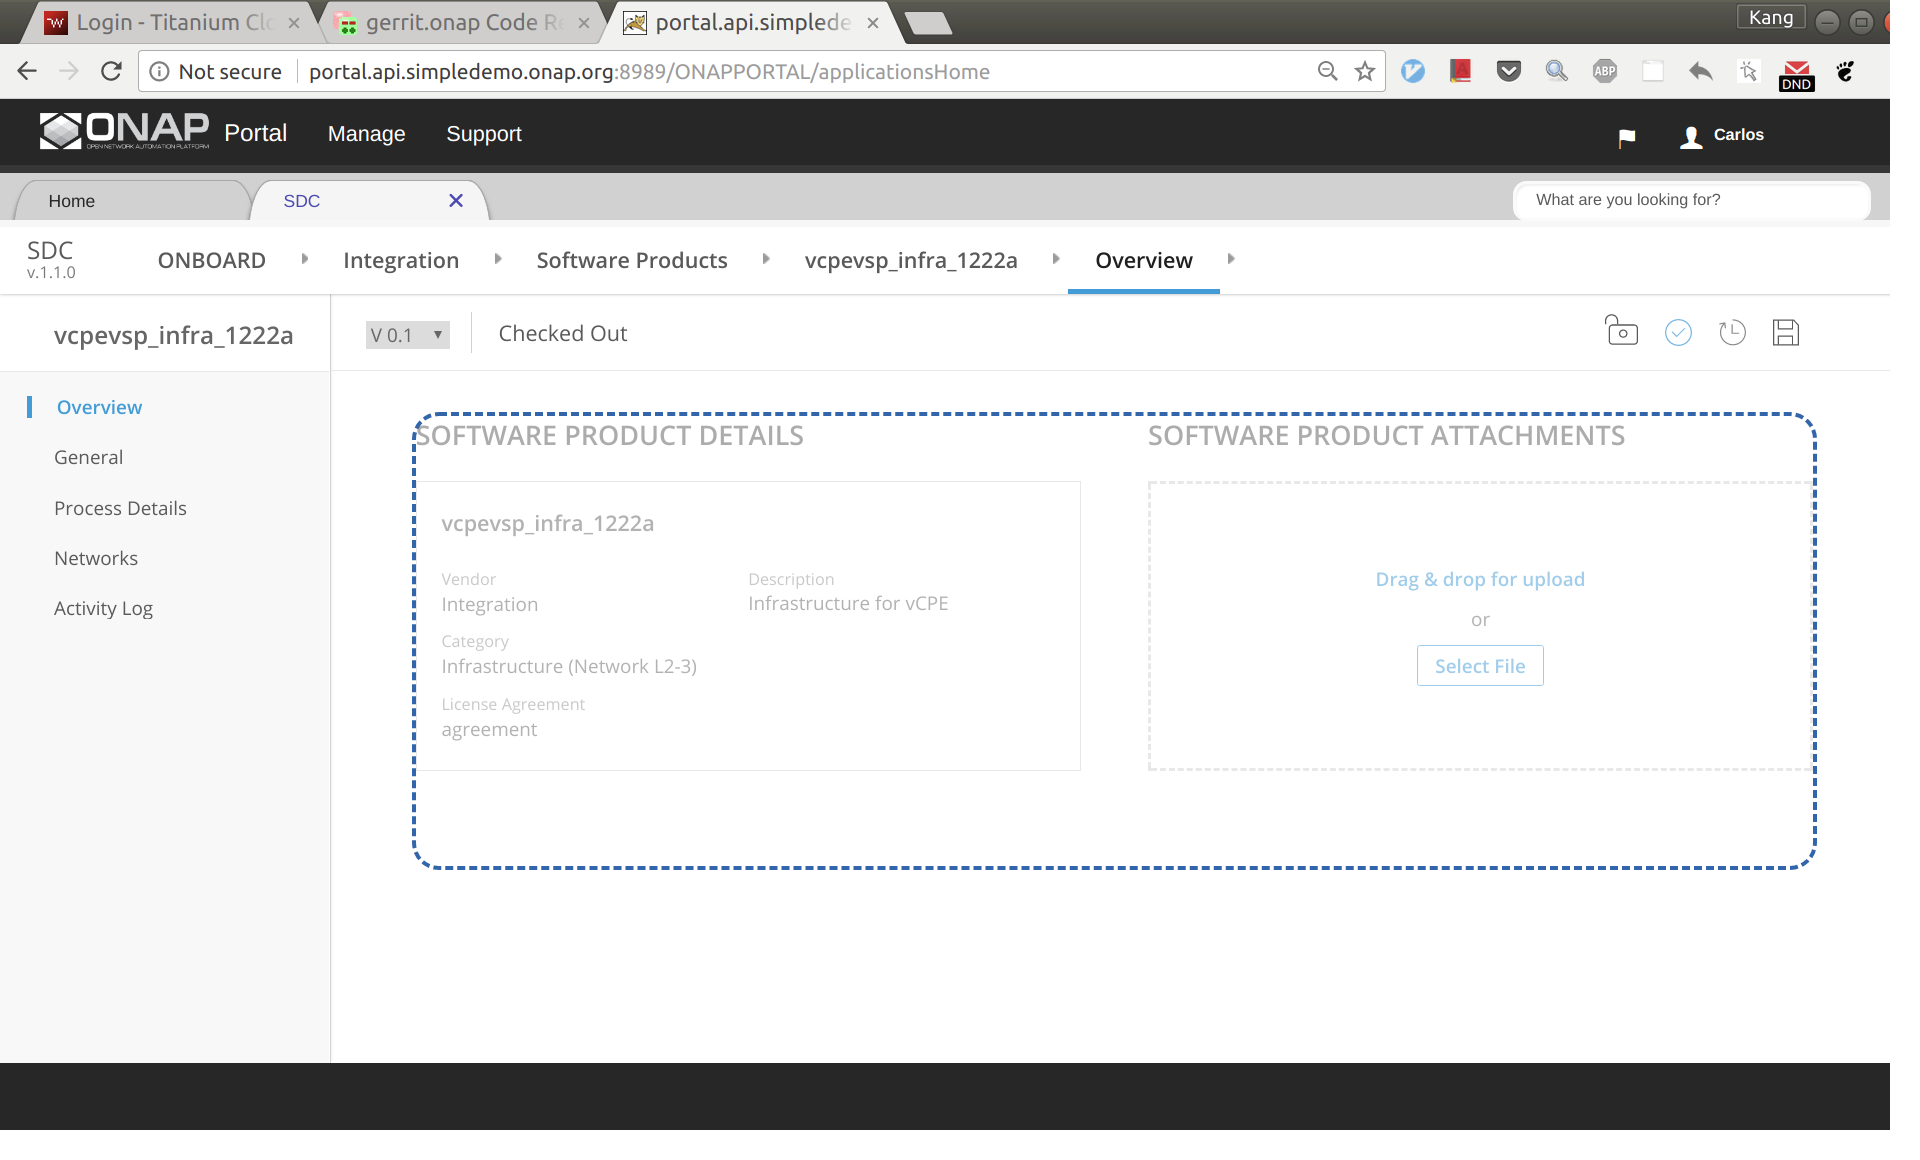
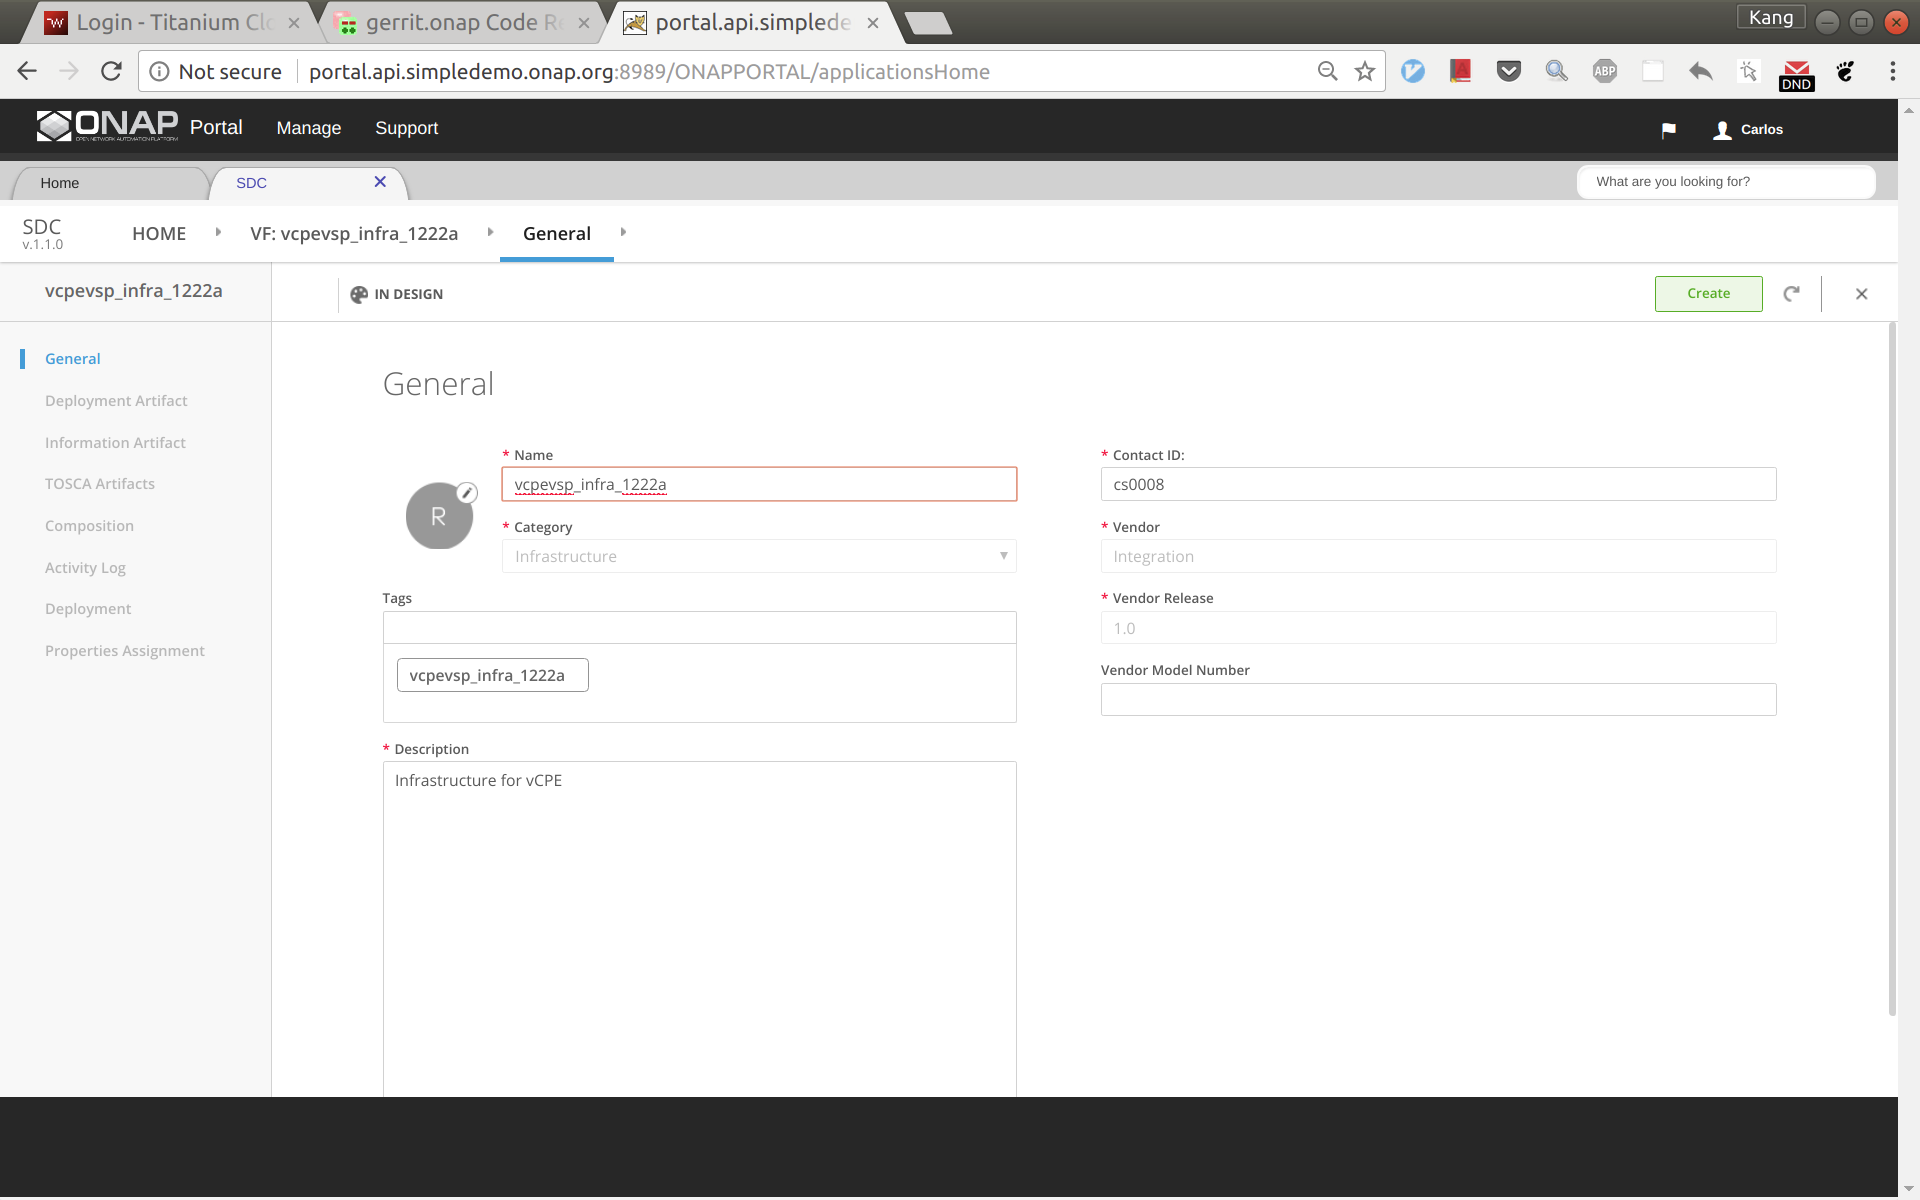
Below is an example for onboarding infra.
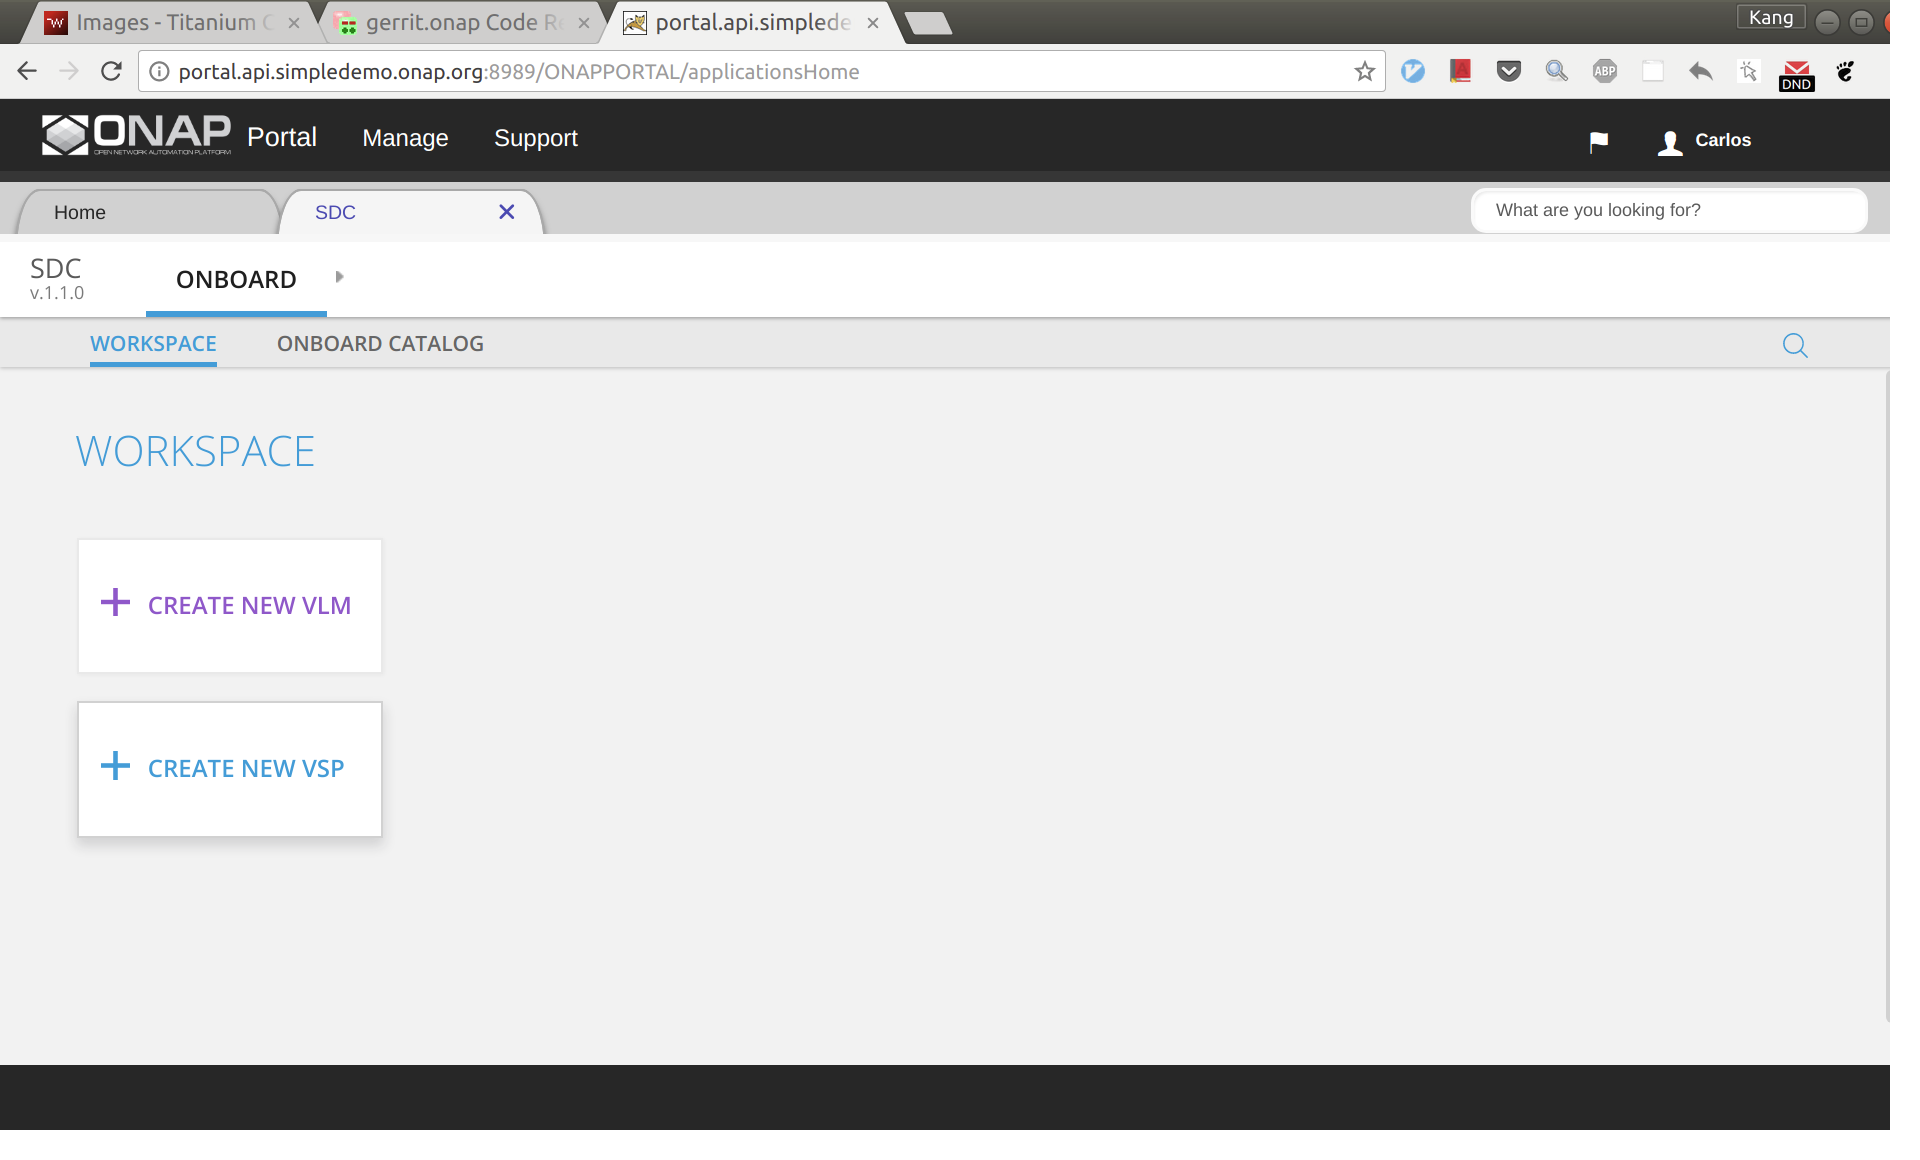
Sign into SDC as cs0008, choose ONBOARD and then click 'CREATE NEW VSP'.
Now enter the name of the vsp. For naming, I'd suggest all lower case with format vcpevsp_[vnf]_[suffix], see example below.
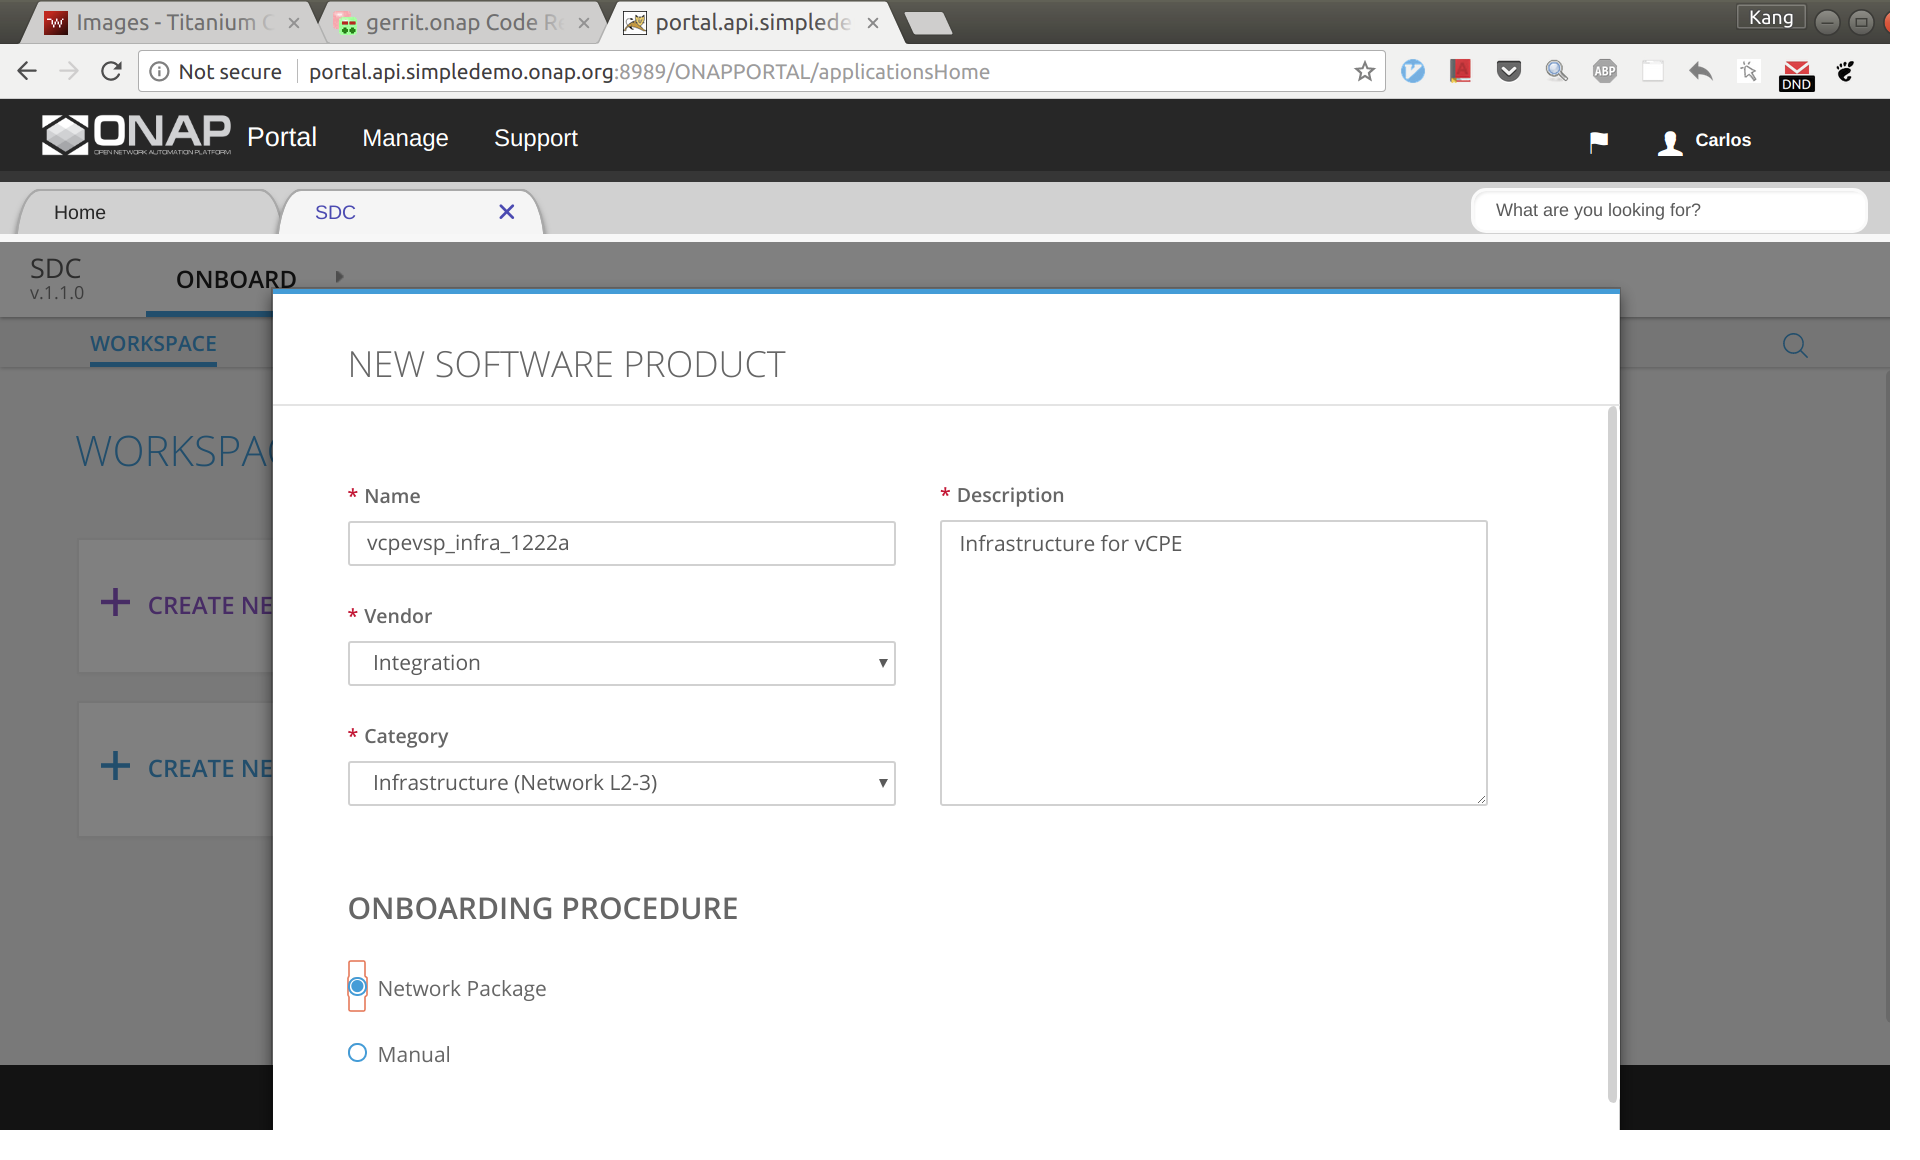
After clicking 'Create', click 'missing' and then select to use the license model created previously.
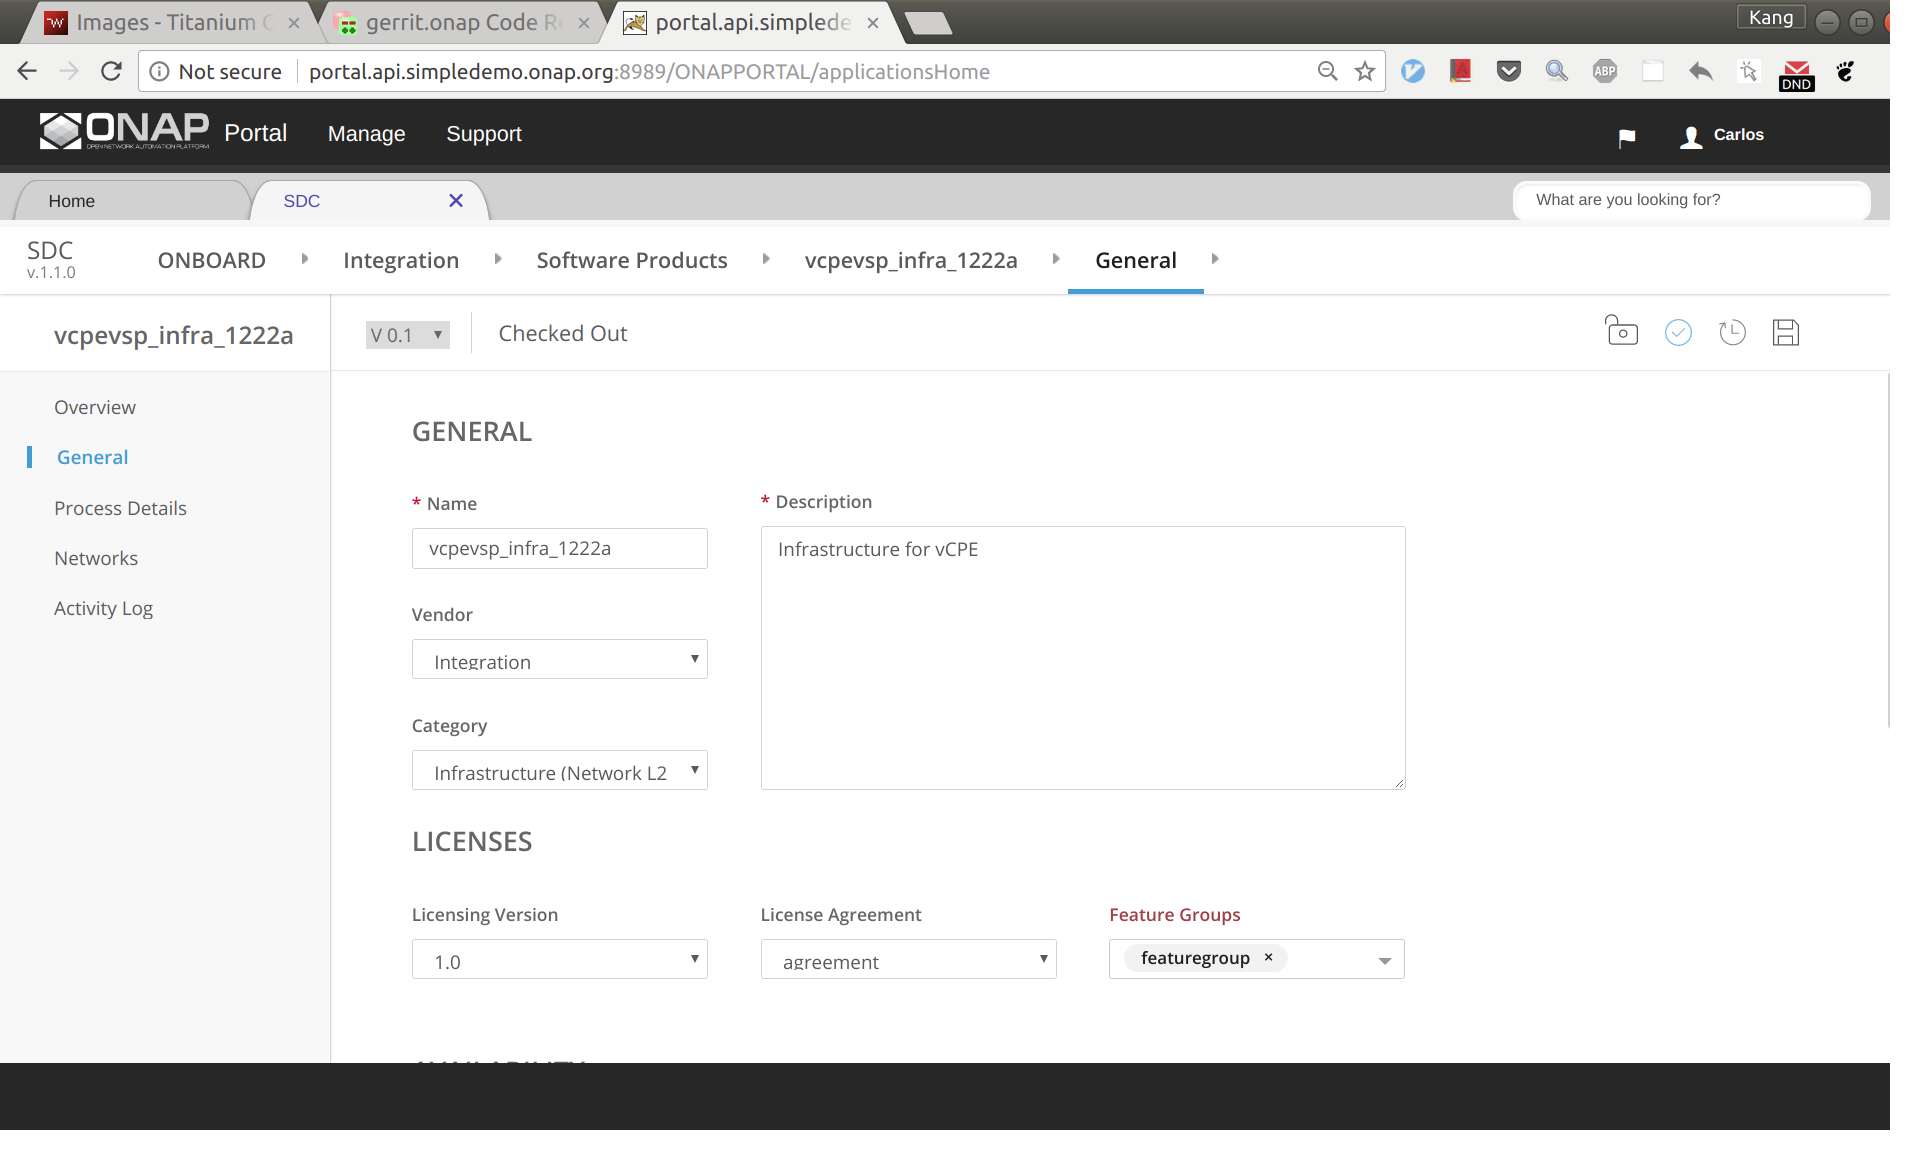
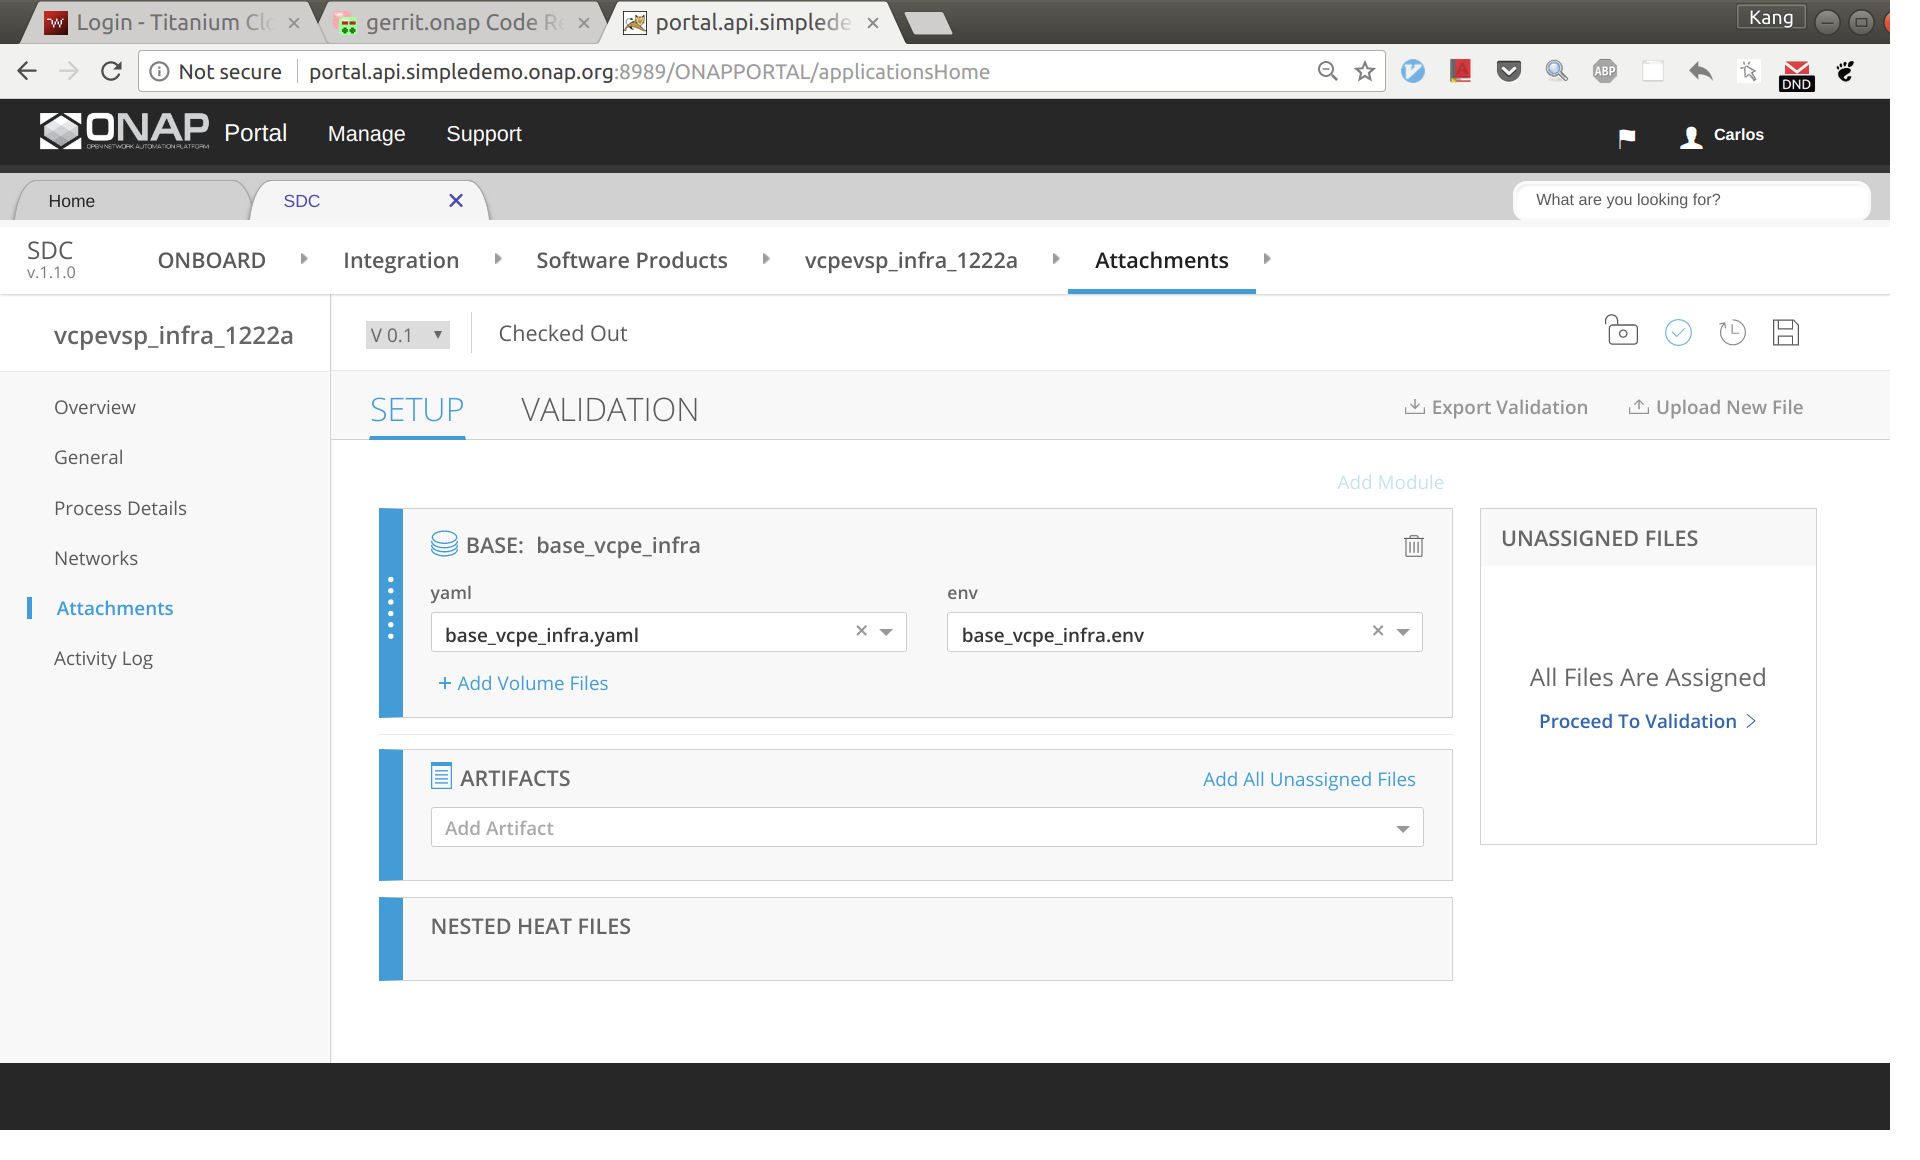
Click 'Overview' on the left size panel, then drag and drop infra.zip to the webpage to upload the HEAT.
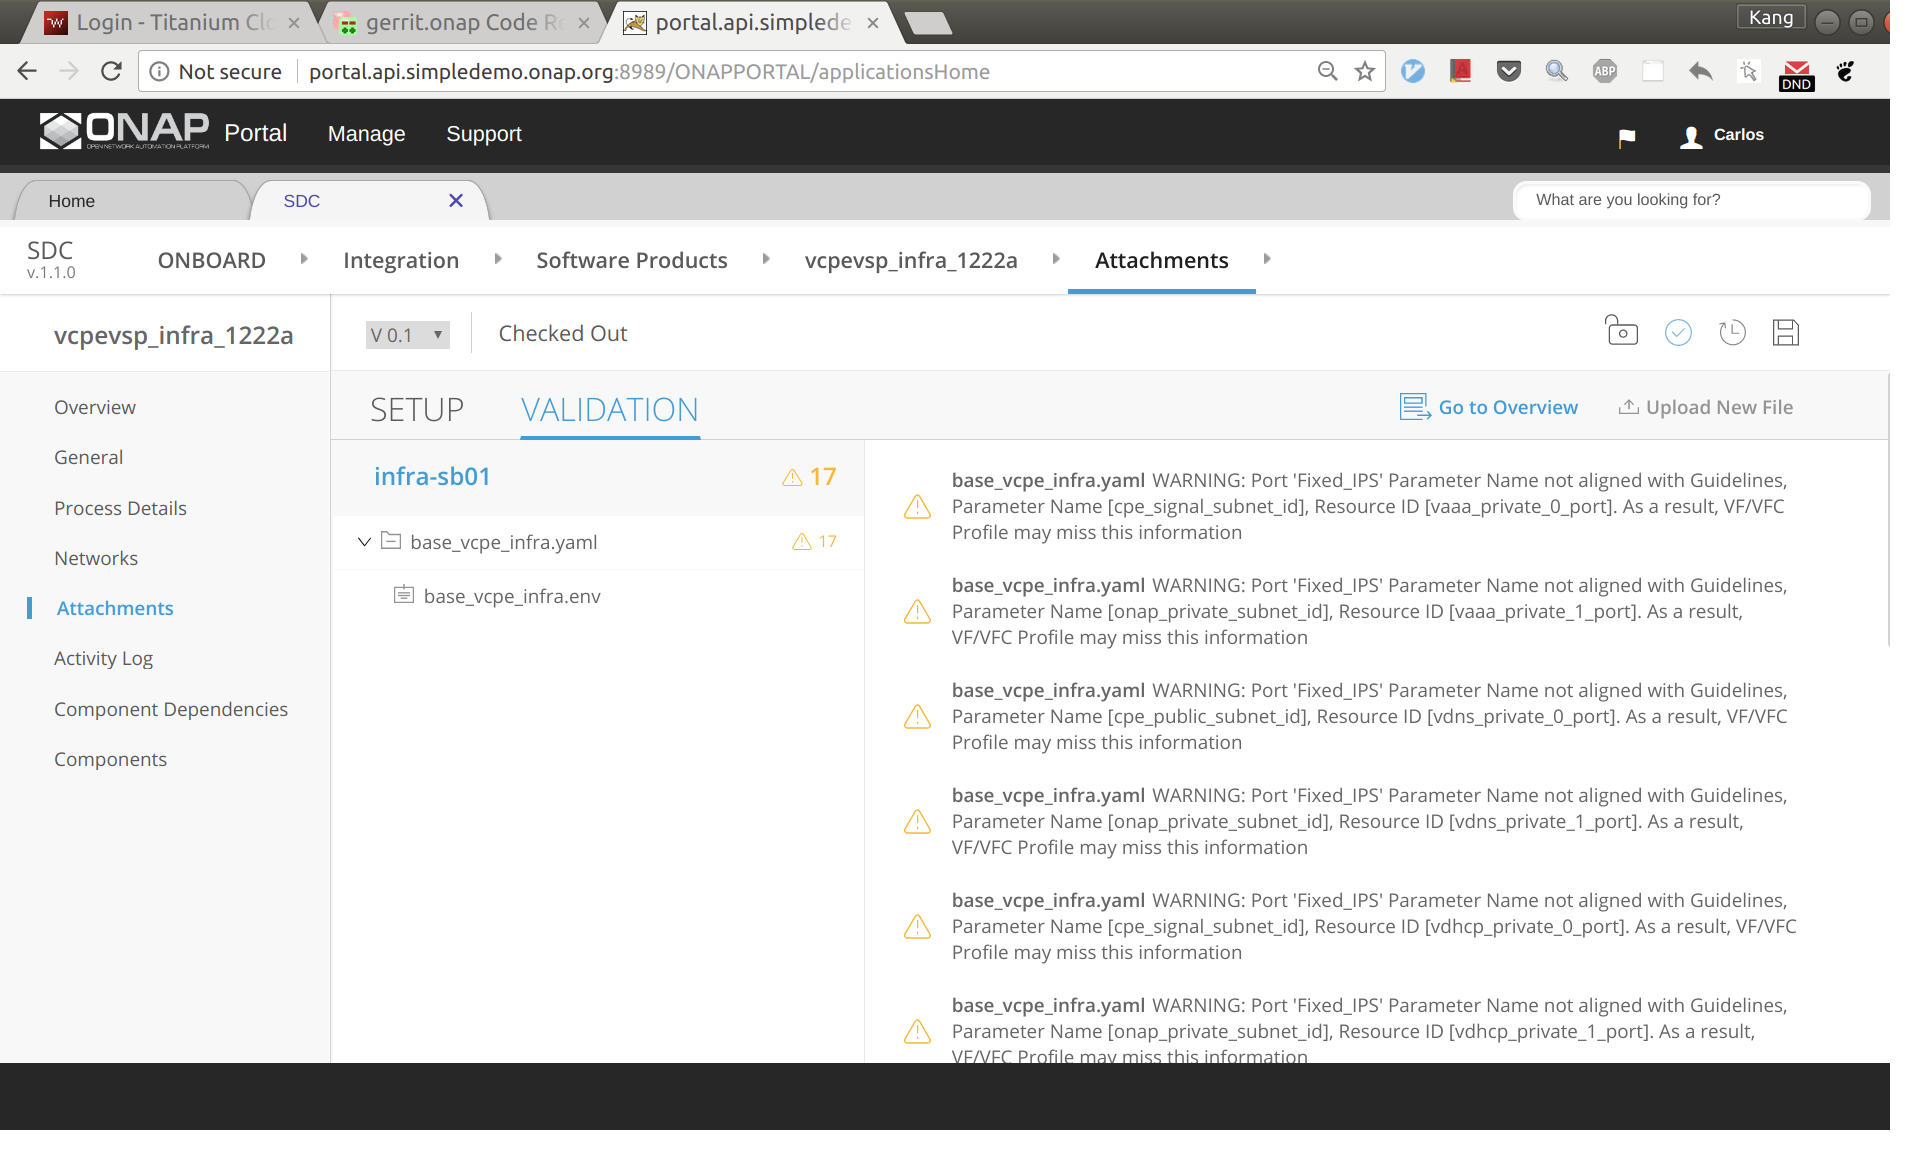
Now click 'Proceed To Validation' to validate the HEAT template.
You may see a lot of warnings. In most cases, you can ignore those warnings.
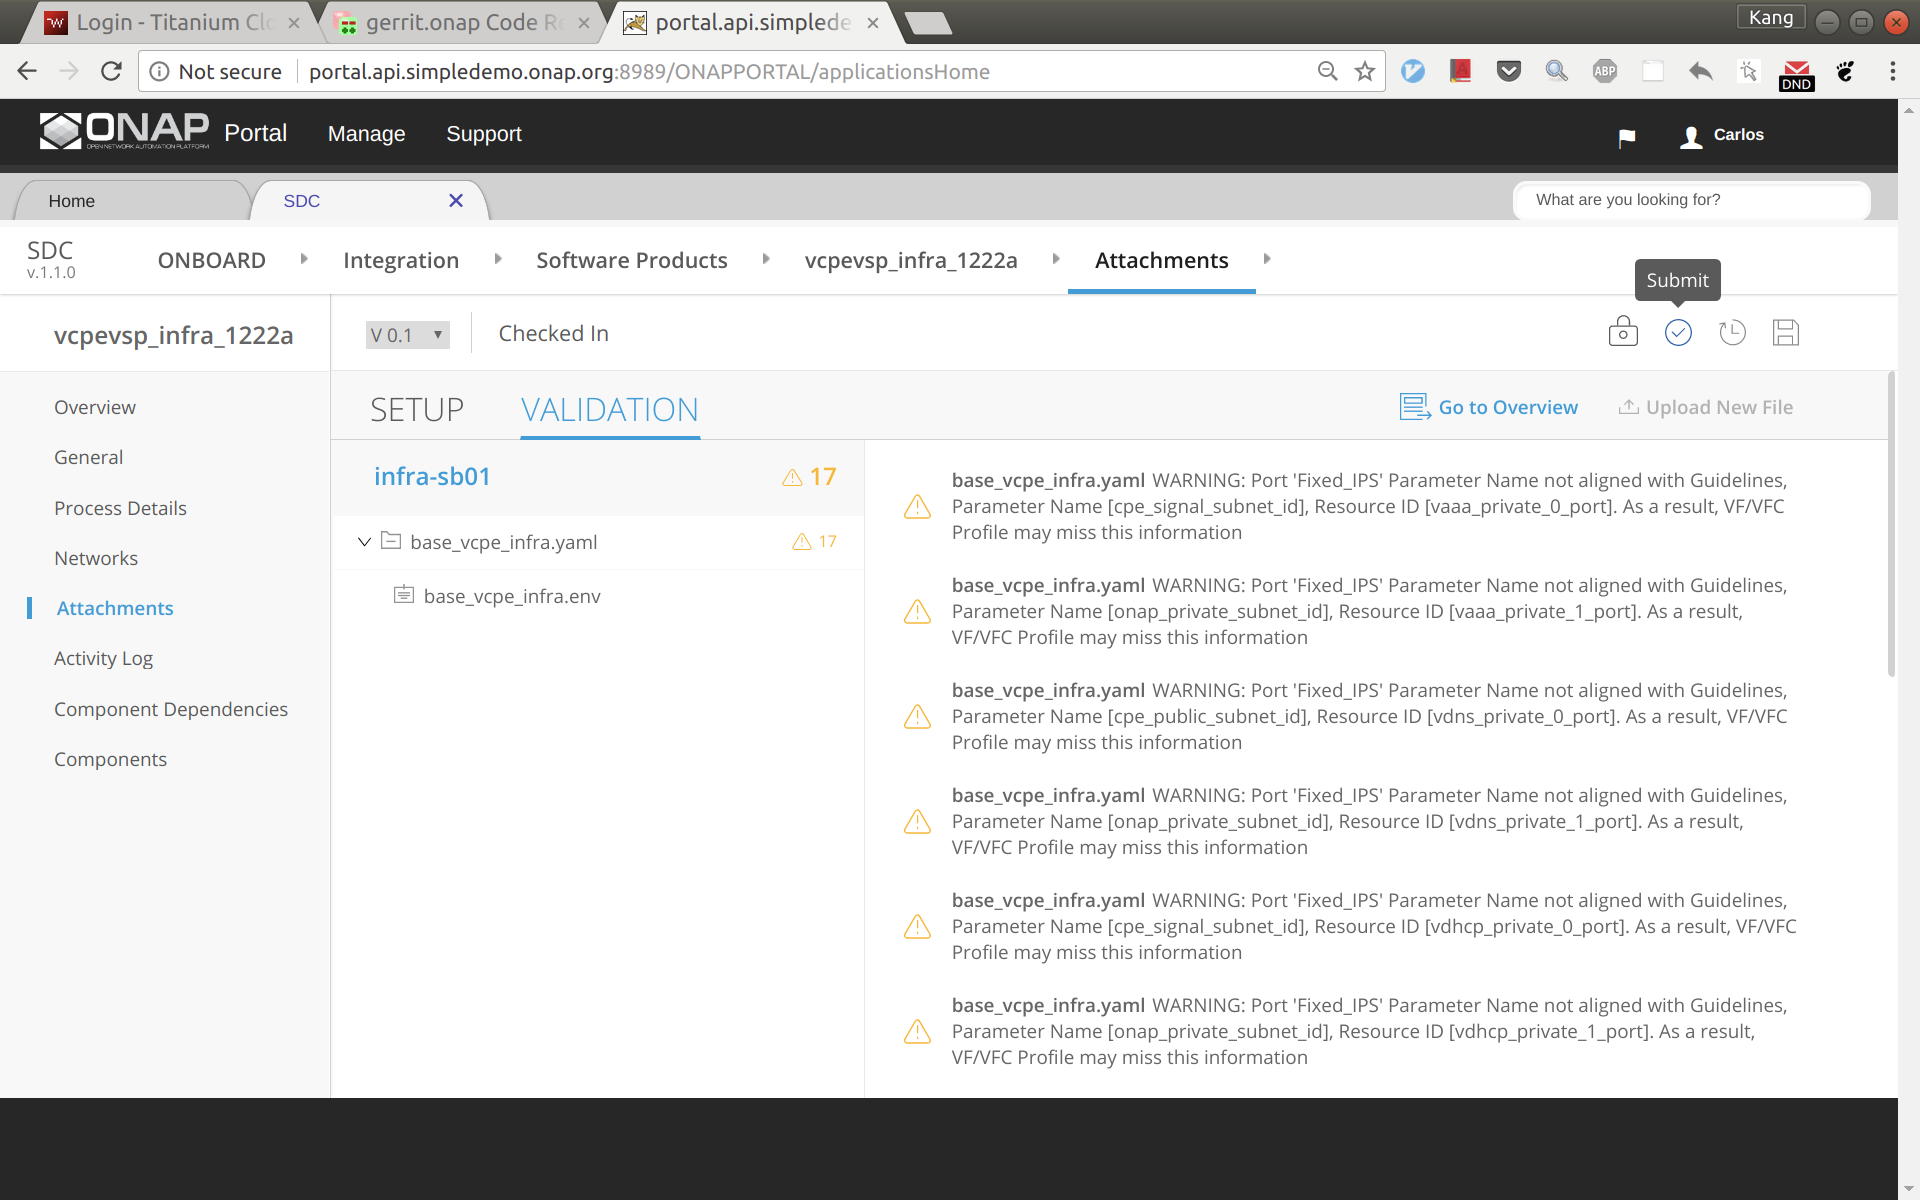
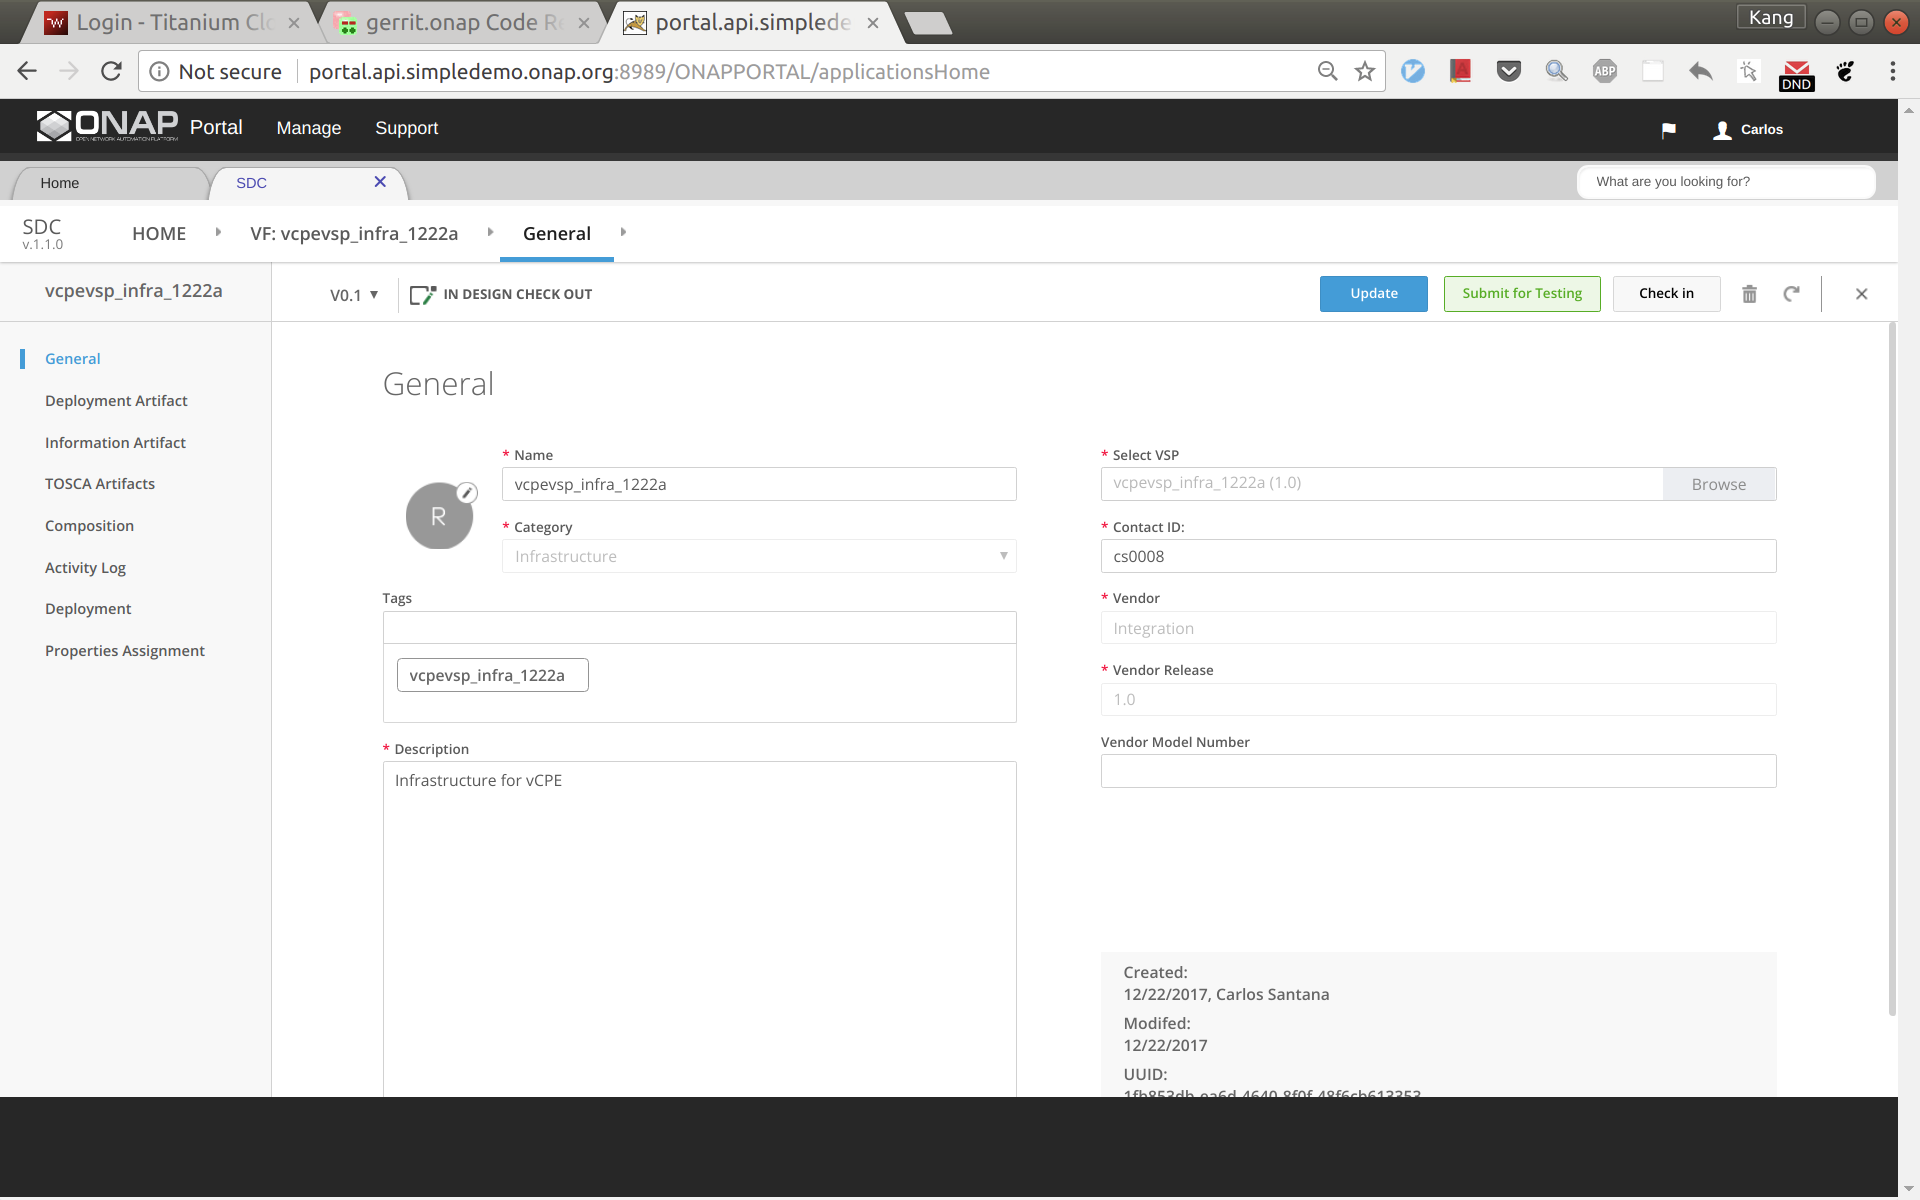
Click 'Check in', and then 'Submit'
Go to SDC home, and then click 'Import VSP'.
In the search box, type in suffix of the vsp you onboarded a moment ago to easily locate the vsp. Then click 'Import VSP'.

Click 'Create' without changing anything.
Now a VF based on the HEAT is created successfully. Click 'Submit for Testing'.
Sign out and sign back in as tester: jm0007, select the VF you created a moment ago, test and accept it.
Service Design and Creation
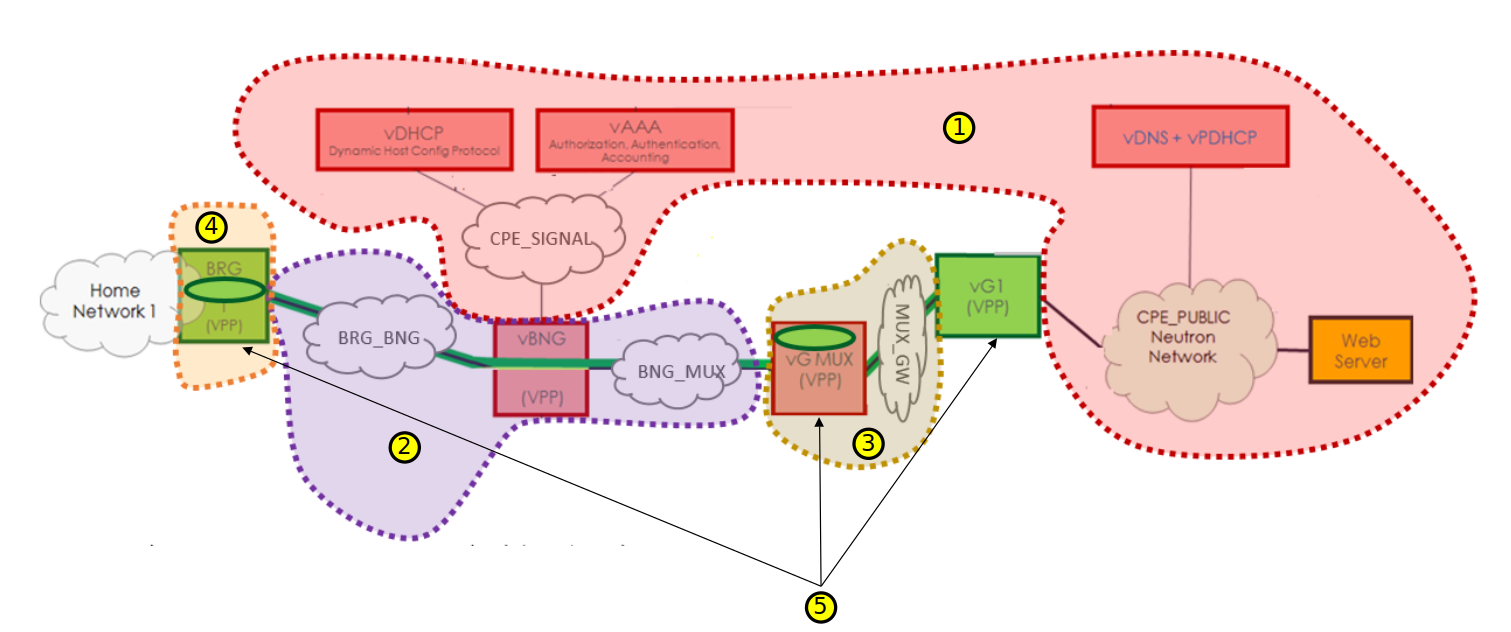
The entire vCPE use case is divided into five services as show below. Each service is described below with suggested names.
- vcpesvc_infra_[suffix]: includes two generic neutron networks named cpe_signal and cpe_public (all names are lower case) and a VNF infra.
- vcpesvc_vbng_[suffix]: includes two generic neutron networks named brg_bng and bng_mux and a VNF vBNG.
- vcpesvc_vgmux_[suffix]: includes a generic neutron network named mux_gw and a VNF vGMUX
- vcpesvc_vbrg_[suffix]: includes a VNF vBRG.
- vcpesvc_rescust_[suffix]: includes a VNF vGW and two allotted resources that will be explained shortly.
Service design and distribution for infra, vBNG, vGMUX, and vBRG
The process for creating these four services are the same. Below are the steps to create vcpesvc_infra_1222a. Follow the same process to create the other three services.
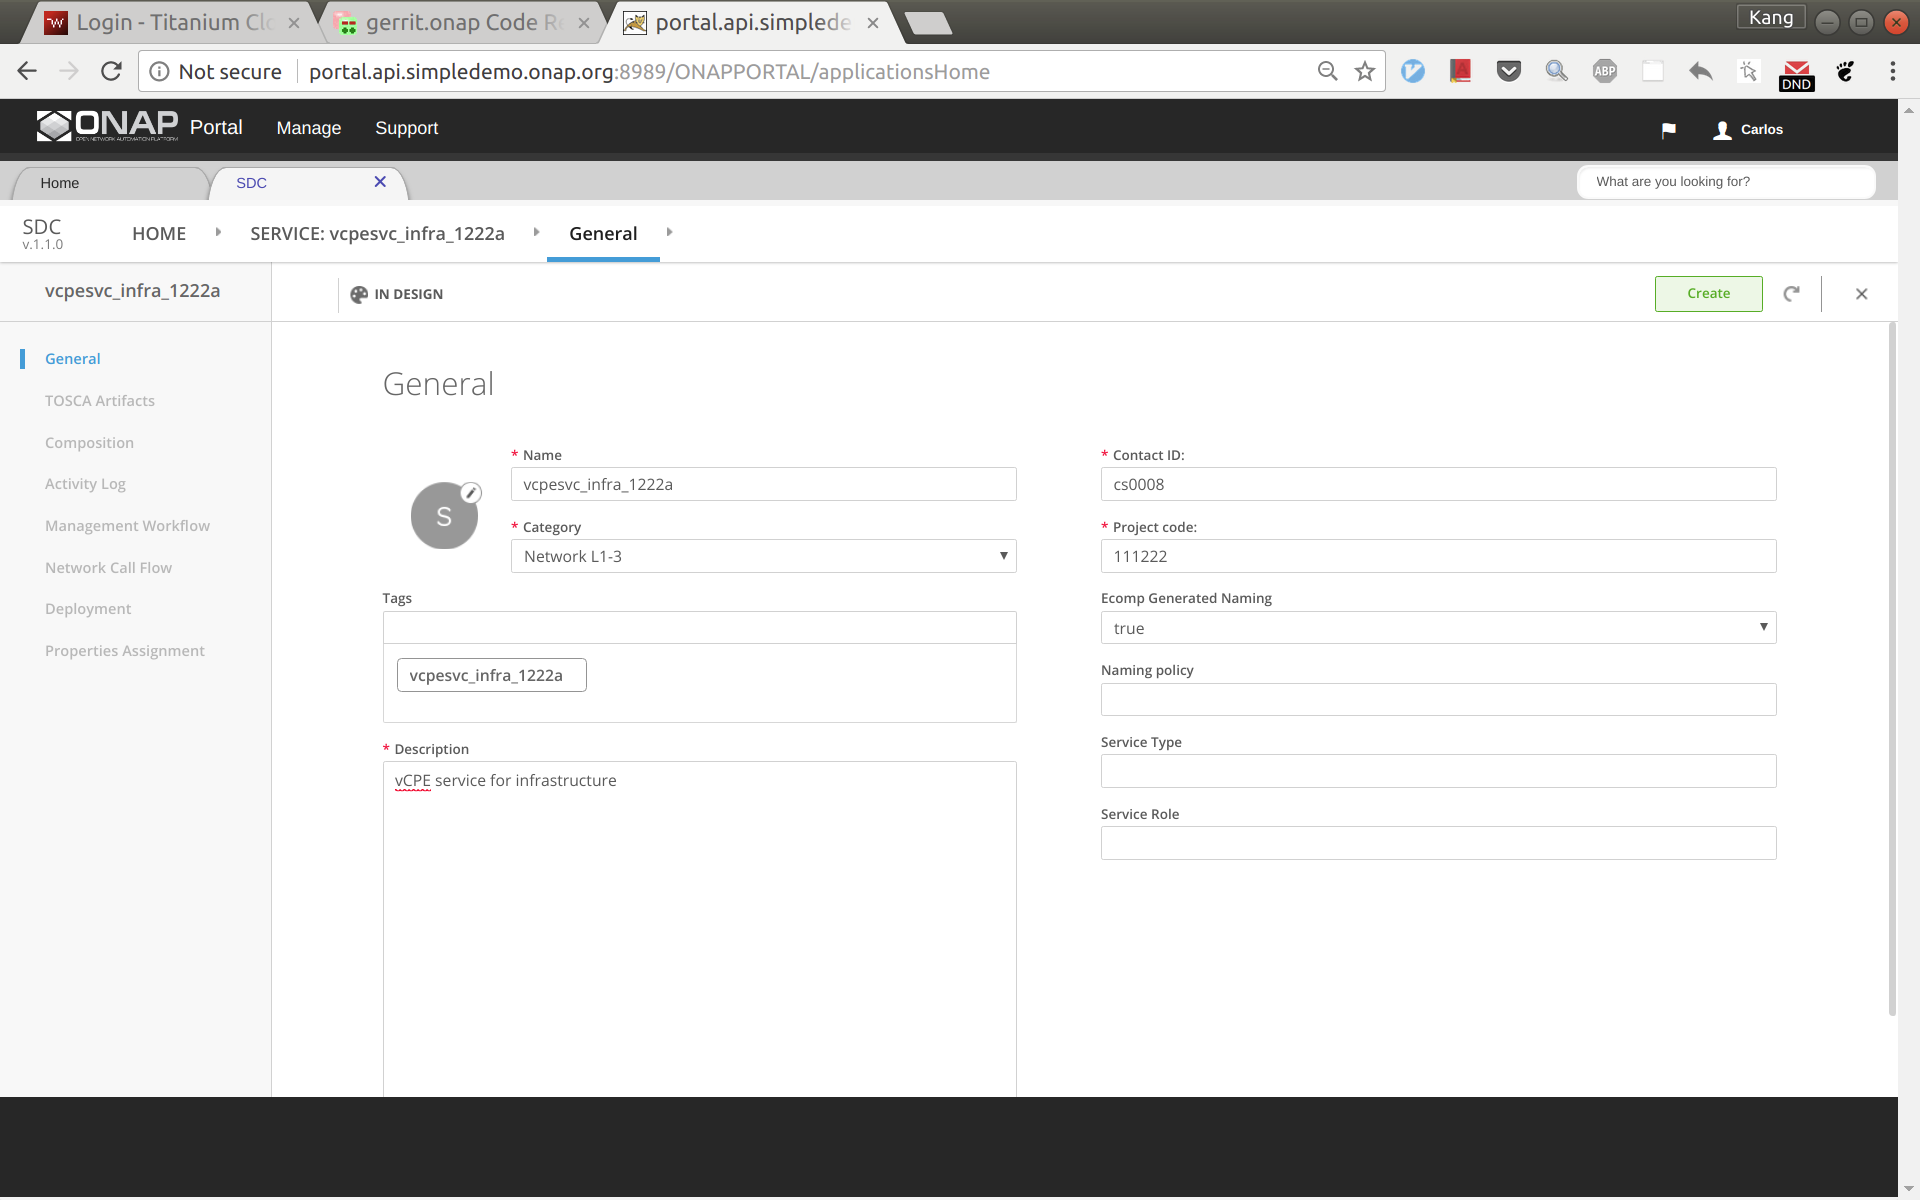
In SDC, click 'Add Service' to create a new service
Enter name, category, description, product code, and click 'Create'.
Click 'Composition' from left side panel. Drag and drop VF vcpevsp_infra_1222a to the design.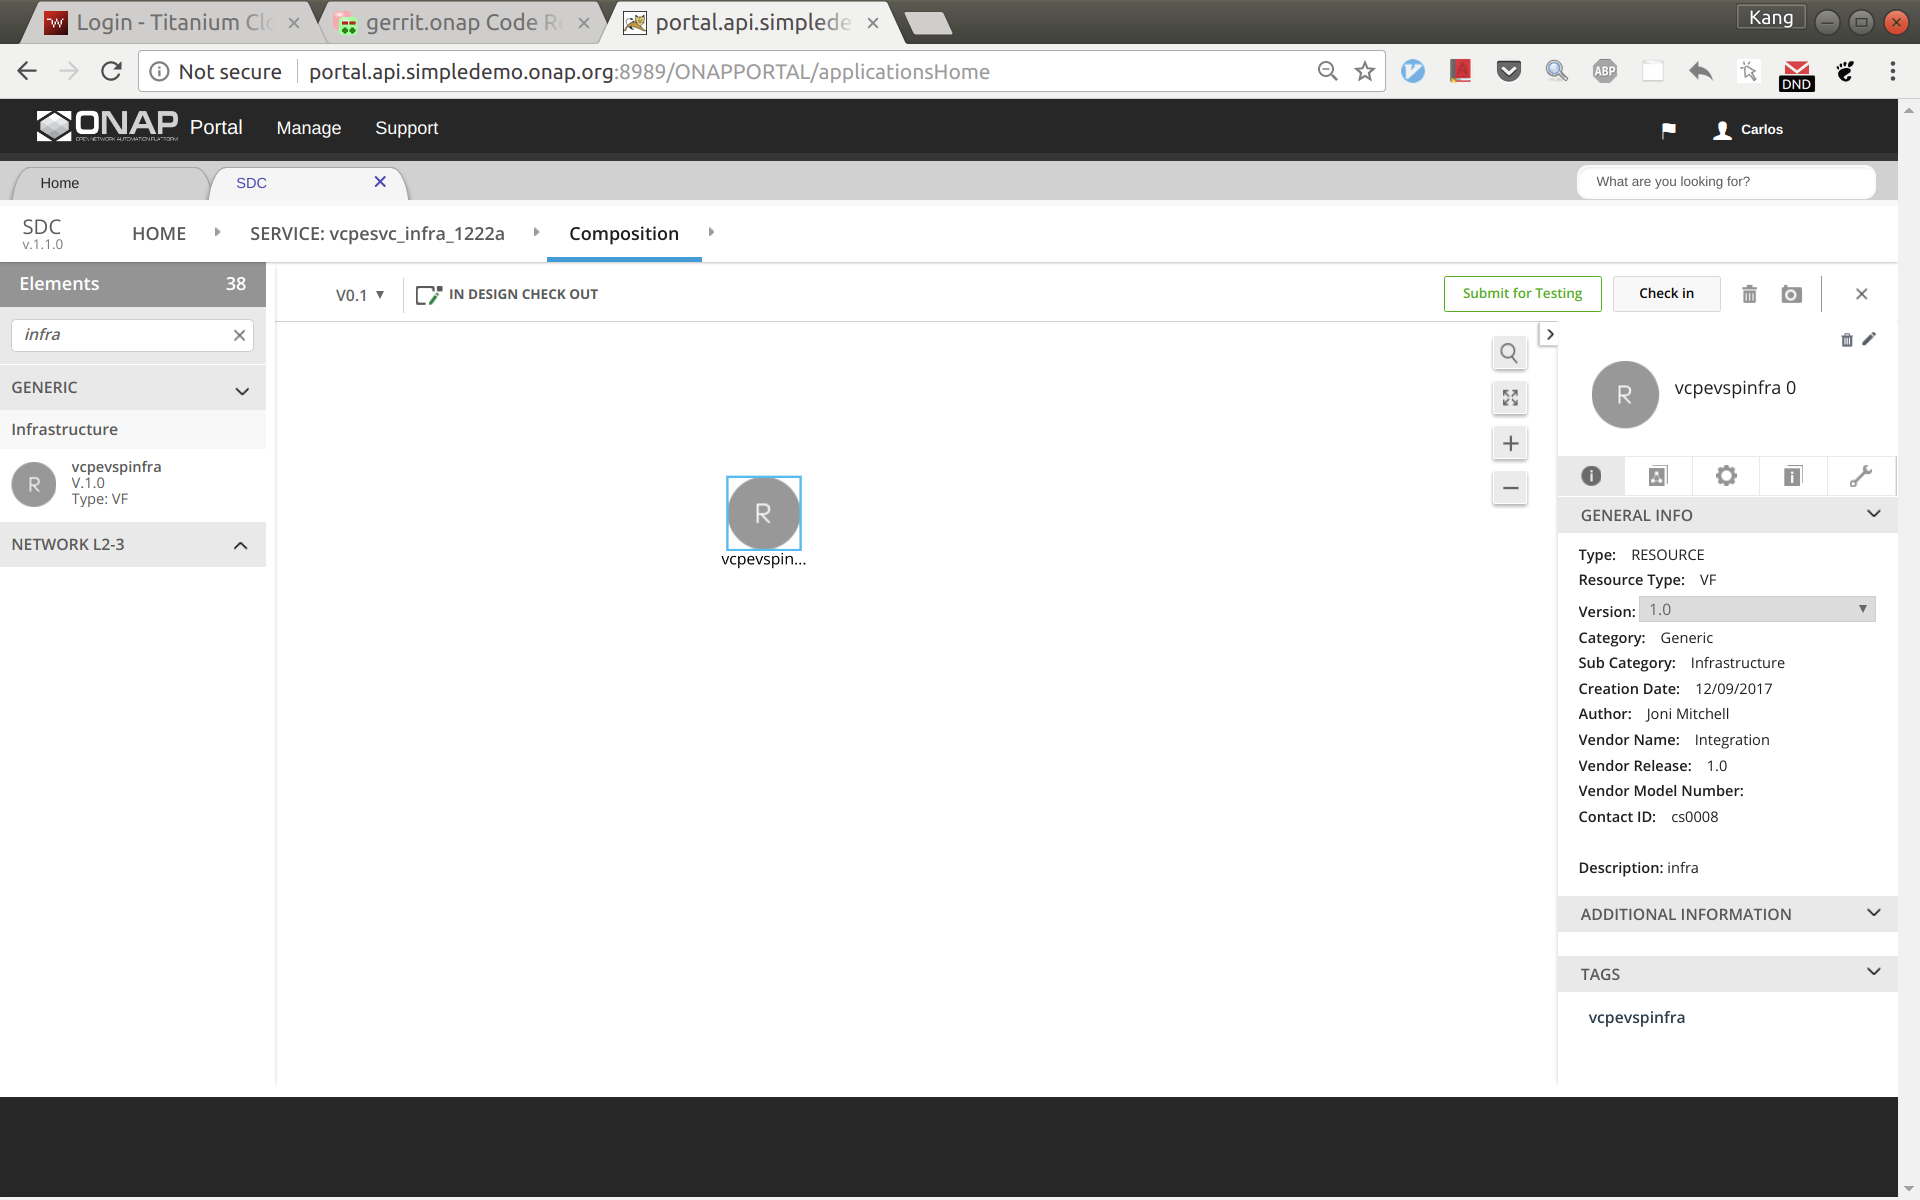
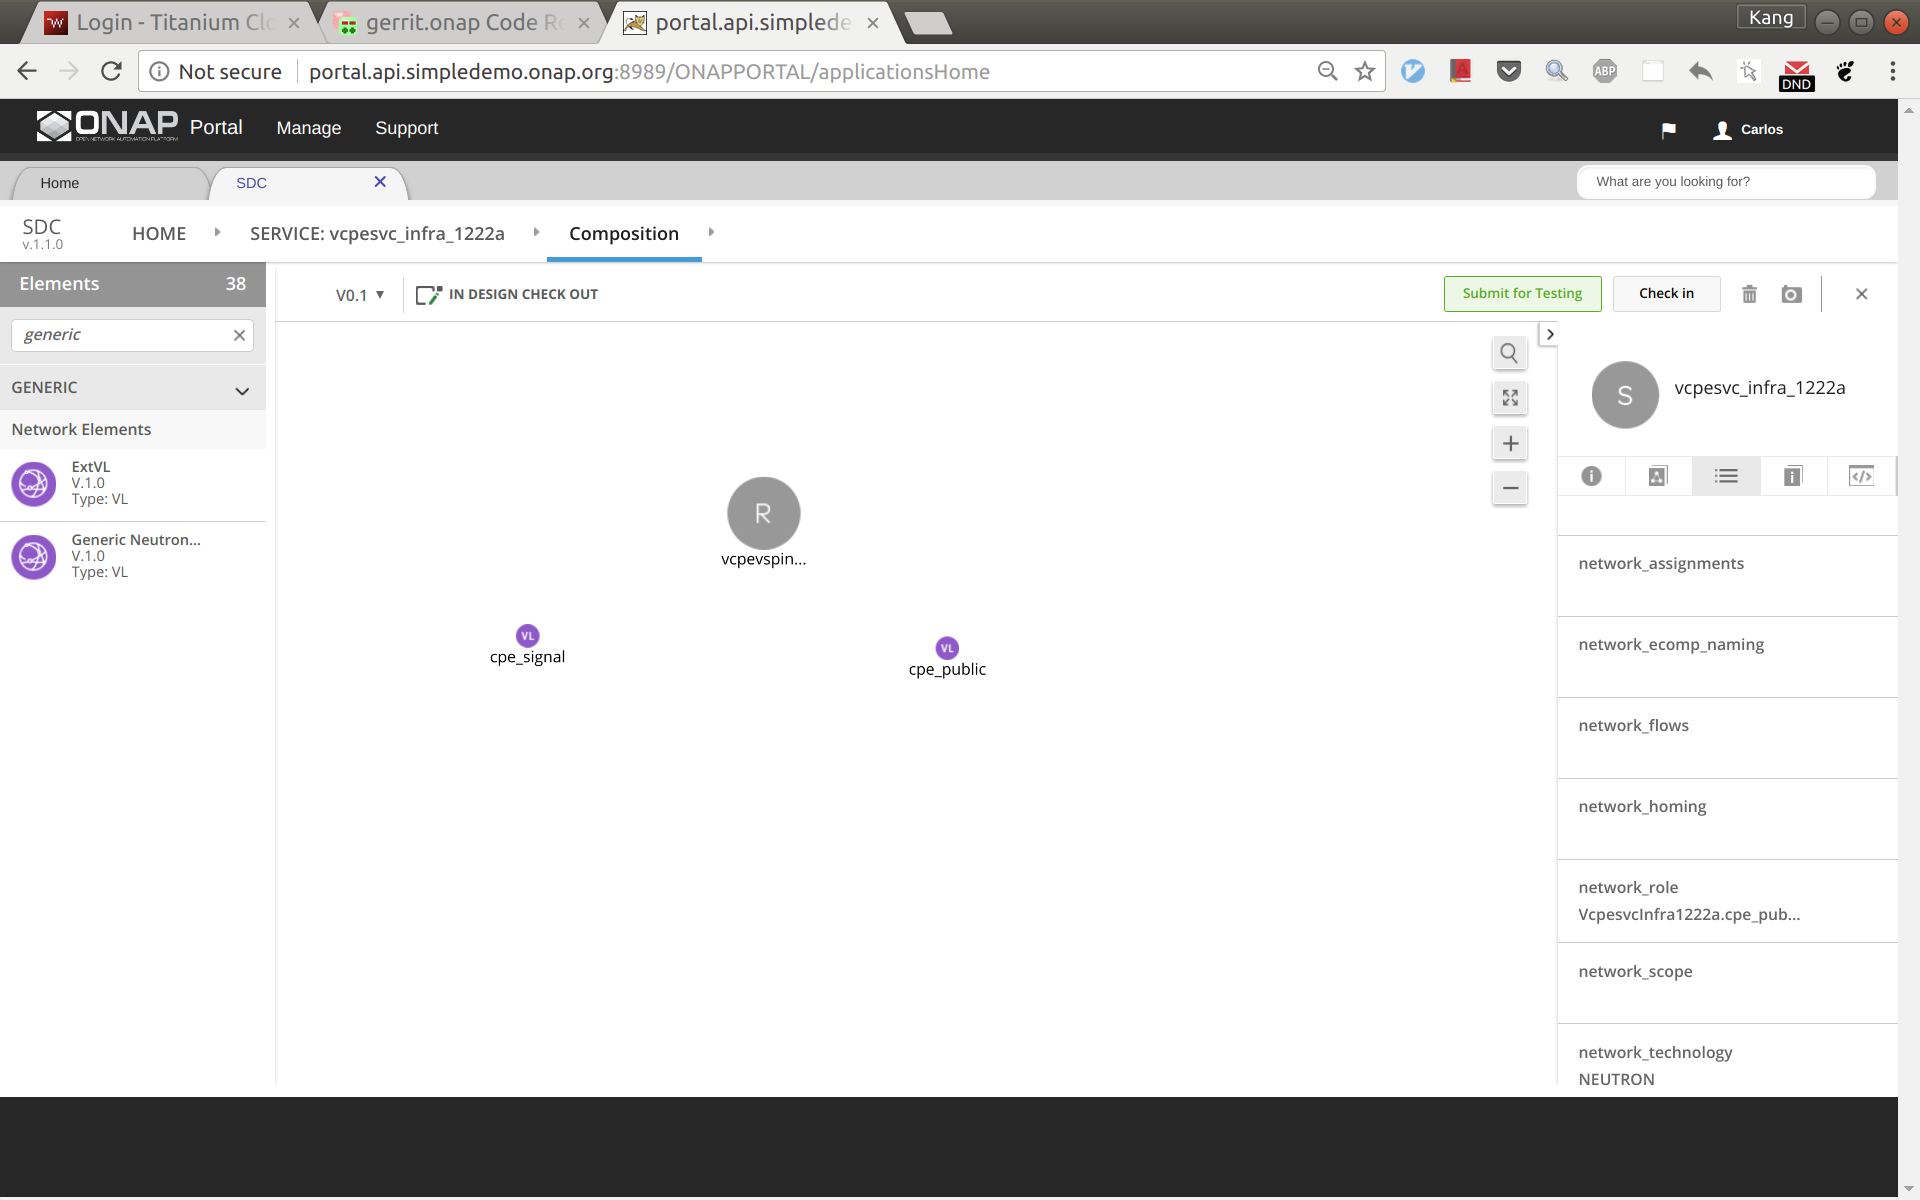
Drag and drop a generic neutron network to the design, click to select the icon in the design, then click the pen in the upper right corner (next to the trash bin icon), a window will pop up as shown below. Now change the instance name to 'cpe_signal'.
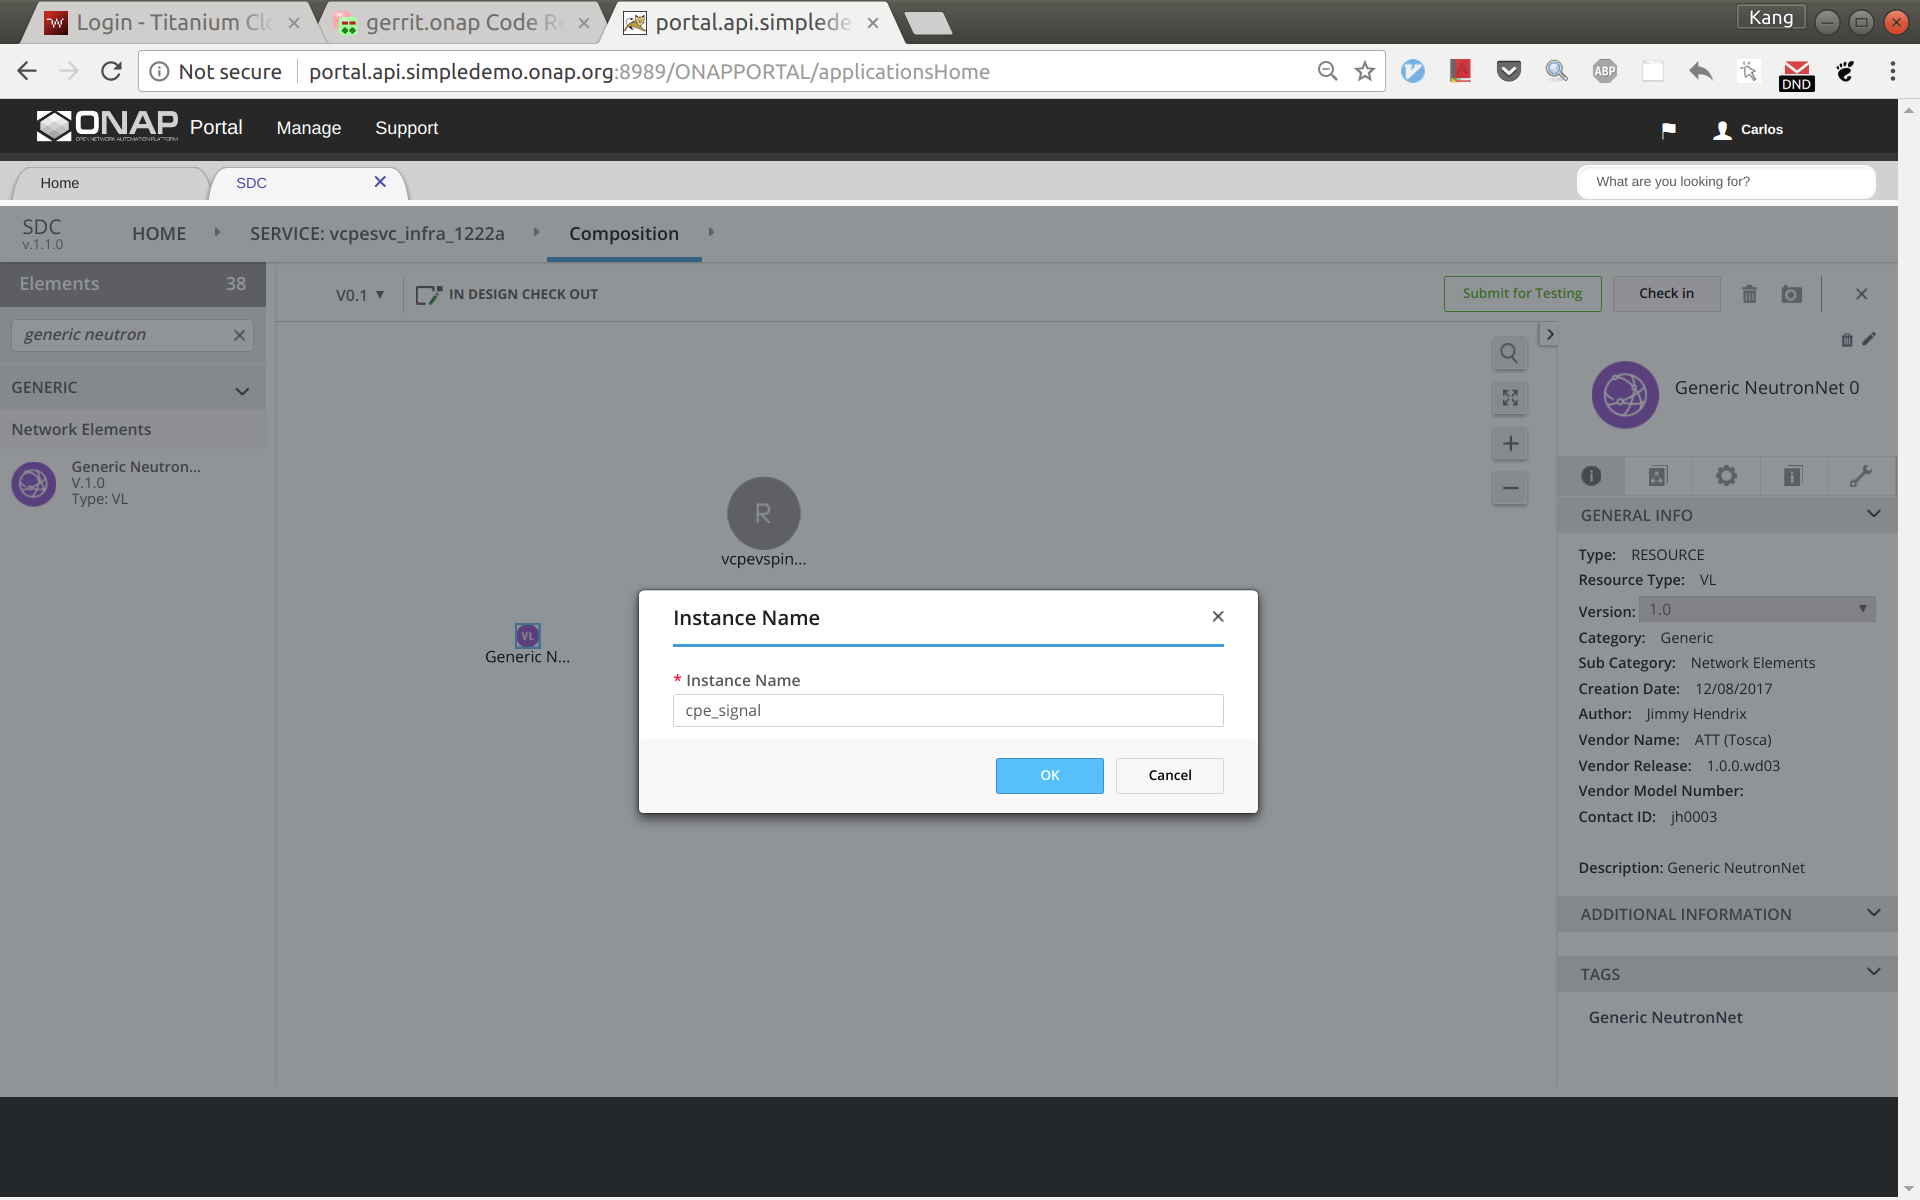
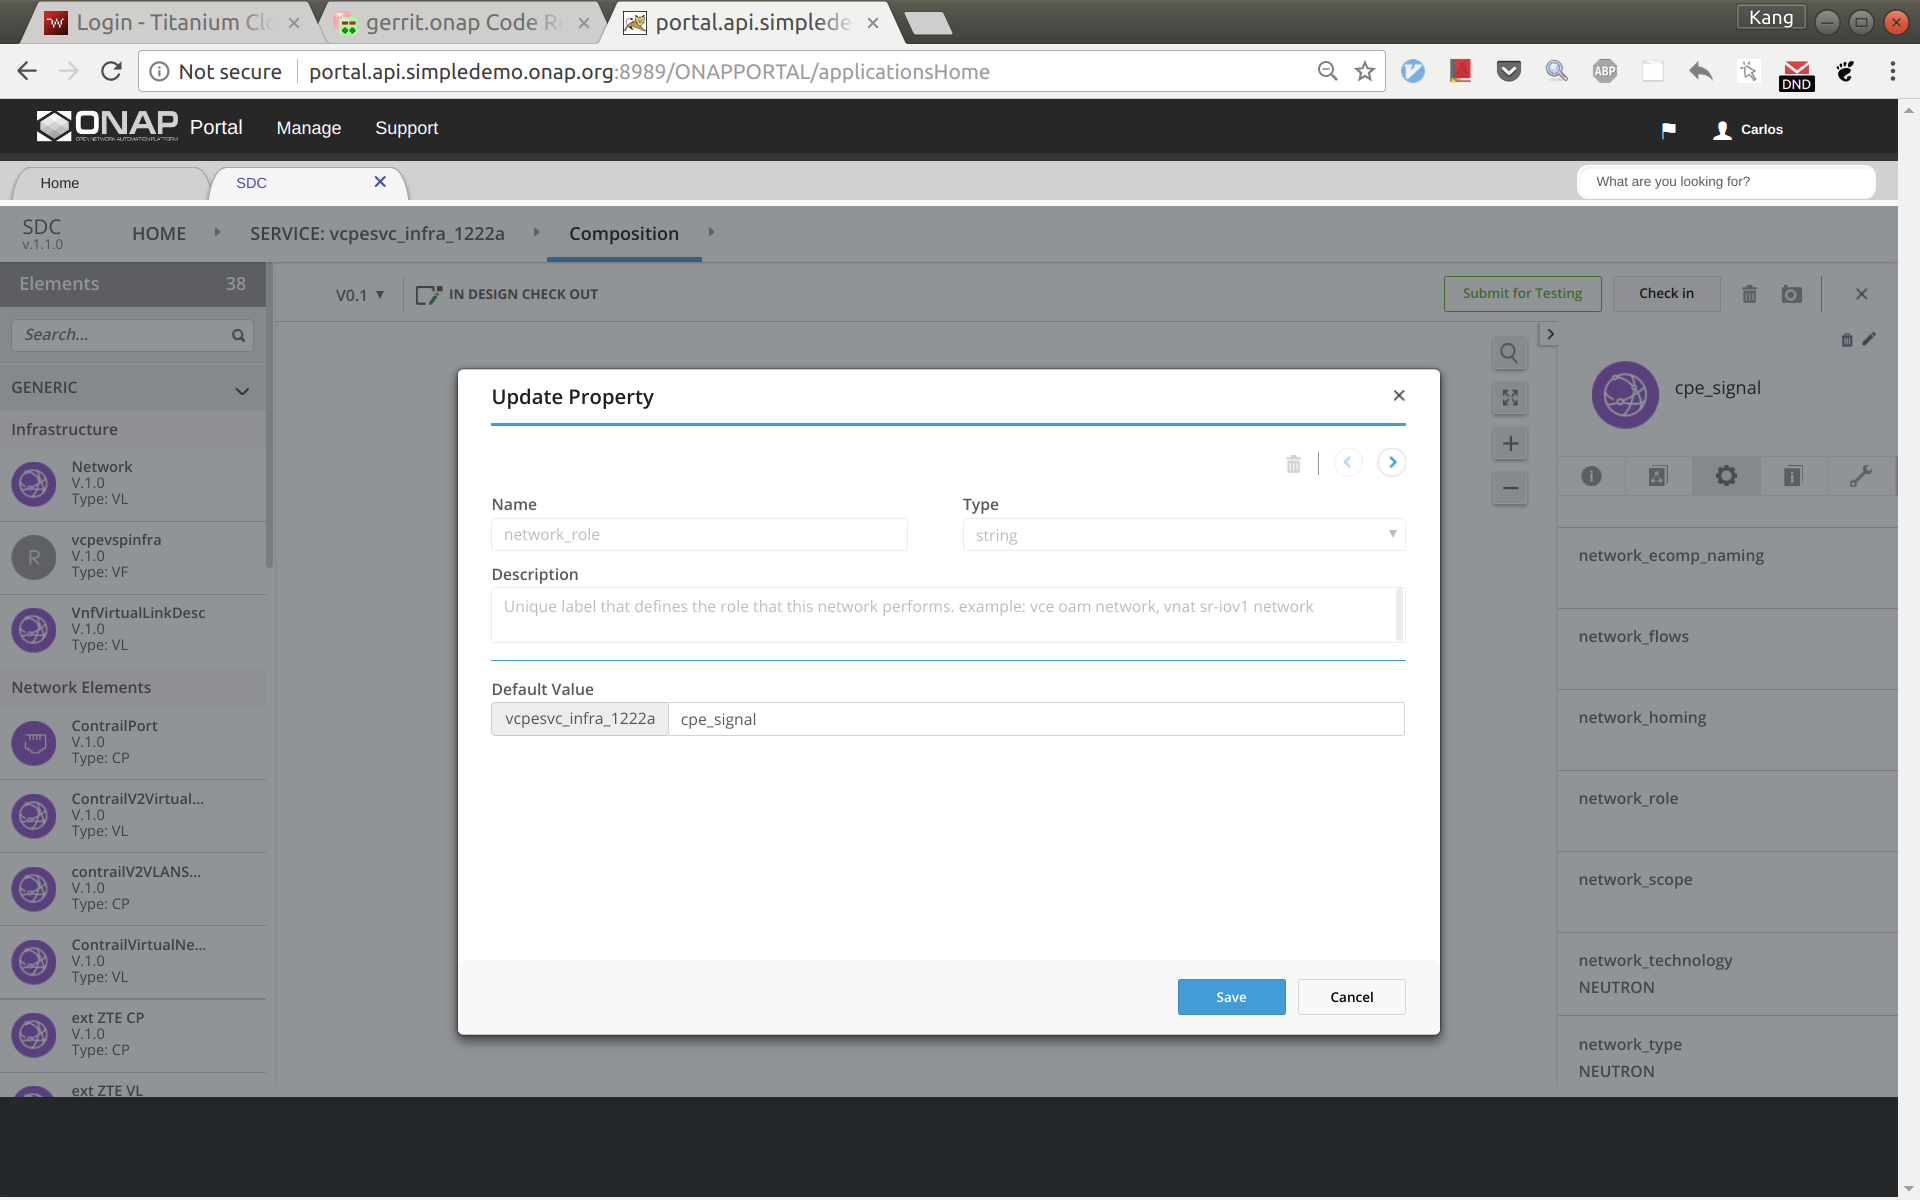
Click and select the network icon in the design again. From the right side panel, click the ![]() icon and then select 'network_role'. In the pop up window, enter 'cpe_signal' as shown below.
icon and then select 'network_role'. In the pop up window, enter 'cpe_signal' as shown below.
Add another generic neutron network the sam way. This time change the instance name and network role to 'cpe_public'. Now the service design is completed. Click 'Submit for Testing'.
Sign out and sign back in as tester 'jm0007'. Test and approve this service.
Sign out and sign back in as governer 'gv0001'. Approve this service.
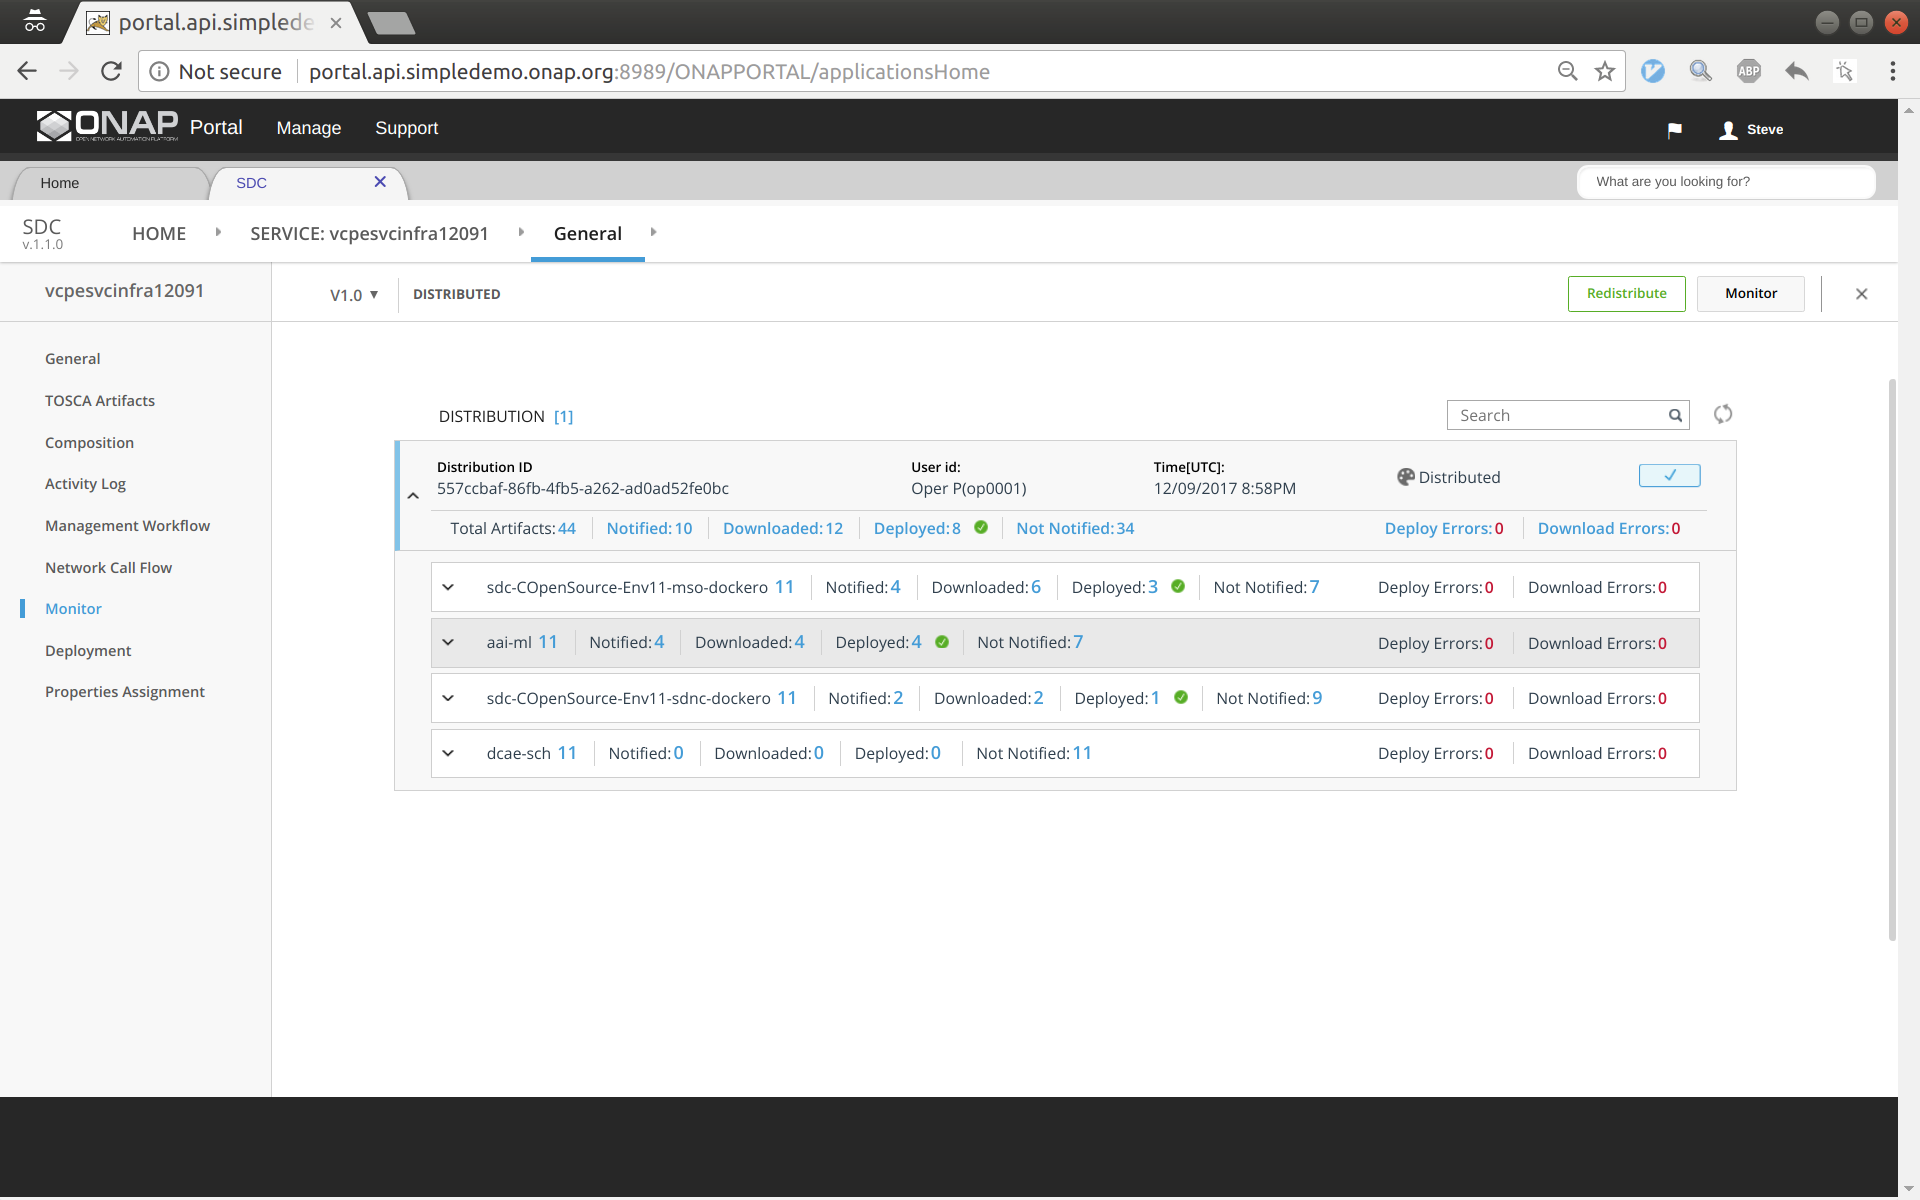
Sign out and sign back in as operator 'op0001'. Distribute this service. Click monitor to see the results. After some time (could take 30 seconds or more), you should see the service being distributed to AAI, SO, SDNC.
Service design and distribution for customer service
Before continue, please make sure that all the previous four services have been created and distributed successfully.