So far, all of our work has been done in the role of "Designer", but designers shouldn't test or approve their own designs; that should be done independently. ONAP uses the "Tester" role, represented here by user ID jm0007, for that purpose.
If you're still logged in as cs0008, log out by clicking on the user name in the upper right corner of the page and then clicking on the "Log out" button. Then log in again as jm0007 with the same password, demo123456!. Go into SDC

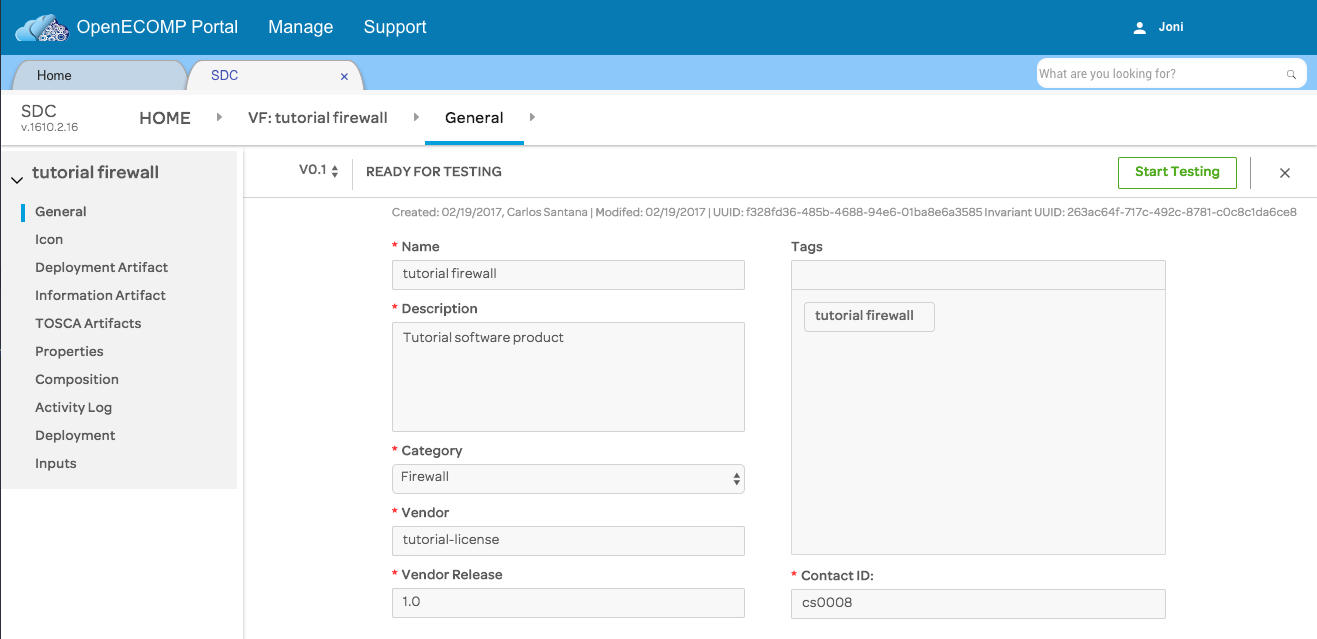
Note than once you have logged in with the "Tester" ID, and clicked on SDC to log into the SDC subsytem, its home page looks slightly different: there's no option for creating new products or license models here. However, our "tutorial firewall" virtual function (note the "VF" indicator in the upper left corner) shows as being "Ready for testing". Until a Tester has tested and approved it, the VF cannot be used to create a service which can be distributed, the ultimate goal of this exercise.

Click on the "tutorial firewall" artifact to bring up its detail screen.
We're merely going to sketch out the testing and approval process here. Click "Start Testing". After a moment, an alert will appear to indicate that the test suite has completed successfully.

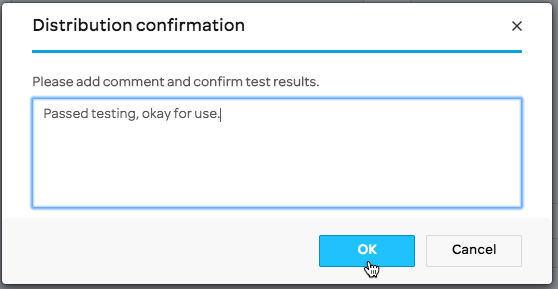
Now, click on "Accept". A form will appear to get a distribution confirmation message. Fill something in and click "OK".
You'll be returned to the SDC Home page, and the VF artifact will no longer appear — having approved it, it's now out of the tester's workflow — but an alert will appear that the artifact has been successfully accepted.

The Tester's work is done for the moment, and the VF is back in the Designer's hands to be packaged as a service which can then be distributed (by someone in the "Ops" role), once it's been tested and accepted (by a Tester) and approved (by a Governor).
The reason for a second testing cycle is that the testing and approval we just went through apply to a specific virtual function. While the service we'll create consists only of a single VF, typical services will comprise a number of different ones, so the service-level testing functions as "integration testing" for a potentially large number of virtual functions.
Log out, and log in as user ID cs0008 again. Click on SDC to access the SDC subsystem and view our VF artifact, now tested and accepted, showing a status of "Certified".

Hover over the "Add" panel, and click the "Add Service" button when it appears.

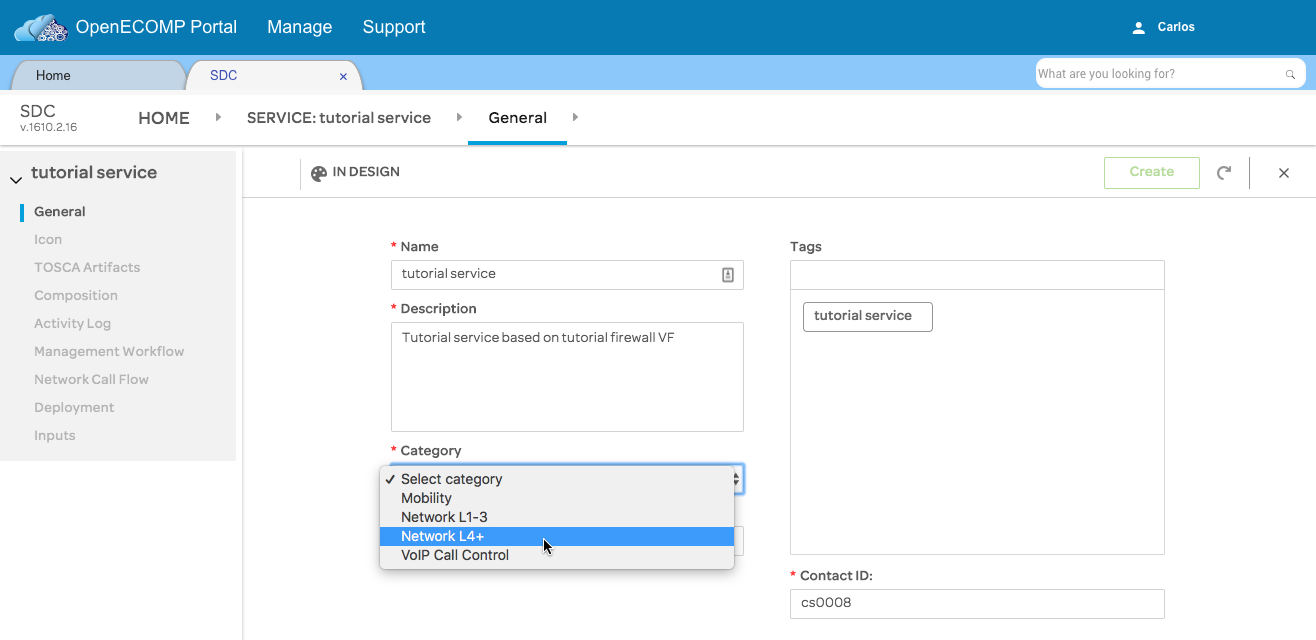
In the resulting details form, fill in "Name" and "Description" with any values you like, choose "Network L4+" for the "Category", and fill in a six-digit "Project code". Then, click "Create".
After a few moments, an alert will appear indicating that the artifact has been successfully created.
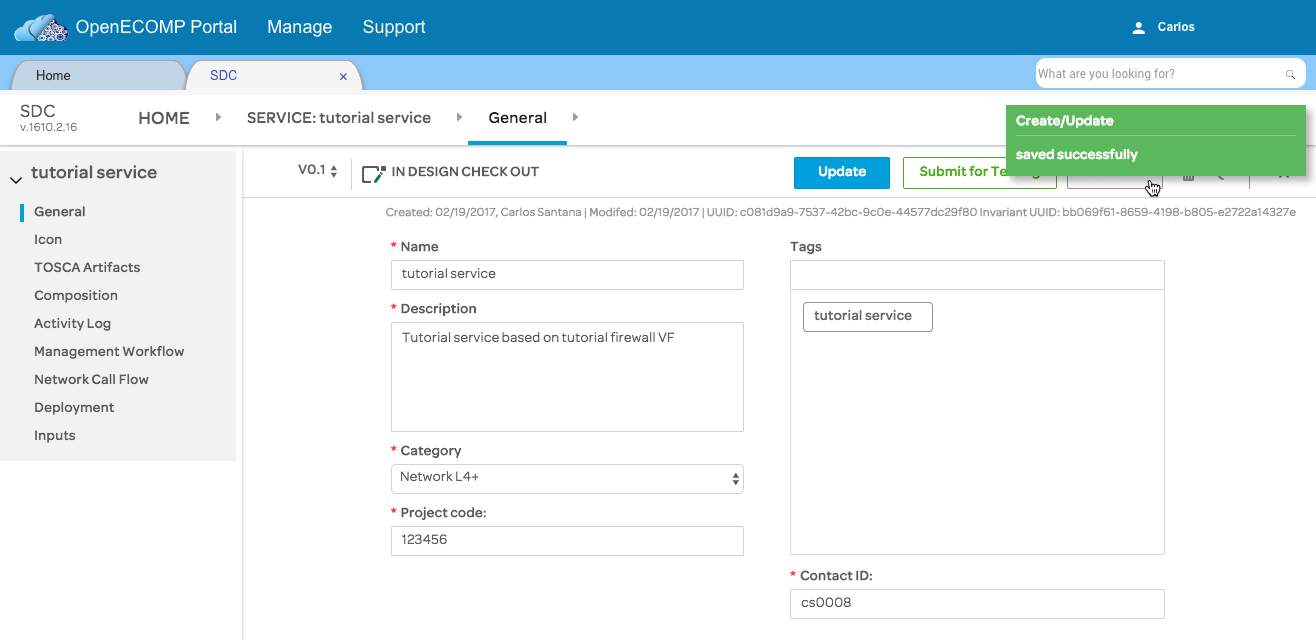
As when we created our virtual function, the sidebar links were greyed; now that the service has been created, they're active. Click on the icon link, and select an icon for the service.

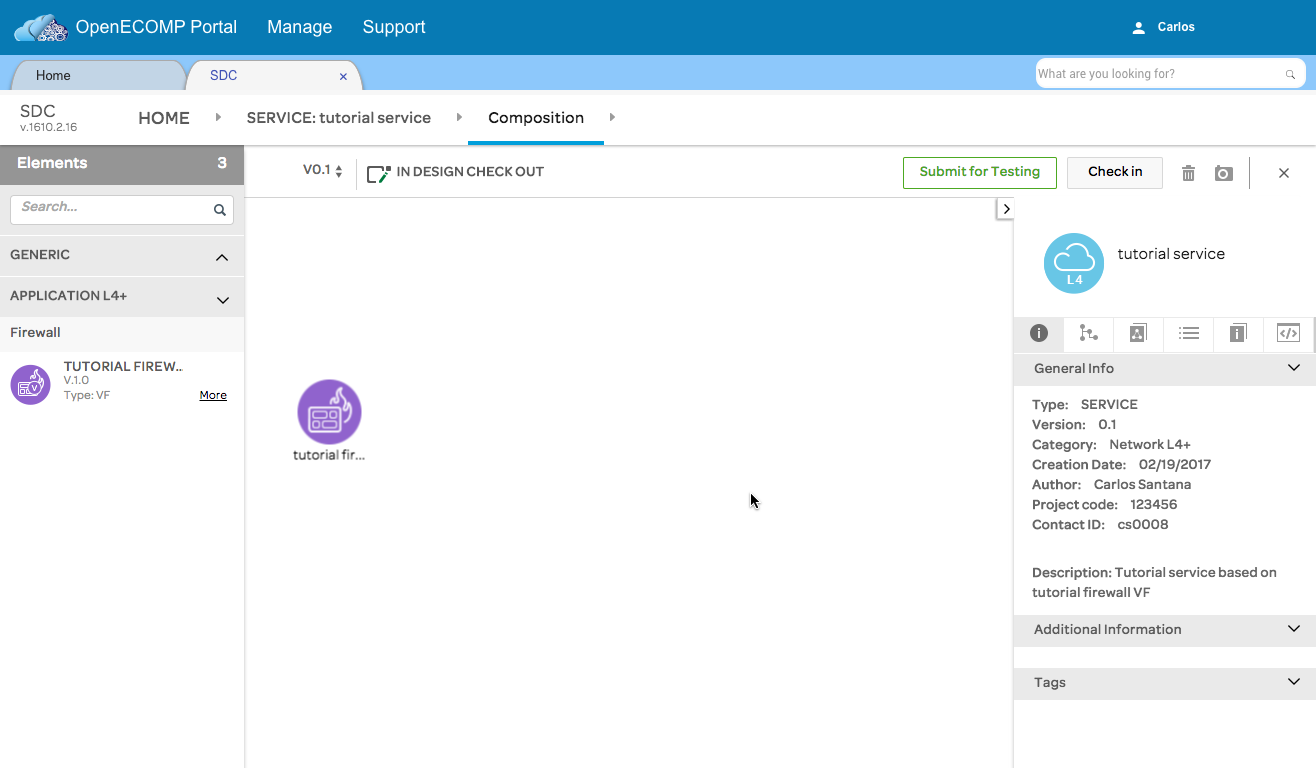
Next, click on "Composition". This is the step at which we actually "design" the service we'll be distributing. Initially, the "Composition" page shows an empty canvas and a couple of default network elements. Click on the disclosure arrow to the right of "APPLICATION L4+" in the sidebar.

Now we can see our "tutorial firewall" VF in the sidebar. Drag the VF out of the sidebar and drop it onto the canvas.

The canvas should look like the following when you're done:
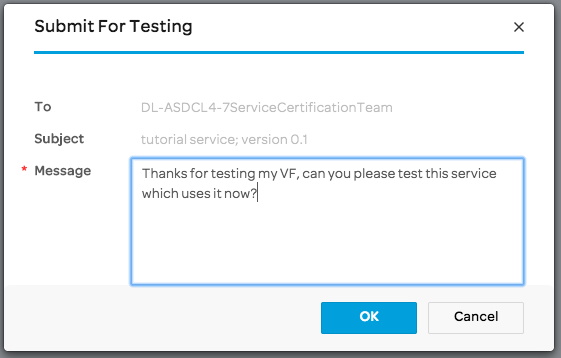
You have now created a new service consisting of the single virtual function we created in part 2 of this series of tutorials. Before it can be distributed for use, though, the service must be tested and approved. Click "Submit for testing" and enter a message in the dialog which appears. Click "Save".
You'll be returned to the SDC Home screen, and an alert showing that the new service has been successfully submitted for testing will appear. Note that both our virtual function and our new service now appear on the SDC Home screen; the service shows "v0.1" and a status of "Ready for testing". TODO: JIRA on grouping services/virtualFunctions (when multiple of each exist)

This completes our Designer's involvement in the workflow, and the service now goes to the Tester for testing and approval. Log out and log back in as jm0007. Click on "SDC" to access the SDC Home page. Note that it's once again no longer empty: the "tutorial service" artifact has been added to our workflow.

Click on the "tutorial service" artifact to get to its details, and then click "Start testing".

After a few moments, an alert will notify you that testing completed successfully. Click on the "Accept" button now. (TODO add accept screencap) As before, you'll be notified that the artifact has been successfully accepted and then returned to a now-empty SDC Home page. This completes the work of our Tester, and it's now the responsibility of someone in a Governor role to approve the distribution of the new service.
Log out, and log in again as gv0001 with the password demo123456!. Access the SDC Home page, and note the the now tested and accepted service appears with version "1.0" and the status "Waiting for distribution".

Click on the service artifact to access its details and then click the "Approve" button above the form.

You'll receive a notification that the service has been successfully approved and be returned to the SDC Catalog.

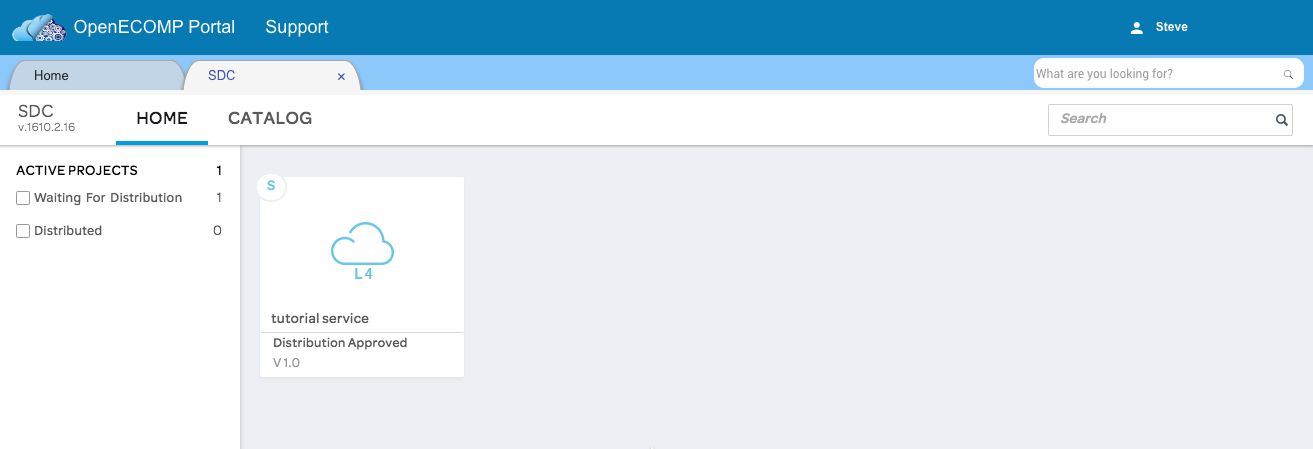
The Governor's part in the workflow is now complete, and it only remains for a user in the "Ops" role to actually distribute the service. Log out, and log in again as op0001 with the password demo123456!. Access the SDC Home page, which now shows the "tutorial service" with a status of "Distribution Approved".
Click on the artifact to open its details. When the "General" page appears, click on the "Distribute" button that appears above the form:

After a moment, you'll be notified that the service has been successfully distributed. If you return to the SDC Home screen (by clicking on "HOME" in the breadcrumbs), the "tutorial services" now shows a status of "Distributed".

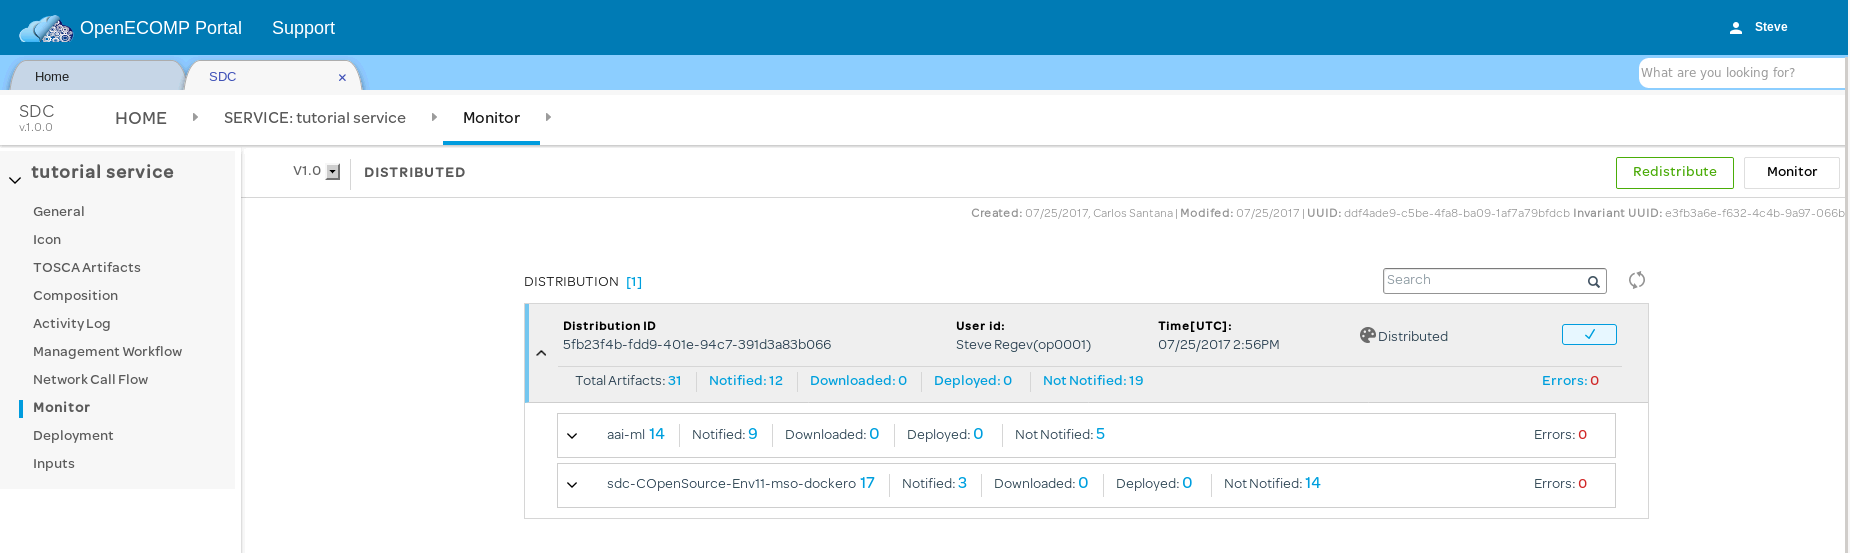
You can also click the service and view the Monitor tab to see the various components that have accepted your distribution.
If SO complains due to timeout - repeat the redistribute.
10 Comments
Brian Matt
Issue was that I had specified docker version 1.1 as well as artifiact version. Reverted to only artifact version 1.1 and docker 1.0 and this is not an issue any longer. I'm leaving this here in case someone else has the same issue.
When using 1.1 I had many issues with missing columns in the MSO database. I remedied these by adding columns, making educated guesses at the data types and lengths. The errors I received were similar to the one below.
Unknown column 'MODEL_CUSTOMIZATION_UUID' in 'field list' - Query is: insert into VNF_RESOURCE (VNF_TYPE, ASDC_SERVICE_MODEL_VERSION, SERVICE_MODEL_INVARIANT_UUID, MODEL_CUSTOMIZATION_NAME, ORCHESTRATION_MODE, DESCRIPTION, TEMPLATE_ID, ENVIRONMENT_ID, ASDC_UUID, AIC_VERSION_MIN, AIC_VERSION_MAX, MODEL_INVARIANT_UUID, MODEL_VERSION, MODEL_NAME, MODEL_CUSTOMIZATION_UUID) values (?, ?, ?, ?, ?, ?, ?, ?, ?, ?, ?, ?, ?, ?, ?), parameters ['tutorial service/tutorial firewall 0','1.0','3e33427d-001b-4e44-be5a-af02a016b649','tutorial firewall 0','HEAT','Tutorial service based on tutorial firewall VF',<null>,<null>,'3101abb0-106d-4f10-9624-e971e120a168',<null>,<null>,'7510edb1-464a-482a-850e-82e3c6e2c724','1.0','tutorial firewall','3397727e-da3e-4566-981b-56f18b47c6f7']
Below are the SQL statements I ran on the MSO DB to fix the issues, if anyone else needs them.
alter table VNF_RESOURCE add MODEL_CUSTOMIZATION_UUID varchar(200);
alter table heat_template add ARTIFACT_CHECKSUM varchar(200)
alter table HEAT_ENVIRONMENT add ARTIFACT_CHECKSUM varchar(200)
alter table vf_module add MODEL_CUSTOMIZATION_UUID varchar(200)
alter table VF_MODULE add MIN_INSTANCES INT;
alter table VF_MODULE add MAX_INSTANCES INT;
alter table VF_MODULE add INITIAL_COUNT INT;
alter table VF_MODULE add LABEL VARCHAR(200);
Michael O'Brien
Matt,
Nice work but this sounds pretty scary if there is a schema mismatch - I would definitely raise a JIRA on MSO.
https://jira.onap.org/projects/SO/issues
Brian Matt
Yea, I just found the error was self induced. I'll see if I can put a note on the original comment. The issue was I had docker version set to 1.1 as well as the artifact version, so I was getting some experimental code I guess?
Stephen Moffitt
I completed this process above, then realised I needed to update the vFW heat template. I thought I should be able to check out the VF and make an update to it, but I could not see a way to do this. In the end I created a new VF and Service.
Should it be possible to update an existing VF/Service by replacing the deployment artefacts? or is it only possible to add new information/artefacts to an existing VF or Service?
Michael O'Brien
Stephen, I don't think the system can dynamically pickup heat template changes and reapply them to a running VF yet. In my experience I delete the VF Module (even all the way to deleting the service) - in VID. then rerun the process - unfortunately all the way back to VF onboarding.
/michael
Stephen Moffitt
Thanks Michael O'Brien . I repeated this process with ONAP 1.1. It appears that is is possible to checkout the Vendor Software Product(VSP) and then upload new Heat template files to replace the existing ones. The VSP will then be created with a new version and the remainder of the workflow "repeated" with this new version. Not sure how this new version gets instantiated, replacing the old instance as I haven't managed to instantiate any service yet.
Yogini Avsare
Hi,
I have completed Create Licensing, Define VSP and Define VF. I have followed all steps till distribution. I am seeing Deploy Errors :3. Need some help on this issue.
Brian Matt
I had this issue previously, and with my instance just a moment ago. To solve it I wipe and redeploy the AAI instances, I did this on both AAI1/2.
cd /opt
for c in `docker ps -a | awk '{print $1}' | grep -v CONTAIN`; do docker stop $c; docker rm $c; done
for v in `docker volume ls | awk '{print $2}' | grep -v VOLUME`; do docker volume rm $v; done
for i in `docker images | awk '{print $3}' | grep -v IMAGE`; do docker rmi -f $i; done
rm -rf test-config/; rm -rf docker/; rm -rf aai; rm -rf message-router/
./aai_install.sh
Suryansh Pratap
I am getting the following error:
2018-11-23 12:43:47,020:[lcm.pub.utils.restcall]:[restcall.py]-[35] [DEBUG]:[6b6d2a10-ef1d-11e8-9aad-023e566e0eb0]call_req('http://msb-iag:80/api','SDC','SDC',0,'/sdc/v1/catalog/services','GET','')
2018-11-23 12:43:47,352:[lcm.pub.utils.restcall]:[restcall.py]-[52] [DEBUG]:[6b6d2a10-ef1d-11e8-9aad-023e566e0eb0][0]status=403)
2018-11-23 12:43:47,353:[lcm.pub.utils.restcall]:[restcall.py]-[55] [DEBUG]:resp_body={
"requestError": {
"policyException": {
"messageId": "POL5003",
"text": "Error: Not authorized to use the API.",
"variables": []
}
}
}
2018-11-23 12:43:47,354:[lcm.pub.utils.restcall]:[restcall.py]-[81] [DEBUG]:[6b6d2a10-ef1d-11e8-9aad-023e566e0eb0]ret=[1, u'{\n "requestError": {\n "policyException": {\n "messageId": "POL5003",\n "text": "Error: Not authorized to use the API.",\n "variables": []\n }\n }\n}', '403']
2018-11-23 12:43:47,354:[lcm.pub.msapi.sdc]:[sdc.py]-[67] [ERROR]:Status code is 403, detail is {
"requestError": {
"policyException": {
"messageId": "POL5003",
"text": "Error: Not authorized to use the API.",
"variables": []
}
}
}.
haoling Hu
In the tutorial vFW Service Design Tutorial — onap master documentation
In step F & G ,when I connected the Generic NeutronNet & vFW_demo together and wanted to set the options, I found the different from the tutorial.
but in my work it shows the requirement and I could not change it.