Warning: Draft Content
This wiki is under construction as of 20171227 - this means that content here may be not fully specified or missing as we bring up the system and investigate deployments - this notice will be removed in the near future
slack | cloudify-developers list | github | cloudify-source JIRA | JIRA Board |
see OOM with TOSCA and Cloudify and OOM-579 - Getting issue details... STATUS
Note: cloudify manager is used in 3 places (as an alternative wrapper on OOM/Kubernetes, as a pending multi-VIM southbound plugin manager between SO and the Python based Multi-VIM containers and as the orchestrator in DCAEGEN2 during DCAE bootstrap of the HEAT version of DCAE.
+ cfy local init --install-plugins -p ./blueprints/centos_vm.yaml -i /tmp/local_inputs -i datacenter=0LrL
Purpose
Investigate the use of Cloudify Community edition - specifically http://cloudify.co/community/ in bringing up ONAP on Kubernetes using TOSCA blueprints on top of Helm. The white paper and blog article detail running hybrid Kubernetes and non-Kubernetes deployment together via http://cloudify.co/cloudify.co/2017/09/27/model-driven-onap-operations-manager-oom-boarding-tosca-cloudify/
TOSCA: https://www.oasis-open.org/committees/tc_home.php?wg_abbrev=tosca
One use case where Cloudify would be used as a layer above OOM and Kubernetes - is if you wish to run one of your databases - for example the MariaDB instance outside of the managed kubernetes environment (possibly as part of a phased in migration into kubernetes) - in this case you would need an external cloud controller to manage this hybrid environment - we will attempt to simulate this use case.
Quickstart
Here are the step to to deploy ONAP on Kubenetes using TOSCA and Cloudify:
- Install Cloudify manager, the fastest way is to use an existing Image for your environment (OpenStack, AWS, etc.)
- http://cloudify.co/download/
- Here are detailed instruction per environment (choose the non-bootstrap option) https://github.com/cloudify-examples/cloudify-environment-setup
- Provision a Kubernetes Cluster
- login to Coudify Manager UI
- Upload Kubernetes Blueprint zip file
- create a deployment
- execute the installation workflow
- After the Kubernetes cluster is up, prepare OOM environment
- Install Helm on Kubernetes master
- Pull docker images on all cluster working nodes
- After completion of pulling docker images, provision ONAP using Helm TOSCA blueprint (Link to be provided soon)
Quickstart Validation Examples
OpenStack
Install Cloudify manager
- Upload the Cloudify manager image to your OpenStack environment.
The image file can be found here (https://cloudify.co/download/#)
This image ID will be used in the openstack.yaml file.
- Create a VM in your OpenStack. This VM will be used for launching the cloudify manager. Attach a floating IP on this VM to access it.

Perpare the virtual environment
sudo apt-get update
sudo apt-get install python-dev
sudo apt-get install virtualenv
sudo apt-get install python-pip
virtualenv env
. env/bin/activate
Install Cloudify CLI
install Cloudify CLiwget http://repository.cloudifysource.org/cloudify/4.2.0/ga-release/cloudify-cli-4.2ga.deb sudo dpkg -i cloudify-cli-4.2ga.deb
Run cfy to test whether cfy isnatll successfully.
ubuntu@cloudify-launching:~$ cfy
Usage: cfy [OPTIONS] COMMAND [ARGS]...

  Cloudify's Command Line Interface

  Note that some commands are only available if you're using a manager. You
  can use a manager by running the `cfy profiles use` command and providing
  it with the IP of your manager (and ssh credentials if applicable).

  To activate bash-completion. Run: `eval "$(_CFY_COMPLETE=source cfy)"`

  Cloudify's working directory resides in ~/.cloudify. To change it, set the
  variable `CFY_WORKDIR` to something else (e.g. /tmp/).

Options:
  -v, --verbose  Show verbose output. You can supply this up to three times
                 (i.e. -vvv)
  --version      Display the version and exit (if a manager is used, its
                 version will also show)
  -h, --help     Show this message and exit.

Commands:
  agents            Handle a deployment's agents
  blueprints        Handle blueprints on the manager
  bootstrap         Bootstrap a manager
  cluster           Handle the Cloudify Manager cluster
  deployments       Handle deployments on the Manager
  dev               Run fabric tasks [manager only]
  events            Show events from workflow executions
  executions        Handle workflow executions
  groups            Handle deployment groups
  init              Initialize a working env
  install           Install an application blueprint [locally]
  ldap              Set LDAP authenticator.
  logs              Handle manager service logs
  maintenance-mode  Handle the manager's maintenance-mode
  node-instances    Show node-instance information [locally]
  nodes             Handle a deployment's nodes
  plugins           Handle plugins on the manager
  profiles          Handle Cloudify CLI profiles Each profile can...
  rollback          Rollback a manager to a previous version
  secrets           Handle Cloudify secrets (key-value pairs)
  snapshots         Handle manager snapshots
  ssh               Connect using SSH [manager only]
  ssl               Handle the manager's external ssl
  status            Show manager status [manager only]
  teardown          Teardown a manager [manager only]
  tenants           Handle Cloudify tenants (Premium feature)
  uninstall         Uninstall an application blueprint
  user-groups       Handle Cloudify user groups (Premium feature)
  users             Handle Cloudify users
  workflows         Handle deployment workflows
Download and edit the cloudfy-environment-setup blueprint
run following command to get the cloudfy-environment-setup blueprint
wget https://github.com/cloudify-examples/cloudify-environment-setup/archive/4.1.1.zip
sudo apt-get install unzip
unzip 4.1.1.zip
vi cloudify-environment-setup-4.1.1/inputs/openstack.yaml
Fill in the openstack information.
username: -cut-
password: -cut-
tenant_name: -cut-
auth_url: https://-cut-:5000/v2.0
region: RegionOne
external_network_name: GATEWAY_NET
cloudify_image:
centos_core_image:
ubuntu_trusty_image:
small_image_flavor: 2
large_image_flavor: 4
bootstrap: True
Install the Cloudify manager , it will take about 10 mins to finish the installation.
sudo cfy install cloudify-environment-setup-4.1.1/openstack-blueprint.yaml -i cloudify-environment-setup-4.1.1/inputs/openstack.yaml --install-plugins
Find the floating IP of cloudify manager
 Then you can access the Cloudify Manager GUI from that IP Address. The default username and password is admin:admin.
Provision a Kubernetes Cluster
- login to Coudify Manager UI
- Upload Kubernetes Blueprint zip file
Right now the Blueprint is under review https://gerrit.onap.org/r/#/c/28455/3
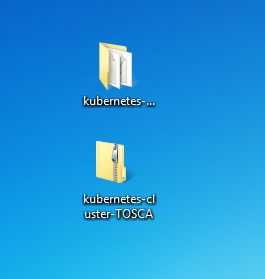
- Zip the directory kubernetes-cluster-TOSCA
- In the cloudify manager , first click the Local Blueprints Button on the left side, then click the upload button

- Click Select blueprint file to upload the blueprint from local.

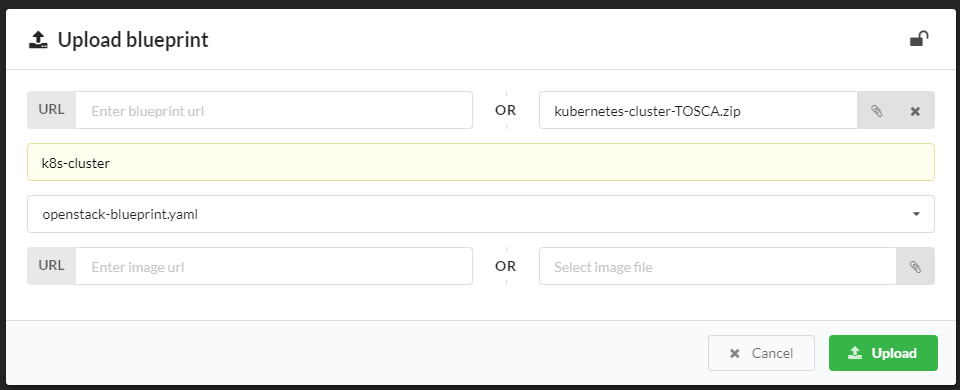
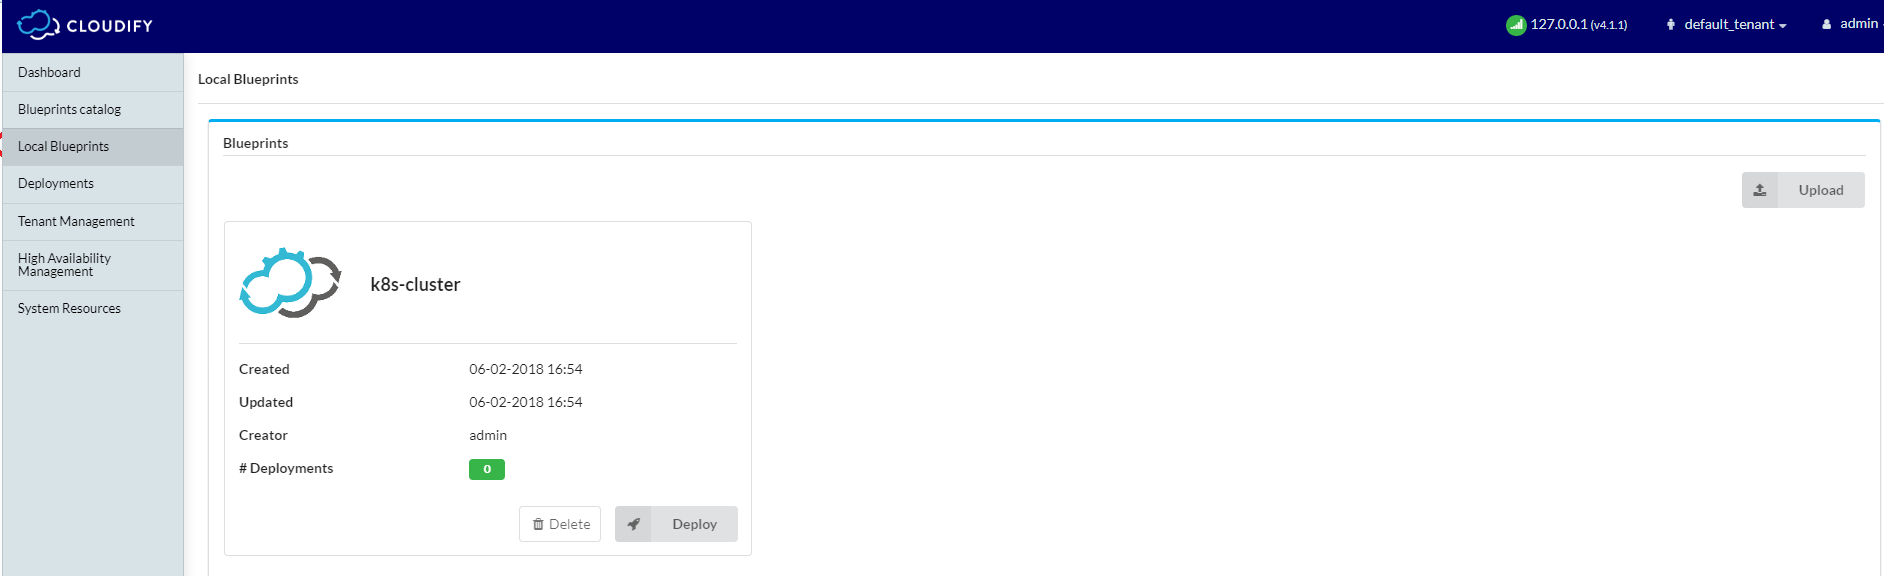
- Click upload, then your bule print shows here
- Zip the directory kubernetes-cluster-TOSCA
3. create a deployment
- Click the deploy button

- You only need give a deployment name, then click deploy button.

- Click the deploy button
4. execute the installation workflow
Deployments → K8s-cluster-deploy1→ Execute workflow→ Install
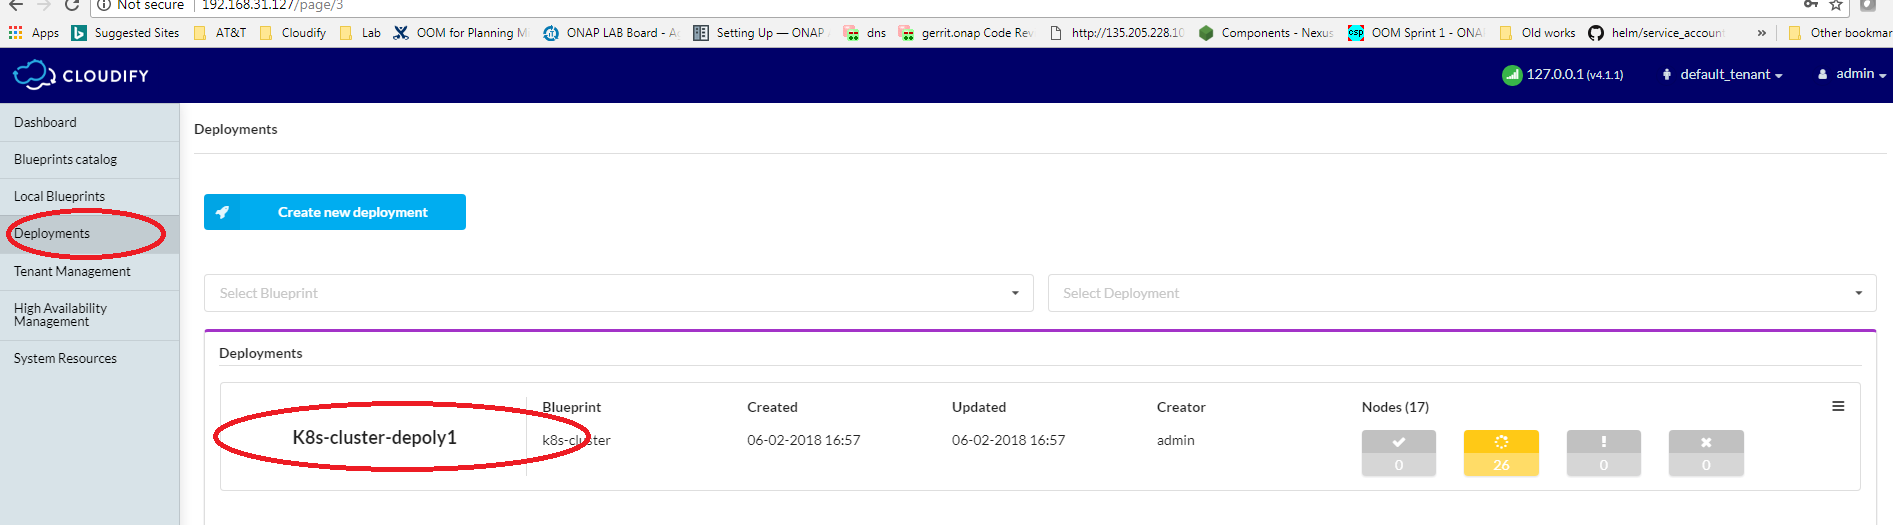

Scroll down, you can see the install workflow is searted.

5.When install workflow finishes, it will show terminated .
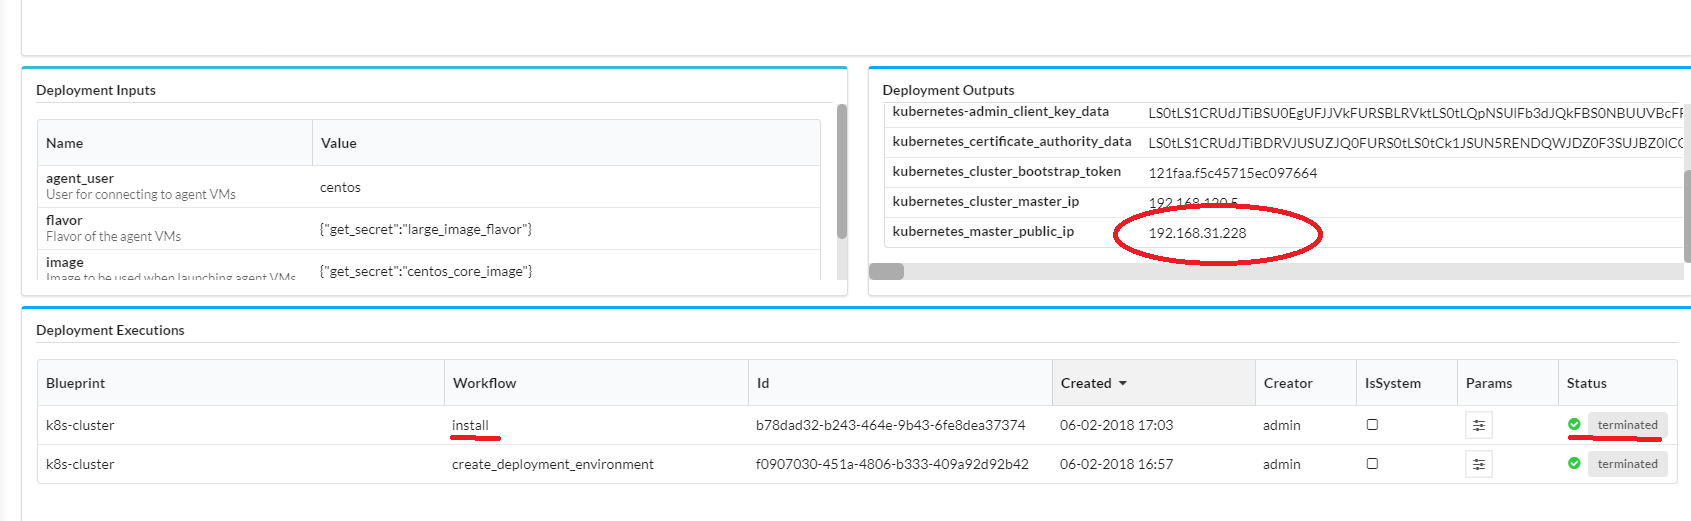
You can find the public IP of master node. The private key to access those VM is in that cloudify-launching vm.
(env) ubuntu@cloudify-launching:~$ cd .ssh
(env) ubuntu@cloudify-launching:~/.ssh$ ls
authorized_keys  cfy-agent-key-os  cfy-agent-key-os.pub  cfy-manager-key-os  cfy-manager-key-os.pub
ubuntu@cloudify-launching:~/.ssh$ sudo ssh -i cfy-agent-key-os centos@192.168.31.228
sudo: unable to resolve host cloudify-launching
The authenticity of host '192.168.31.228 (192.168.31.228)' can't be established.
ECDSA key fingerprint is SHA256:ZMHvC2MrgNNqpRaO96AxTaVjdEMcwXcXY8eNwzrhoNA.
Are you sure you want to continue connecting (yes/no)? yes
Warning: Permanently added '192.168.31.228' (ECDSA) to the list of known hosts.
Last login: Tue Feb  6 22:05:03 2018 from 192.168.120.3
[centos@server-k8s-cluster-depoly1-kubernetes-master-host-7g4o4w ~]$ kubectl get nodes
NAME                                                       STATUS    ROLES     AGE       VERSION
server-k8s-cluster-depoly1-kubernetes-master-host-7g4o4w   Ready     master    11m       v1.8.6
server-k8s-cluster-depoly1-kubernetes-node-host-1r81t1     Ready     <none>    10m       v1.8.6
server-k8s-cluster-depoly1-kubernetes-node-host-js0gj6     Ready     <none>    10m       v1.8.6
server-k8s-cluster-depoly1-kubernetes-node-host-o73jcr     Ready     <none>    10m       v1.8.6
server-k8s-cluster-depoly1-kubernetes-node-host-zhstql     Ready     <none>    10m       v1.8.6
[centos@server-k8s-cluster-depoly1-kubernetes-master-host-7g4o4w ~]$ kubectl version
Client Version: version.Info{Major:"1", Minor:"8", GitVersion:"v1.8.6", GitCommit:"6260bb08c46c31eea6cb538b34a9ceb3e406689c", GitTreeState:"clean", BuildDate:"2017-12-21T06:34:11Z", GoVersion:"go1.8.3", Compiler:"gc", Platform:"linux/amd64"}
Server Version: version.Info{Major:"1", Minor:"8", GitVersion:"v1.8.7", GitCommit:"b30876a5539f09684ff9fde266fda10b37738c9c", GitTreeState:"clean", BuildDate:"2018-01-16T21:52:38Z", GoVersion:"go1.8.3", Compiler:"gc", Platform:"linux/amd64"}
[centos@server-k8s-cluster-depoly1-kubernetes-master-host-7g4o4w ~]$ docker version
Client:
 Version:         1.12.6
 API version:     1.24
 Package version: docker-1.12.6-71.git3e8e77d.el7.centos.1.x86_64
 Go version:      go1.8.3
 Git commit:      3e8e77d/1.12.6
 Built:           Tue Jan 30 09:17:00 2018
 OS/Arch:         linux/amd64

Server:
 Version:         1.12.6
 API version:     1.24
 Package version: docker-1.12.6-71.git3e8e77d.el7.centos.1.x86_64
 Go version:      go1.8.3
 Git commit:      3e8e77d/1.12.6
 Built:           Tue Jan 30 09:17:00 2018
 OS/Arch:         linux/amd64
prepare OOM environment
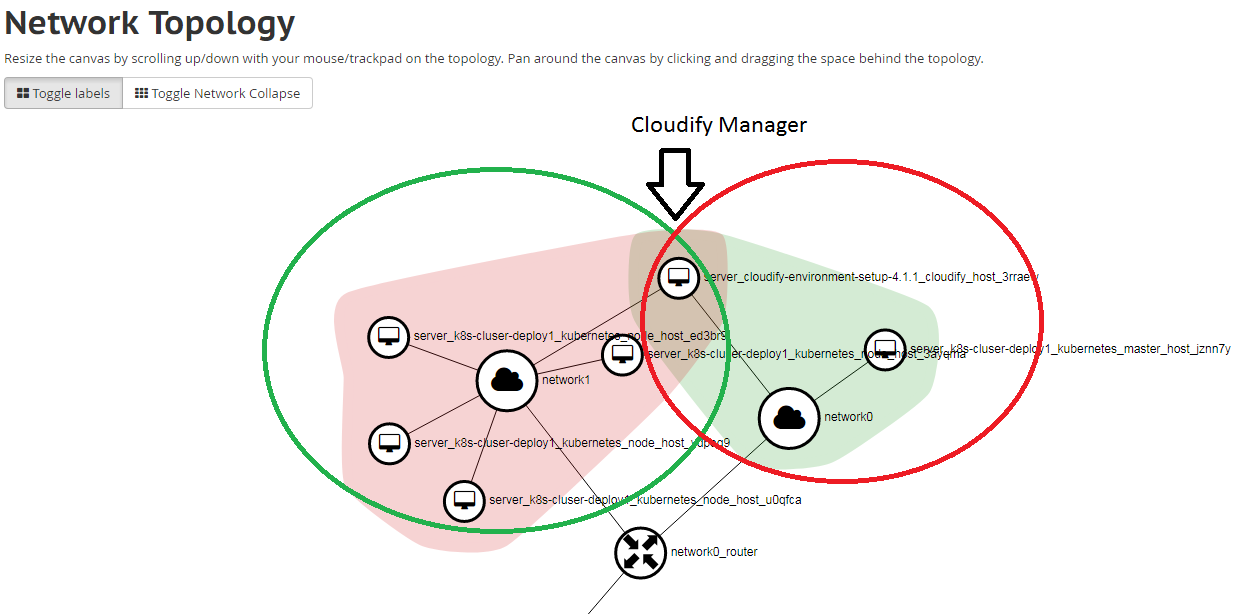
Let's look into this Cluster
In this kubernetes Cluster, there is one master node sit on public network (network0), and 4 work nodes on privare netwrok.

- Install Helm on Kubernetes master
Log into Kubernetes master run following command to install the helm
sudo yum install git wget -y
#install helm
wget http://storage.googleapis.com/kubernetes-helm/helm-v2.7.0-linux-amd64.tar.gz
tar -zxvf helm-v2.7.0-linux-amd64.tar.gz
sudo mv linux-amd64/helm /usr/bin/helm
RBAC is enabled in this cluster, so you need create a service account for the tiller.
kubectl -n kube-system create sa tiller
kubectl create clusterrolebinding tiller --clusterrole cluster-admin --serviceaccount=kube-system:tiller
helm init --service-account tiller
result:
[centos@server-k8s-cluser-deploy1-kubernetes-master-host-jznn7y ~]$ kubectl -n kube-system create sa tiller
helm init --service-account tiller
serviceaccount "tiller" created
[centos@server-k8s-cluser-deploy1-kubernetes-master-host-jznn7y ~]$ kubectl create clusterrolebinding tiller --clusterrole cluster-admin --serviceaccount=kube-system:tiller
clusterrolebinding "tiller" created
[centos@server-k8s-cluser-deploy1-kubernetes-master-host-jznn7y ~]$ helm init --service-account tiller
Creating /home/centos/.helm
Creating /home/centos/.helm/repository
Creating /home/centos/.helm/repository/cache
Creating /home/centos/.helm/repository/local
Creating /home/centos/.helm/plugins
Creating /home/centos/.helm/starters
Creating /home/centos/.helm/cache/archive
Creating /home/centos/.helm/repository/repositories.yaml
Adding stable repo with URL: https://kubernetes-charts.storage.googleapis.com
Adding local repo with URL: http://127.0.0.1:8879/charts
$HELM_HOME has been configured at /home/centos/.helm.

Tiller (the Helm server-side component) has been installed into your Kubernetes Cluster.
Happy Helming!
[centos@server-k8s-cluser-deploy1-kubernetes-master-host-jznn7y ~]$ helm version
Client: &version.Version{SemVer:"v2.7.0", GitCommit:"08c1144f5eb3e3b636d9775617287cc26e53dba4", GitTreeState:"clean"}
Server: &version.Version{SemVer:"v2.7.0", GitCommit:"08c1144f5eb3e3b636d9775617287cc26e53dba4", GitTreeState:"clean"}
2. Pull docker images on all cluster working nodes
Single VIM: Amazon AWS EC2
Following https://github.com/cloudify-examples/cloudify-environment-setup
Navigate to your AWS console https://signin.aws.amazon.com/oauth
Create a 64G VM on EBS - using Ubuntu 16.04 for now and the cost effective spot price for R4.2xLarge - enough to deploy all of ONAP in 55G plus the undercloud - the same as the OOM RI

Install Cloudify CLI
bootstrap (not pre-baked AMI) - I am doing this as root (to avoid any permissions issues) and on Ubuntu 16.04 (our current recommended OS for Rancher)
https://github.com/cloudify-examples/cloudify-environment-setup
"Install Cloudify CLI. Make sure that your CLI is using a local profile. (You must have executed cfy profiles use local in your shell."
links to http://docs.getcloudify.org/4.1.0/installation/from-packages/
switch to community tab
click DEB - verify you are human - fill out your name, email and company - get cloudify-cli-community-17.12.28.deb
scp the file up to your vm
obrienbiometrics:_deployment michaelobrien$ scp ~/Downloads/cloudify-cli-community-17.12.28.deb ubuntu@cloudify.onap.info:~/
cloudify-cli-community-17.12.28.deb                                                                                                 39%   17MB   2.6MB/s   00:09 ETA
obrienbiometrics:_deployment michaelobrien$ ssh ubuntu@cloudify.onap.info
ubuntu@ip-172-31-19-14:~$ sudo su -
root@ip-172-31-19-14:~# cp /home/ubuntu/cloudify-cli-community-17.12.28.deb .
root@ip-172-31-19-14:~# sudo dpkg -i cloudify-cli-community-17.12.28.deb
Selecting previously unselected package cloudify.
(Reading database ... 51107 files and directories currently installed.)
Preparing to unpack cloudify-cli-community-17.12.28.deb ...
You're about to install Cloudify!
Unpacking cloudify (17.12.28~community-1) ...
Setting up cloudify (17.12.28~community-1) ...
Thank you for installing Cloudify!
Configure the CLI
root@ip-172-31-19-14:~# cfy profiles use local
Initializing local profile ...
Initialization completed successfully
Using local environment...
Initializing local profile ...
Initialization completed successfully
Download the archive
wget https://github.com/cloudify-examples/cloudify-environment-setup/archive/latest.zip
root@ip-172-31-19-14:~# apt install unzip
root@ip-172-31-19-14:~# unzip latest.zip
   creating: cloudify-environment-setup-latest/
  inflating: cloudify-environment-setup-latest/README.md
  inflating: cloudify-environment-setup-latest/aws-blueprint.yaml
  inflating: cloudify-environment-setup-latest/azure-blueprint.yaml
  inflating: cloudify-environment-setup-latest/circle.yml
  inflating: cloudify-environment-setup-latest/gcp-blueprint.yaml
   creating: cloudify-environment-setup-latest/imports/
  inflating: cloudify-environment-setup-latest/imports/manager-configuration.yaml
   creating: cloudify-environment-setup-latest/inputs/
  inflating: cloudify-environment-setup-latest/inputs/aws.yaml
  inflating: cloudify-environment-setup-latest/inputs/azure.yaml
  inflating: cloudify-environment-setup-latest/inputs/gcp.yaml
  inflating: cloudify-environment-setup-latest/inputs/openstack.yaml
  inflating: cloudify-environment-setup-latest/openstack-blueprint.yaml
   creating: cloudify-environment-setup-latest/scripts/
   creating: cloudify-environment-setup-latest/scripts/manager/
  inflating: cloudify-environment-setup-latest/scripts/manager/configure.py
  inflating: cloudify-environment-setup-latest/scripts/manager/create.py
  inflating: cloudify-environment-setup-latest/scripts/manager/delete.py
  inflating: cloudify-environment-setup-latest/scripts/manager/start.py
Configure the archive with your AWS credentials
- vpc_id: This is the ID of the vpc. The same vpc that your manager is attached to.
- private_subnet_id: This is the ID of a subnet that does not have inbound internet access on the vpc. Outbound internet access is required to download the requirements. It must be on the same vpc designated by VPC_ID.
- public_subnet_id: This is the ID of a subnet that does have internet access (inbound and outbound). It must be on the same vpc designated by VPC_ID.
- availability_zone: The availability zone that you want your instances created in. This must be the same as your public_subnet_id and private_subnet_id.
- ec2_region_endpoint: The AWS region endpint, such as ec2.us-east-1.amazonaws.com.
- ec2_region_name: The AWS region name, such as ec2_region_name.
- aws_secret_access_key: Your AWS Secret Access Key. See here for more info. This may not be provided as an environment variable. The string must be set as a secret.
- aws_access_key_id: Your AWS Access Key ID. See here for more info. This may not be provided as an environment variable. The string must be set as a secret.
Install the archive
# I am on AWS EC2
root@ip-172-31-19-14:~# cfy install cloudify-environment-setup-latest/aws-blueprint.yaml -i cloudify-environment-setup-latest/inputs/aws.yaml --install-plugins --task-retries=30 --task-retry-interval=5
Initializing local profile ...
Initialization completed successfully
Initializing blueprint...


#30 sec
Collecting https://github.com/cloudify-incubator/cloudify-utilities-plugin/archive/1.4.2.1.zip (from -r /tmp/requirements_whmckn.txt (line 1))2018-01-13 15:28:40.563  CFY <cloudify-environment-setup-latest> [cloudify_manager_ami_i29qun.create] Task started 'cloudify_awssdk.ec2.resources.image.prepare'
2018-01-13 15:28:40.639  CFY <cloudify-environment-setup-latest> [vpc_w1tgjn.create] Task failed 'cloudify_aws.vpc.vpc.create_vpc' -> EC2ResponseError: 401 Unauthorized
<?xml version="1.0" encoding="UTF-8"?>
<Response><Errors><Error><Code>AuthFailure</Code><Message>AWS was not able to validate the provided access credentials</Message></Error></Errors><RequestID>d8e7ff46-81ec-4a8a-8451-13feef29737e</RequestID></Response>
2018-01-13 15:28:40.643  CFY <cloudify-environment-setup-latest> 'install' workflow execution failed: Workflow failed: Task failed 'cloudify_aws.vpc.vpc.create_vpc' -> EC2ResponseError: 401 Unauthorized
<?xml version="1.0" encoding="UTF-8"?>
<Response><Errors><Error><Code>AuthFailure</Code><Message>AWS was not able to validate the provided access credentials</Message></Error></Errors><RequestID>d8e7ff46-81ec-4a8a-8451-13feef29737e</RequestID></Response>
Workflow failed: Task failed 'cloudify_aws.vpc.vpc.create_vpc' -> EC2ResponseError: 401 Unauthorized
<?xml version="1.0" encoding="UTF-8"?>
<Response><Errors><Error><Code>AuthFailure</Code><Message>AWS was not able to validate the provided access credentials</Message></Error></Errors><RequestID>d8e7ff46-81ec-4a8a-8451-13feef29737e</RequestID></Response>
I forgot to add my AWS auth tokens - editing....rerunning
Multi VIM: Amazon AWS EC2 + Microsoft Azure VM
Investigation
Starting with the AWS EC2 example TOSCA blueprint at https://github.com/cloudify-cosmo/cloudify-hello-world-example/blob/master/ec2-blueprint.yaml - starting with the intro page in http://docs.getcloudify.org/4.2.0/intro/what-is-cloudify/
Git/Gerrit/JIRA Artifacts
OOM-569 - Getting issue details... STATUS as part of bringing DCAE into K8S OOM-565 - Getting issue details... STATUS
OOM-46 - Getting issue details... STATUS
OOM-105 - Getting issue details... STATUS
OOM-106 - Getting issue details... STATUS
OOM-450 - Getting issue details... STATUS
OOM-63 - Getting issue details... STATUS
INT-371 - Getting issue details... STATUS
Github Artifacts
https://github.com/cloudify-cosmo/cloudify-hello-world-example/issues/58
https://github.com/cloudify-cosmo/cloudify-hello-world-example/issues/59
Notes
Download Cloudify - select Community tab on the right
17.12 community looks to align with 4.2 http://cloudify.co/releasenotes/community-edition-release-notes
Aria is the RI for Tosca http://ariatosca.org/project-aria-announcement/
discuss
- OASIS TOSCA SImple YAML Profile v1.2
- OASIS TOSCA NFV Profile (WD5)