...
- Install openvpn from here: https://openvpn.net
- Check if your name is in the DCAE section of this page: Integration / Developer Lab Access
- If it is, you should have received an email from Stephen Gooch with a 7zip file
- If not:
- open a ticket at ONAP Jira with the subject "Openlab access for <Your Name> <your LF ID> <your email>".
- Request access for the DCAE and Integration tenants (below are list of current tenants available).
- The 7zip file which you received via email should look similar to this:
Unpack the 7zip file and you find 2 files:
login.txt pod-onap-01.ovpn
- Edit the ovpn profile file
- If you need to connect via proxy:
In the ### Proxy support ### section, add something like the following (your local proxy configuration may vary)
http-proxy <your proxy fqdn> <your proxy port> authproxy.txt basic http-proxy-retry
authproxy.txt should include your proxy login/password (if applicable)
Comment out the line "auth-nocache":
#auth-nocache
- If you need to connect via proxy:
Connect to the windriver lab openvpn:
sudo openvpn --config pod-onap-01.ovpn
You should see something like this when you are connected:
Wed Oct 5 1:42:21 2018 us=969853 Initialization Sequence Completed
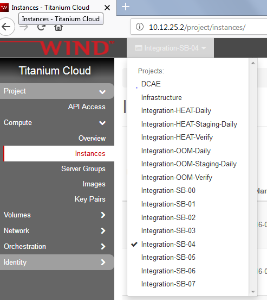
You can connect to the web interface at 10.12.25.2. Enter your username and password from the login.txt file:
Choose "DCAE" from the dropdown at the top of the page:
...