- Set up a development environment as described in A&AI Developer Environment Setup
- This document will show editing schema files with Eclipse, but Eclipse is not required.
- In this example, we will add a new node type called "new-widget" which will be a child node of "cloud-region" and also add 2 new attributes to the cloud-region node type
- Adding a new attribute to "cloud-region"
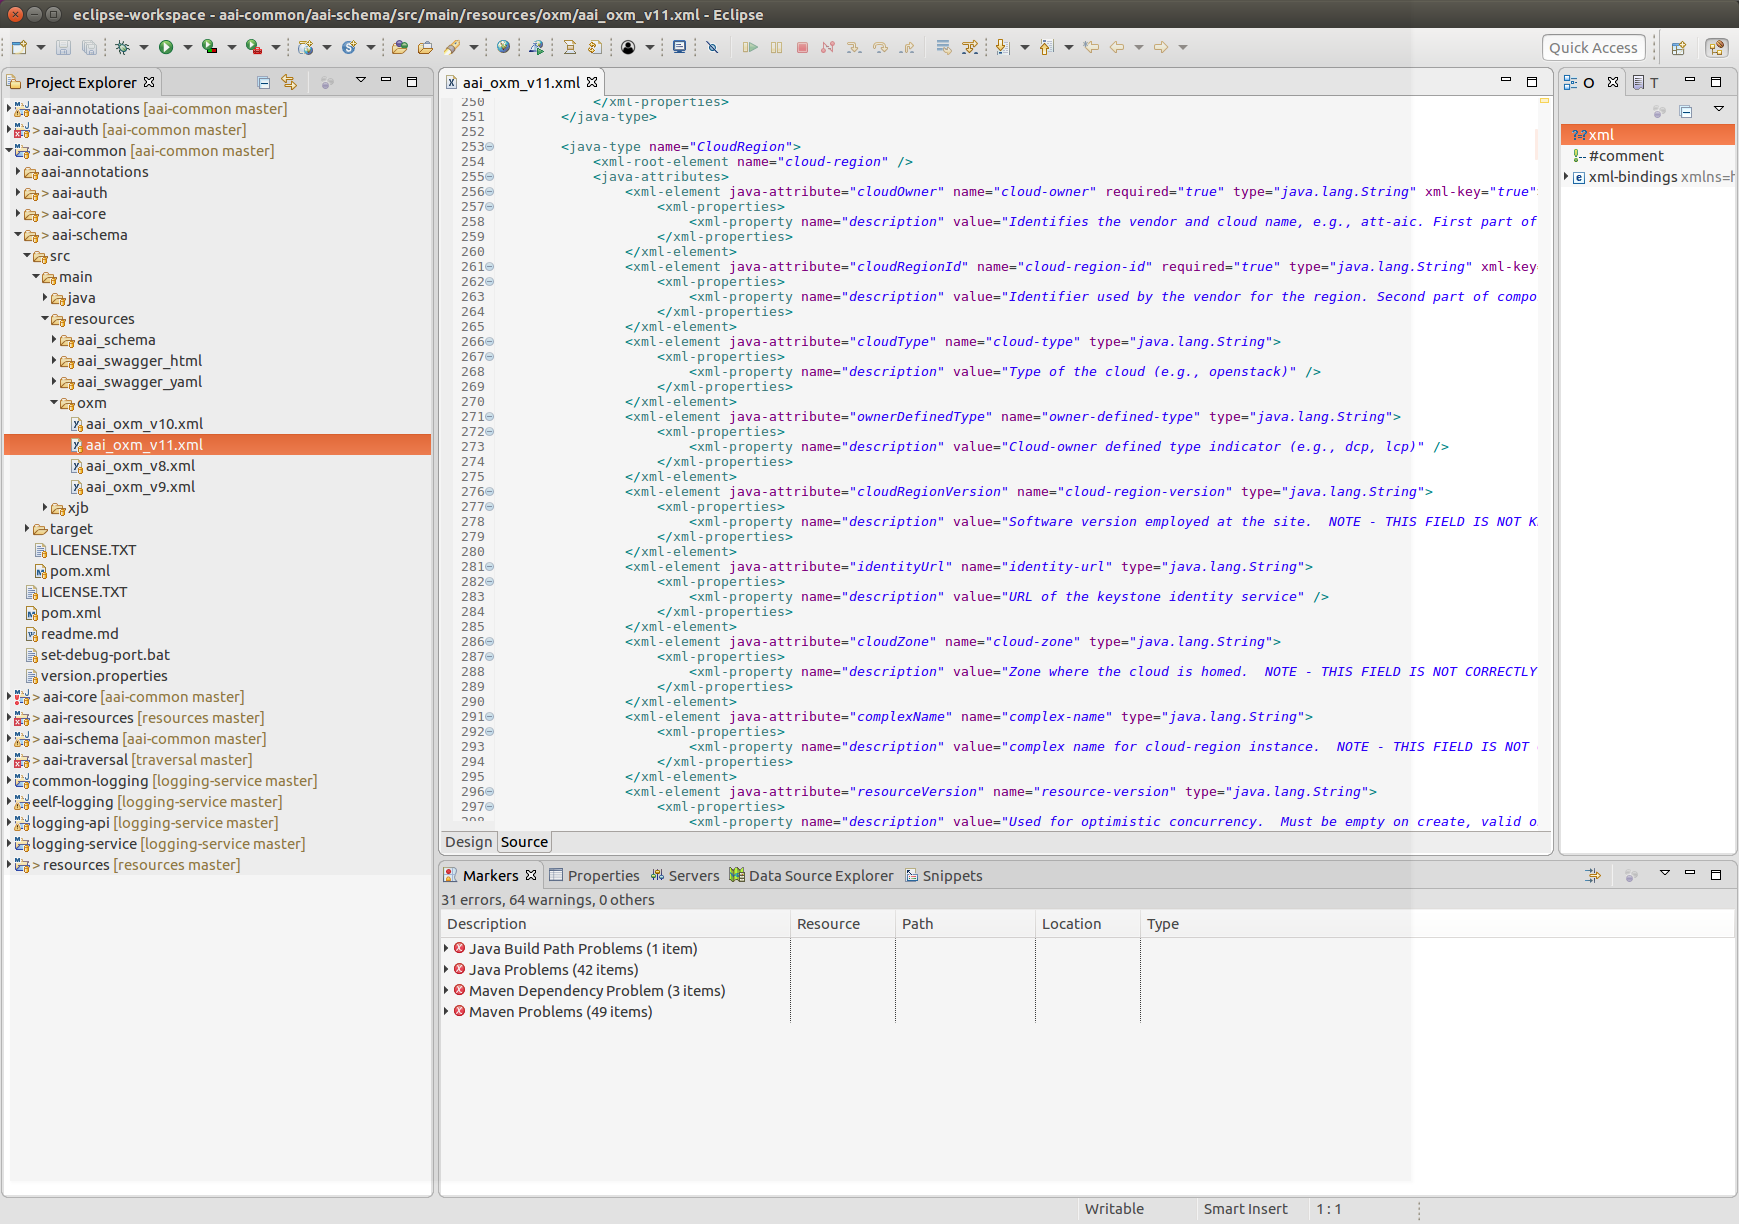
- Open aai/aai-common, aai-schema/src/main/java/resources/oxm/aai_oxm_v11.xml
- Open aai/aai-common, aai-schema/src/main/java/resources/oxm/aai_oxm_v11.xml
Add the following attributes between "complexName" and "resourceVersion":
<xml-element java-attribute="complexName" name="complex-name" type="java.lang.String">
<xml-properties>
<xml-property name="description" value="complex name for cloud-region instance. NOTE - THIS FIELD IS NOT CORRECTLY POPULATED." />
</xml-properties>
</xml-element>
<xml-element java-attribute="newAttributeForDemo" name="new-attribute-for-demo" required="true" type="java.lang.String">
<xml-properties>
<xml-property name="description" value="Example new attribute for cloud-region instance. " />
</xml-properties>
</xml-element>
<xml-element java-attribute="numberAttributeForDemo" name="number-attribute-for-demo" required="true" type="java.lang.Integer">
<xml-properties>
<xml-property name="description" value="Example number attribute for cloud-region instance. " />
</xml-properties>
</xml-element>
<xml-element java-attribute="resourceVersion" name="resource-version" type="java.lang.String">
<xml-properties>
<xml-property name="description" value="Used for optimistic concurrency. Must be empty on create, valid on update and delete." />
</xml-properties>
</xml-element>Save the file, and rebuild the libraries and microservices:
- Rebuild aai-common first:
- $ cd ~/LF/AAI/aai-common
- $ mvn clean install
Should result in BUILD SUCCESS - $ cd ~/LF/AAI/resources
- $ mvn clean install -o
Should result in BUILD SUCCESS - $ cd ~/LF/AAI/logging-service
- $ mvn clean install -o
Should result in BUILD SUCCESS - $ cd ~/LF/AAI/traversal
mvn clean install -o - Should result in BUILD SUCCESS
Run GenTester, using the target dir under aai-resources:
$ cd ~/LF/AAI; java -DAJSC_HOME=/home/jimmy/LF/AAI/resources/aai-resources/target/swm/package/nix/dist_files/opt/app/aai-resources -DBUNDLECONFIG_DIR="bundleconfig" -cp aai-common/aai-core/target/aai-core-1.1.0-SNAPSHOT.jar:resources/aai-resources/target/aai-resources.jar:resources/aai-resources/target/userjars/* org.openecomp.aai.dbgen.GenTester
There will be lots of output, you should see the following which indicates that resources has picked up the new OXM file:
Creating PropertyKey: [new-attribute-for-demo], [String], [SINGLE]
[DEV: 2017-Jul-27 13:07:26,856][INFO ][main ]Creating PropertyKey: [new-attribute-for-demo], [String], [SINGLE]
No index added for PropertyKey: [new-attribute-for-demo]
[DEV: 2017-Jul-27 13:07:27,902][INFO ][main ]No index added for PropertyKey: [new-attribute-for-demo]
Creating PropertyKey: [number-attribute-for-demo], [Integer], [SINGLE]
[DEV: 2017-Jul-27 13:07:27,904][INFO ][main ]Creating PropertyKey: [number-attribute-for-demo], [Integer], [SINGLE]
No index added for PropertyKey: [number-attribute-for-demo]
[DEV: 2017-Jul-27 13:07:27,912][INFO ][main ]No index added for PropertyKey: [number-attribute-for-demo]- Start the "resources" microservice
- Resources runs on port 8446. Go to the resources directory
$ cd ~/LF/AAI/resources - Set the debug port to 9446
$ export MAVEN_OPTS="-Xms1024m -Xmx5120m -XX:PermSize=2024m -Xdebug -Xnoagent -Djava.compiler=NONE -Xrunjdwp:transport=dt_socket,address=9446,server=y,suspend=n" - Start the microservice
$ mvn -P runAjsc
- Resources runs on port 8446. Go to the resources directory
Overview
Content Tools
