This guide will illustrate setting up an A&AI development environment in Ubuntu 16.04.
For this exercise, I set up a new instance of Ubuntu in Virtualbox and gave it 16G RAM, 200GB dynamically allocated storage, and 3 processors.
- install openjdk 8
- sudo apt install openjdk-8-jdk
- sudo apt install openjdk-8-jdk
- Install single node hadoop/titan
- $ wget http://s3.thinkaurelius.com/downloads/titan/titan-1.0.0-hadoop1.zip
- $ unzip titan-1.0.0-hadoop1.zip
- $ cd titan-1.0.0-hadoop1
- $ sudo ./bin/titan.sh start
- Install haproxy
- $ sudo apt-get -y install haproxy
- $ haproxy -v
HA-Proxy version 1.6.3 2015/12/25
Copyright 2000-2015 Willy Tarreau <willy@haproxy.org> Install this haproxy.cfg file in /etc/haproxy
- $ sudo cp aai.pem /etc/ssl/private/aai.pem
- $ sudo chmod 640 /etc/ssl/private/aai.pem
- $ sudo chown root:ssl-cert /etc/ssl/private/aai.pem
aai.pem - sudo mkdir /usr/local/etc/haproxy
Add these hostnames to the loopback interface in /etc/hosts:
127.0.0.1 localhost aai-traversal.api.simpledemo.openecomp.org aai-resources.api.simpledemo.openecomp.org
- $ sudo service haproxy restart
- Set up repos. First, follow the initial setup instructions in Setting Up Your Development Environment
- $ mkdir -p ~/LF/AAI
- $ cd ~/LF/AAI
- $ git clone ssh://<username>@gerrit.onap.org:29418/aai/aai-common
- $ git clone ssh://<username>@gerrit.onap.org:29418/aai/traversal
- $ git clone ssh://<username>@gerrit.onap.org:29418/aai/resources
- $ git clone ssh://<username>@gerrit.onap.org:29418/aai/logging-service
- If you did not originally create a settings.xml file when setting up the dev environment, you may get an error on some of the repos saying that oparent is unresolvable. Using the example settings.xml file should solve this problem: Setting Up Your Development Environment#MavenExamplesettings.xml
- Build aai-common, traversal, and resources
- $ cd ~/LF/AAI/aai-common
- $ mvn -DskipTests clean install
Should result in BUILD SUCCESS - $ cd ~/LF/AAI/resources
- $ mvn -DskipTests clean install
Should result in BUILD SUCCESS - $ cd ~/LF/AAI/logging-service
- $ mvn -DskipTests clean install
Should result in BUILD SUCCESS - $ cd ~/LF/AAI/traversal
I had to add the following to traversal/pom.xml to get traversal to build:<repositories> <repository> <id>maven-restlet</id> <name>Restlet repository</name> <url>https://maven.restlet.com</url> </repository> </repositories> - mvn -DskipTests clean install
Should result in BUILD SUCCESS
- Titan setup
- Modify both titan-cached.properties and titan-realtime.properties to the following (for all MS’s that will connect to the local Cassandra backend)
storage.backend=cassandra
storage.hostname=localhost - update ~/LF/AAI/resources/aai-resources/bundleconfig-local/etc/appprops/titan-cached.properties
- update ~/LF/AAI/resources/aai-resources/bundleconfig-local/etc/appprops/titan-realtime.properties
- update ~/LF/AAI/traversal/aai-traversal/bundleconfig-local/etc/appprops/titan-cached.properties
- update ~/LF/AAI/traversal/aai-traversal/bundleconfig-local/etc/appprops/titan-realtime.properties
- The following property can be added to specify the keyspace name, each time you do this step (g) should be done. If not specified Titan will try to create/use a defaulted keyspace named titan.
storage.cassandra.keyspace=<keyspace name> - From the resources MS run the create db schema standalone program.
NOTE: The first thing that would need to be done is adding the schema to the local instance. (this will need to be done whenever using a new keyspace or after wiping the data).
Runnable class com.att.aai.dbgen.GenTester with the following vm args.
-DAJSC_HOME=~/LF/AAI/resources -DBUNDLECONFIG_DIR="bundleconfig-local"
- Here's the command I used, and it worked:
$ cd ~/LF/AAI; java -DAJSC_HOME=/home/jimmy/LF/AAI/resources/aai-resources -DBUNDLECONFIG_DIR="bundleconfig-local" -cp aai-common/aai-core/target/aai-core-*.jar:resources/aai-resources/target/aai-resources.jar:resources/aai-resources/target/userjars/* org.onap.aai.dbgen.GenTester
- Modify both titan-cached.properties and titan-realtime.properties to the following (for all MS’s that will connect to the local Cassandra backend)
- Start the "resources" microservice
- Resources runs on port 8447. Go to the resources directory
$ cd ~/LF/AAI/resources - Set the debug port to 9447
$ export MAVEN_OPTS="-Xms1024m -Xmx5120m -XX:PermSize=2024m -Xdebug -Xnoagent -Djava.compiler=NONE -Xrunjdwp:transport=dt_socket,address=9447,server=y,suspend=n" - Start the microservice
$ mvn -P runAjsc
- Resources runs on port 8447. Go to the resources directory
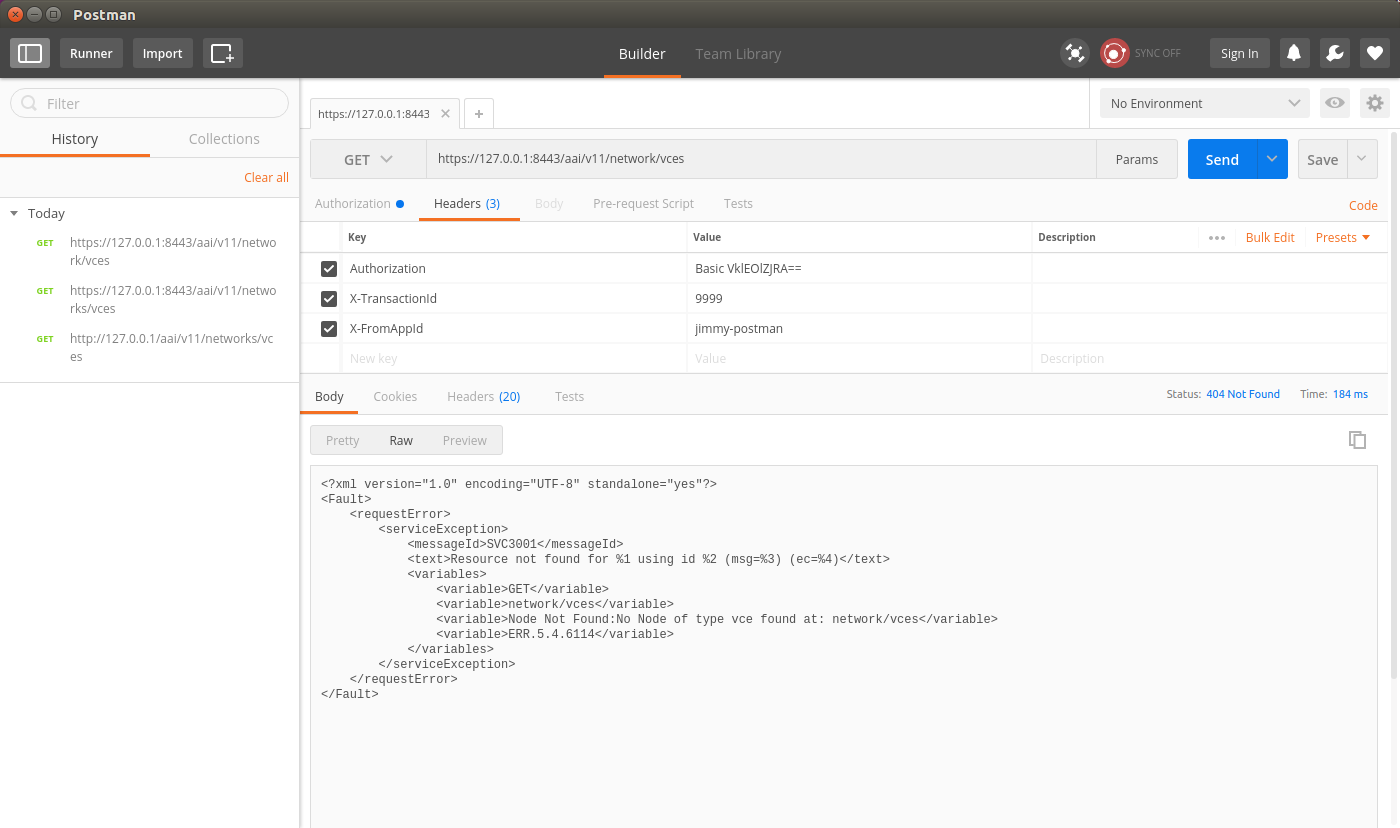
- Verify the resources microservice (this example uses Postman utility for Google Chrome)
- Use basic auth, user = AAI, pw = AAI
- Set the X-TransactionId header (in the example below, the value is 9999)
- Set the X-FromAppId header (in the example below, the value is jimmy-postman)
- Perform a GET of https://127.0.0.1:8443/aai/v11/network/vces
- You should see an error as below, 404 Not Found, ERR.5.4.6114. This indicates that the service is functioning normally:
- Start the "traversal" microservice
- Traversal runs on port 8446. Go to the traversal directory
$ cd ~/LF/AAI/traversal - Set the debug port to 9446
$ export MAVEN_OPTS="-Xms1024m -Xmx5120m -XX:PermSize=2024m -Xdebug -Xnoagent -Djava.compiler=NONE -Xrunjdwp:transport=dt_socket,address=9446,server=y,suspend=n" - Start the microservice
$ mvn -P runAjsc
Should see something like this: 2017-07-26 12:46:35.524:INFO:oejs.Server:com.att.ajsc.runner.Runner.main(): Started @25827ms
- Traversal runs on port 8446. Go to the traversal directory
- Verify the traversal microservice
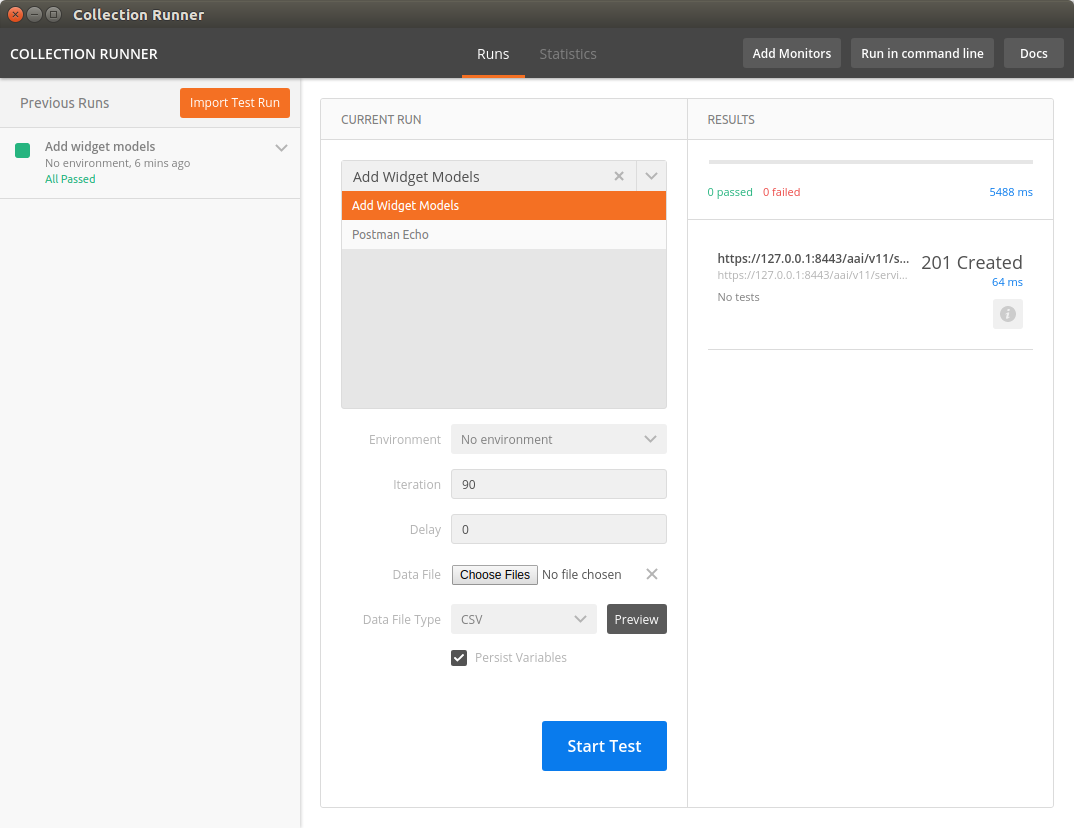
- Set up the widget models
This will set up the postman to add widget models: Add Widget Models.postman_collection.jsonNamedQuery.postman_collection.json - Create a runner using this file: models.csv
- Run the test runner
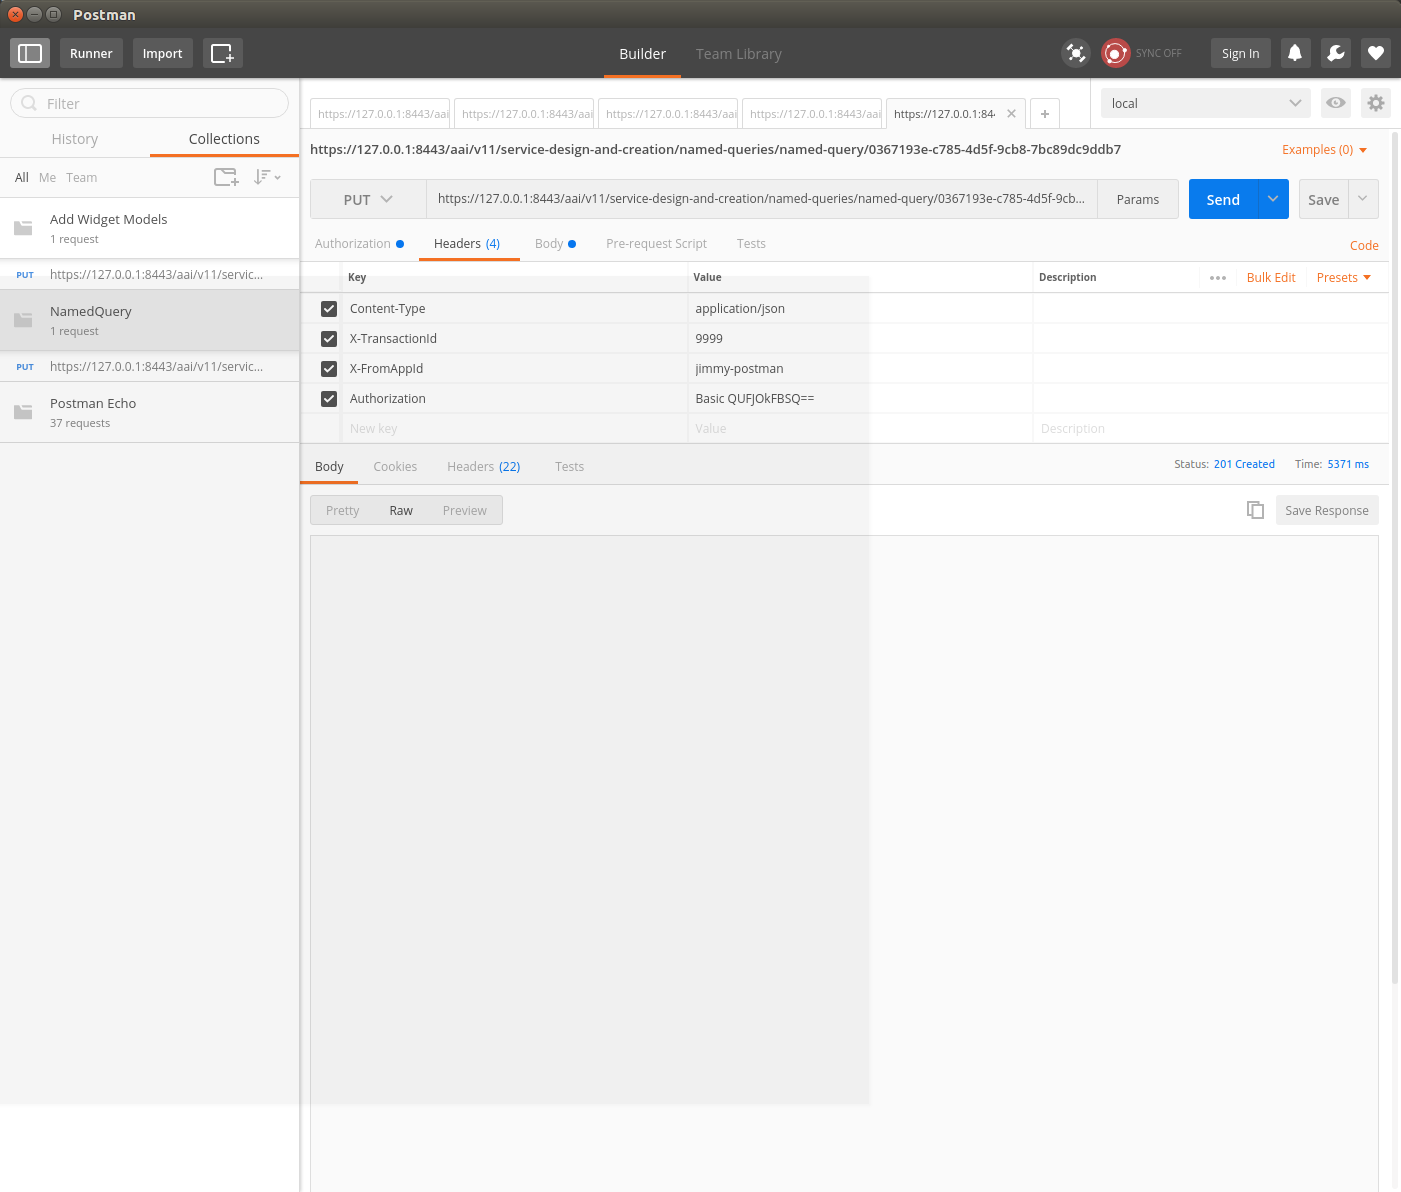
- Add a named query called "getComponentList" (this named query is used by VID): NamedQuery.postman_collection.json
- Add objects: Add Instances for Named Query.postman_collection.json (replacing the xmlns "http://org.openecomp.aai.inventory/v11" with "http://org.onap.aai.inventory/v11" in the Body of the PUT request)
- Execute named-query: Execute Named Query.postman_collection.json
You should see something like the following:
- Set up the widget models
- Your A&AI instance is now running, both the resources and traversal microservices are working properly with a local titan graph.
- Next: Tutorial: Making and Testing a Schema Change in A&AI