Installation
The Open Source UML tool Papyrus is a plug-in for the Open Source integrated development environment (IDE) Eclipse. GenDoc is the associated tool that allows you to output a model in Papyrus into a word document. The artifacts in the output (diagrams, classes, datatypes, etc.) can be copy/pasted directly into a model project's wiki page.
Applied tool versions:
- Eclipse: version 4.7.2 "Oxygen"
- Papyrus: version 3.3.0
- GenDoc: version 0.6.0
Eclipse
- Eclipse “Oxygen” Modeling Tools package version 4.7.2 can be downloaded from here:
https://www.eclipse.org/downloads/packages/eclipse-modeling-tools/oxygen2 - Select the download link that is appropriate for the machine on which you will be making the install, i.e. "Windows 64-bit"
- This results in the download of a zip file.
- Note that Eclipse Oxygen requires a 1.8 compatible JVM
- Extract the contents of the zip file to wherever you would like to install Eclipse. On a PC, "Program Files" is always a good option.
- The content of the extracted files should look something like this:

- To launch eclipse, double-click on the "eclipse.exe" file
- When Eclipse starts coming up, it will prompt you for a "Workspace", providing a default that you can override.
- This is where the Eclipse projects, with associated models, will be stored.
- When Eclipse fully comes up, you can close the Welcome tab
- To verify you have the correct installation of the product, go to "Help" → "About Eclipse"
- You should see something that looks like this:

- You have now successfully installed Eclipse
Papyrus
- Papyrus version 3.3.0 can be downloaded from here:
https://www.eclipse.org/papyrus/ - Scroll down on the right side of the page and select: "Papyrus 3.3.0 Oxygen" Posted March 20th, 2018 and select "Download Page"
- This takes you to "Papyrus Update Sites". Scroll down and select the "Papyrus Oxygen (3.X.0) Release Update Site
- Copy the URL of the update site to which it takes you. Should be something like: http://download.eclipse.org/modeling/mdt/papyrus/updates/releases/oxygen/
- Now you go back into Eclipse and select "Help"→ "Install new software"
- An "Available Software" screen comes up. Paste your URL into the "Work with:" box and hit enter
- There should be multiple "Papyrus" related packages available to install. Select only the box: "Papyrus" and make sure the others are not selected.
- Then click on "Next" to install the product. The installation will check for dependencies and requirement, and next prompt you to "Accept" the license agreement
- Once accepted, you can select "Finish" and the installation process continues.
- When the installation is finished, restart Eclipse to begin to use Papyrus.
- Go to "Window"→ "Perspective"→"Open Perspective"→ "Other" and select Papyrus.
- You will now be in the Papyrus Perspective where you can begin to use Papyrus.
GenDoc
The Gendoc plugin is used in conjunction with a document template. The template contains instructions that enable generation of a Microsoft Word document. The document can include extracts from the model such as diagrams, class definitions, attribute definitions along with their stereotypes etc as well as figures and text directly entered into the template.
- In Eclipse, go to "Help" → "Install new software"
- Click "Add" and enter the GenDoc site: http://download.eclipse.org/gendoc/updates/releases/0.6.0/
- An "Add Repository" screen will come up prompting you for a "Name" for your site. Give it the name "Gendoc"
- In your "Available Software" page, you can select this site from the scroll box in the "Work with" box and hit enter.
- The "gendoc" package should show. Select this package and hit "Next".
- Follow the instructions to complete the installation.
Using the ONAP Model in Gerrit
Downloading the Model
Setup of RSA Keys
This process must be followed if you have never used Eclipse/Git function with Gerrit.
- You must first generate an SSH key on your Eclipse/Papyrus platform
- Go to "Window→ Preferences→ General→ Network Connection→ SSH2
- Select the tab "Key Management" and choose "Generate RSA Key"
- The system will generate a key for you and place the key in the same window. Select "Save private key" which will save your key as id_rsa.
- You will need to "copy/paste" that key that you will upload into Gerrit before you hit "Apply and Close"
- Uploading the key into Gerrit
- Login to Gerrit (gerrit.onap.org)
- Click your name at the top right
- Click Settings > SSH Public Keys (https://git.eclipse.org/r/#/settings/ssh-keys)
- Click Add Key ..
- Paste the text of your public key into the text box
Click Add
Cloning the Model
The ONAP model currently resides in Gerrit in the modeling/modelspec repository. In order to download the model to your machine, to either visualize it or make updates, you will need to clone it in Eclipse/Git. Steps to do this:
- Bring up your Eclipse/Papyrus that you installed in the previous steps.
- Go to the Git Perspective by selecting "Window->Perspective→Open Perspective→ Other" on the top of your screen and then select "Git". Note: Another quick way to get to this perspective exists on the top right side of your screen. You will see "Quick Access". Select the "Git" perspective.

- Note: If you were previously using Papyrus ONAP model when it was in a "Private" GitHub, you will have to select that repository, right click, and select "Delete Repository".
- Once in the Git perspective, your screen should have the following on top:

- On the bottom of the picture above you see a "cloud" with a repository and a green arrow. That is your "clone repository" function in Git. Select that.
- You will need to fill-in the screen that appears with a URI. The format of that URI is: ssh://{LF Userid}@gerrit.onap.org:29418/modeling/modelspec
- Based upon what you have just entered, the rest of the screen gets populated with the correct info. It should look something like this:

- Once the screen is filled in, select "Next"
- It will then prompt you for the branches to select. Choose: 2.0.0-ONAP, R3workingbranch, and Master. Click "Next".
- You will then be prompted to select a local directory on your machine into which the model should be loaded. It can be any location you want, and not necessarily the workspace you are using for Eclipse/Papyrus projects. As an "initial branch", select "R3workingbranch". Select the option "Import all existing Eclipse projects...". Your screen at this point should look like this:

- Note: In order for the above process to work, you may have to exit your corporate VPN.
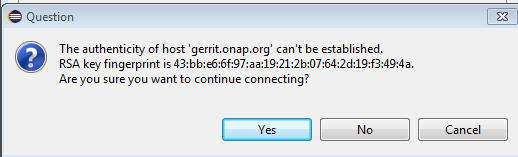
- Select "finish". For a first time, you may get the following message. Select "Yes".
- The cloning process should complete, and the repository should be created on your local machine. If you encounter errors, contact the ONAP model administrator to get help.
- The view below shows an example of the newly created repository which has been opened up down to the level of the "Local" folder. Note: You should have the R3workingbranch only showing up as your "Local".

Viewing the Model in Papyrus
- Once you have successfully cloned the ONAP model, you can now view it in Papyrus. Go to the Papyrus perspective by selecting "Window->Perspective→Open Perspective→ Other" on the top of your screen and then select "Papyrus". Or, again you can go to "Quick Access" and select the icon that looks like a bird:
- This perspective should show a "Project Explorer" on the left side of the screen.
- You should see your newly created Eclipse/Papyrus project in the "Project Explorer" on the left side of the screen.

- The text in light brown is telling you that your project is in the modelspec repository you just created, in the branch "R3workingbranch".
- The model actually resides in the "papyrus" folder, in "modelspec". If you open up the papyrus folder and then the ONAP Information Model folder, you will see:

- Here is a description of what you have in the ONAP Information Model
- GenDoc - This is where the GenDoc templates reside for creating an output of the model in Word
- StyleSheets - These are CSS stylesheets to use when formatting the model
- Common - The common submodel of the model (where artifacts used by multiple sub-models are stored)
- Infrastructure - The infrastructure submodel where the multi-cloud artifacts are stored
- model - This is the "umbrella" ONAP model that contains all the submodels
- Onap_Profile.profile - Contains ONAP specific stereotypes
- OpenModel_Profile.profile- Contains IISOMI stereotypes
- Party - The party submodel for party related artifacts
- Resource - The resource submodel for resource related artifacts
- Service - The service submodel for service related artifacts
- Vnf - The Vnf submodel for Vnf specific artifacts
- To see the entire model, double-click on "model". The model will open up in the model explorer which is on the left side of the screen in the center:

- The icon with the triangle saying "model" represents the entire ONAP model. The icons with a little arrow coming out of a circle represent the sub-models.
- Open up any sub-model like you would a folder, and you will see something like the following (in this example it is the Vnf sub-model)

- Each sub-model has the following types of packages
- Associations - Contains all associations used in diagrams.
- Diagrams - Contains UML diagrams
- Interfaces - Contains Component, Interface, and Operation artifacts (usually empty for now)
- ObjectClasses - Contains all class definitions
- TypeDefinitions - Contains all DataTypes and Enumerations.
- Start viewing the model by selecting any diagram, i.e. in the Vnf → Diagrams package.
- Here's a little trick for seeing the associated artifacts in the diagram. In the model explorer bar you will see two arrows opposing each other. Select that double-arrow option:

- What this means, is when you select any artifact on a diagram, i.e. a "Class", the model explorer takes you directly to that artifact in the model explorer tree.
- Now, explore the model yourself by taking a look at all the class diagrams in the sub-models! Note, some of the sub-models are currently empty.