Hint: This page refers to "Casablanca". For Dublin/El Alto goto here: SDN-R with OOM Rancher/Kubernetes Installation
Introduction
This page discusses the process to install SDNR/SDNC into the ONAP installation at OWL (Open Wireless Laboratory) in WINLAB at Rutgers University. The OWL/WINLAB laboratory environment is described in the wiki page Open Wireless Laboratory (OWL) at Wireless Information Network Laboratory (WINLAB). This page describes how to install a development Docker image of SDNC into ONAP rather than the default image taken from the nexus3.onap.org:10001 repository.
Procedure
Given the close deadline for the proof-of-concept, we have decided to develop our code in a github site that is outside of the ONAP gerrit (there is a description at this wiki page). The starting point for the code will be a branch of the ONAP gerrit, and we will fully conform with ONAP practices with the intention of submitting the code to the ONAP gerrit after the proof-of-concept. We have agreed to install the karaf features into CCSDK and then create a SDNC docker image from that CCSDK image. This approach accords with the policy of keeping features in CCSDK and will help us better leverage the work of the OOM group because their Helm charts install SDNC and not CCSDK. We have also agreed to use the Casablanca branch of both CCSDK and SDNC rather than the master branch because the master branch has been updated to evolve into Dublin and Casablaca will be a stable environment as we work on the proof-of-concept.
We have described the procedure to install a new karaf feature into CCSDK in a set of wiki pages at SDN-R Developer Guide. This page assumes that you have installed your features and included them in the "component meta-feature" for the repository ccsdk/features/sdnr/northbound.
Create a custom CCSDK Docker image
The first step is to create a CCSDK docker image with the desired features. The procedure to do this is the same as that described at SDN-R Developer Guide except we are using the Casablanca branch, which requires two principal changes:
- Update the version values of the maven artifacts to the values in the Casablanca branch
- Modify the version of the OpenDaylight Oxygen Docker image that is used as the starting point for the CCSDK Docker image
This code is taken from ccsdk/sli/core/sliapi and ccsdk/distribution/pom.xml and shows the version numbers for the parent pom.xml files and artifacts. We can use version "1.1.2-SNAPSHOT" for the CCSDK parent poms and "0.3.2-SNAPSHOT" for the artifacts.
<parent>$
    <groupId>org.onap.ccsdk.parent</groupId>$
    <artifactId>single-feature-parent</artifactId>$
    <version>1.1.2</version>$
    <relativePath/>$
</parent>$

<parent>$
    <groupId>org.onap.ccsdk.parent</groupId>$
    <artifactId>feature-repo-parent</artifactId>$
    <version>1.1.2</version>$
    <relativePath/>$
</parent>$

<parent>$
    <groupId>org.onap.ccsdk.parent</groupId>$
    <artifactId>odlparent-lite</artifactId>$
    <version>1.1.2</version>$
    <relativePath/>$
</parent>$

<parent>$
    <groupId>org.onap.ccsdk.parent</groupId>$
    <artifactId>binding-parent</artifactId>$
    <version>1.1.2</version>$
    <relativePath/>$
</parent>$

<groupId>org.onap.ccsdk.distribution</groupId>
<artifactId>distribution-odlsli</artifactId>
<version>0.3.2</version>
<packaging>pom</packaging>
The Dockerfile in ccsdk/distribution/odlsli/src/main/docker that creates the CCSDK Docker images needs to be updated with the correct tag for the OpenDaylight Oxygen image.
Change:
# Base ubuntu with added packages needed for open ecomp
FROM onap/ccsdk-odl-oxygen-image:${project.version}
To:
# Base ubuntu with added packages needed for open ecomp
FROM onap/ccsdk-odl-oxygen-image:0.3.2-STAGING
In the original code, ${project.version} is replaced with "0.3.2-SNAPSHOT," and there is no image with that tag in the nexus3 repository. This is a temporary condition as the Casablanca release goes through the approval process. Also, notice that the Dockerfile assumes a local copy of the image, so one should login to nexus3.onap.org:1001, pull down the image and rename it from:
nexus3.onap.org:1001/onap/ccsdk-odl-oxygen-image:0.3.2-STAGING
to:
onap/ccsdk-odl-oxygen-image:0.3.2-STAGING.
Please edit this page to correct any errors or make improvements. After making these changes, one can navigate to the ccsdk/distribution/odlsli directory and execute the command "mvn clean install -P docker" to create a new CCSDK Docker image that includes the new features for the proof-of-concept. The code below shows the generated images.
% docker images
REPOSITORY                                                     TAG                                       IMAGE ID            CREATED             SIZE
onap/ccsdk-odlsli-image                                        0.3-STAGING-latest                        dc4309c12ee4        31 seconds ago      1.81GB
onap/ccsdk-odlsli-image                                        0.3.2-SNAPSHOT                            dc4309c12ee4        31 seconds ago      1.81GB
onap/ccsdk-odlsli-image                                        0.3.2-SNAPSHOT-STAGING-20181108T170427Z   dc4309c12ee4        31 seconds ago      1.81GB
onap/ccsdk-odlsli-image                                        latest                                    dc4309c12ee4        31 seconds ago      1.81GB
nexus3.onap.org:10001/onap/ccsdk-odl-oxygen-image              0.3.2-STAGING                             ebc754e1a8b0        37 hours ago        1.69GB
onap/ccsdk-odl-oxygen-image                                    0.3.2-STAGING                             ebc754e1a8b0        37 hours ago        1.69GB
...
% docker tag onap/ccsdk-odlsli-image:0.3.2-SNAPSHOT oof-pci/ccsdk-odlsli-image:0.3.2-SNAPSHOT
To minimize confusion, I chose to rename the image to something meaningful for the proof-of-concept: oof-pci/ccsdk-odlsli-image:0.3.2-SNAPSHOT.
Create a custom SDNC Docker image
The next step is to create a custom SDNC Docker image from the newly created CCSDK image. Navigate to sdnc/oam/installation/sdnc and inspect two files:
- sdnc/oam/installation/sdnc/pom.xml
- sdnc/oam/installation/sdnc/installation/sdnc/src/main/docker/Dockerfile
The relevant part of sdnc/oam/installation/sdnc/pom.xml is:
<?xml version="1.0" encoding="UTF-8"?>
<project xmlns="http://maven.apache.org/POM/4.0.0"
        xmlns:xsi="http://www.w3.org/2001/XMLSchema-instance"
        xsi:schemaLocation="http://maven.apache.org/POM/4.0.0 http://maven.apache.org/maven-v4_0_0.xsd">

        <parent>
                <groupId>org.onap.ccsdk.parent</groupId>
                <artifactId>odlparent-lite</artifactId>
                <version>1.1.2-SNAPSHOT</version>
        </parent>

        <modelVersion>4.0.0</modelVersion>
        <packaging>pom</packaging>
        <groupId>org.onap.sdnc.oam</groupId>
        <artifactId>installation-sdnc</artifactId>
        <version>1.4.2-SNAPSHOT</version>

        <name>sdnc-oam :: installation :: ${project.artifactId}</name>
        <description>Creates SDN Controller Docker container</description>

        <properties>
                <image.name>onap/sdnc-image</image.name>
                <sdnc.project.version>${project.version}</sdnc.project.version>
                <sdnc.northbound.version>1.4.2-SNAPSHOT</sdnc.northbound.version>
                <ccsdk.docker.version>0.3-STAGING-latest</ccsdk.docker.version>
                <sdnc.keystore>keystore.sdnc.p12</sdnc.keystore>
                <sdnc.keypass>onap3.0</sdnc.keypass>
                <sdnc.secureport>8443</sdnc.secureport>
                <docker.buildArg.https_proxy>${https_proxy}</docker.buildArg.https_proxy>
                <docker.push.phase>deploy</docker.push.phase>
                <docker.verbose>true</docker.verbose>
                <maven.build.timestamp.format>yyyyMMdd'T'HHmmss'Z'</maven.build.timestamp.format>
        </properties>
...
Notice that the version number for the Casablanca branch of SDNC is 1.4.2, which differs from the version for CCSDK: 0.3.2. Also, it specifies a property for the tag of the CCSDK Docker image. The file sdnc/oam/installation/sdnc/installation/sdnc/src/main/docker/Dockerfile shows:
# Base ubuntu with added packages needed for open ecomp
FROM onap/ccsdk-odlsli-image:${ccsdk.docker.version}
...
Update the name and tag for the CCSDK Docker image in the Dockerfile to the new image that you had just created.
# Base ubuntu with added packages needed for open ecomp
# FROM onap/ccsdk-odlsli-image:${ccsdk.docker.version}
FROM oof-pci/ccsdk-odlsli-image:0.3.2
...
With that single change, one can navigate to sdnc/oam/installation/sdnc and execute the command "mvn clean install -P docker" to create the custom SDNC image. One now has these images.
% docker images
REPOSITORY                                                     TAG                                       IMAGE ID            CREATED             SIZE
onap/sdnc-image                                                1.4-STAGING-latest                        4bb8c2f04a35        12 seconds ago      1.85GB
onap/sdnc-image                                                1.4.2-SNAPSHOT                            4bb8c2f04a35        12 seconds ago      1.85GB
onap/sdnc-image                                                1.4.2-SNAPSHOT-STAGING-20181108T173140Z   4bb8c2f04a35        12 seconds ago      1.85GB
onap/sdnc-image                                                latest                                    4bb8c2f04a35        12 seconds ago      1.85GB
onap/ccsdk-odlsli-image                                        0.3-STAGING-latest                        dc4309c12ee4        27 minutes ago      1.81GB
onap/ccsdk-odlsli-image                                        0.3.2-SNAPSHOT                            dc4309c12ee4        27 minutes ago      1.81GB
onap/ccsdk-odlsli-image                                        0.3.2-SNAPSHOT-STAGING-20181108T170427Z   dc4309c12ee4        27 minutes ago      1.81GB
onap/ccsdk-odlsli-image                                        latest                                    dc4309c12ee4        27 minutes ago      1.81GB
oof-pci/ccsdk-odlsli-image                                     0.3.2-SNAPSHOT                            dc4309c12ee4        27 minutes ago      1.81GB
nexus3.onap.org:10001/onap/ccsdk-odl-oxygen-image              0.3.2-STAGING                             ebc754e1a8b0        37 hours ago        1.69GB
onap/ccsdk-odl-oxygen-image                                    0.3.2-STAGING                             ebc754e1a8b0        37 hours ago        1.69GB
...
Upload the development SDNC Docker image to Docker hub
We now have a development SDNC Docker image, and we want to install it into ONAP at OWL. We are using the OOM Rancher/Kubernetes approach to installing ONAP, and their scripts pull all of the Docker images from the nexus3.onap.org repository. To pull down our development image, we must first push it to a Docker repository, but we cannot push it to nexus3 because of access restrictions. Instead, we use a separate repository in the public Docker hub repository (please contact me for access). The next step is to push the new image to that Docker hub. Below, we first rename the image to something meaningful to the proof-of-concept and then push it.
% docker login --username <docker-hub-username>
% docker tag onap/sdnc-image:1.4.2-SNAPSHOT <docker-hub-username>/oof-pci-sdnr:1.4.2
% docker push <docker-hub-username>/oof-pci-sdnr:1.4.2
The push refers to repository [docker.io/<docker-hub-username>/oof-pci-sdnr]
03e7ad007451: Pushed
a0a1cf35dfbe: Pushed
a07a5ef548f3: Pushed
00f72359482f: Pushed
e8bd422087d4: Pushed
e2049f74dbc7: Pushed
a6be3b814740: Pushed
2aee35f4b0cf: Pushed
cdfcf3c88e0c: Pushed
079c4c5e0c3b: Pushed
c4645863df89: Pushed
c931e6de9fae: Pushed
dda32bf9f38e: Pushed
a9d2e609edd2: Pushed
7f1e7f156f10: Pushed
fd502652d1b6: Pushed
1be2b014d5b5: Pushed
95002f737271: Pushed
daf5c98fd708: Pushed
6ddb554c87b4: Pushed
095019da6309: Pushed
6aaca5663342: Pushed
493565e7bfc4: Pushed
a211906d4a22: Pushed
5d3087e4738c: Pushed
2940f1099458: Pushed
f17a07942400: Pushed
93c6b053ea3a: Layer already exists
ba2b9e9c0ba4: Layer already exists
2ee1b8bcd8b9: Layer already exists
8814cf621812: Layer already exists
f332a5c37505: Layer already exists
f1dfa8049aa6: Layer already exists
79109c0f8a0b: Layer already exists
33db8ccd260b: Layer already exists
b8c891f0ffec: Layer already exists
1.4.2-SNAPSHOT: digest: sha256:381f062e441ae3ea32413f002a6cac83161d8280edcee1b85c5257889a024420 size: 7848
Installing the development SDNC Docker image into ONAP
The instructions to create an ONAP installation using the OOM Rancher/Kubernetes approach are in the ONAP wiki site (be sure to select the Casablanca version of the instructions). Once installed, there are further instructions on deploying ONAP at this wiki page.
Working with the ONAP oom and integration repositories in the "ubuntu" home directory in sb4-rancher
The sb4-rancher VM is the Rancher controller for the ONAP installation at OWL, and we keep clones of the ONAP oom and integration repositories in the ubuntu home directory. Below are commands to execute as user ubuntu in a terminal session with sb4-rancher. Please edit these commands if something is wrong or missing.
| sudo -i -u ubuntu | Change to user ubuntu |
cd ~/git/oom && git status && git checkout . && git pull | Discard any changes in the oom repository and pull down the latest. I assume that we keep all of our changes in override files and other locations |
| cd ~/git/integration | This repository maintains version numbers of the latest code for the ONAP components. There is information about the repository at https://gerrit.onap.org/r/gitweb?p=integration.git;a=summary. |
git checkout casablanca | We agreed to use the casablanca release for the proof-of-concept |
cd ~/git/integration/version-manifest/src/main/scripts | This folder contains scripts that update the OOM repository with the correct version numbers |
./update-oom-image-versions.sh \ ~/git/integration/version-manifest/src/main/resources/docker-manifest-release.csv \ ~/git/oom | Execute a script to update version numbers in the Helm charts in the oom/kubernetes directory. This will make changes to the values.yaml files, so “git status” in ~/git/oom will return many changes. "Release” because there is also a “staging” script. We want to use the release version numbers. |
cd ~/git/oom/kubernetes | Start following instructions at https://wiki.onap.org/display/DW/OOM+Helm+%28un%29Deploy+plugins |
sudo cp -r ~/oom/kubernetes/helm/plugins/ ~/.helm | Get the Helm deploy plugin developed by the OOM group |
make repo | This updates the Helm repo served by a local Helm process listening on port localhost:8879 |
make && make onap | I think this updates the local Helm repo with the latest versions in ~/git/oom/kubernetes. These commands take a while. |
After these commands, the repositories and Helm resources have been updated to the latest versions, and we can use the commands described in the next section to deploy our code into ONAP.
Preparing to install the SDNC Docker image
To install the development image rather than the nexus3 image, open a terminal session with the VM containing the Rancher controller (sb4-rancher). There are instructions on how to create a ssh tunnel to sb4-rancher at this wiki page. Once logged in, we must update parameters in the values.yaml file in the Helm chart for SDNC in the OOM repository, shown here.
% ls -F git/oom/kubernetes/sdnc
charts/  Chart.yaml  Makefile  requirements.lock  requirements.yaml  resources/  sdnc-prom/  templates/  values.yaml
Override file for the SDNC values.yaml file
The simplest way to override the values is to copy the entire values.yaml file into a separate file (I use ~/oof-pci/override-sndc.yaml) and modify the relevant parameters in that new file. The new values are shown below. We identify the repository with the source image name and tag, create a cluster of three ODL members, and create a redundant MySQL deployment of two instances.
...
#################################################################
# Application configuration defaults.
#################################################################
# application images
repository: nexus3.onap.org:10001
repositoryOverride: registry.hub.docker.com
pullPolicy: Always
#image: onap/sdnc-image:1.4.1
image: ft3e0tab7p92qsoceonq/oof-pci-sdnr:1.4.2-SNAPSHOT
...
mysql:
nameOverride: sdnc-db
service:
name: sdnc-dbhost
internalPort: 3306
nfsprovisionerPrefix: sdnc
sdnctlPrefix: sdnc
persistence:
mountSubPath: sdnc/mysql
enabled: true
disableNfsProvisioner: true
replicaCount: 2
geoEnabled: false
...
# default number of instances
replicaCount: 3
...
Override file for the ONAP values.yaml file
By default, the OOM Rancher/Kubernetes script installs all of the components, which we do not need for the proof-of-concept. We identify which components to install by copying the ~/git/oom/kubernetes/onap/values.yaml file into a separate "override" file (~/oof-pci/override-onap.yaml) and changing "enabled: true" to "enabled: false" for the unneeded components. Currently, these are the selected components.
| aaf | false |
| aai | true |
| appc | false |
| clamp | false |
| cli | false |
| consul | false |
| contrib | false |
| dcaegen2 | false |
| dmaap | true |
| esr | false |
| log | true |
| sniro-emulator | true |
| oof | true |
| msb | false |
| multicloud | false |
| nbi | false |
| policy | true |
| pomba | false |
| portal | true |
| robot | true |
| sdc | false |
| sdnc | true |
| so | true |
| uui | false |
| vfc | false |
| vid | false |
| vnfsdk | false |
Command to install ONAP with the development image
Following the guidelines at the OOM wiki page, I use this command to install ONAP with the desired configuration. The ~/oof-pci files are located into https://github.com/onap-oof-pci-poc/ccsdk repository.
cd ~/git/oom/kubernetes
helm install sdnc/ -n demo-sdnc --namespace onap -f ~/oof-pci/override-onap.yaml -f ~/oof-pci/override-sdnc.yaml
The parameter "demo" is used to preface each ONAP component with "demo-" so we have "demo-sdnc," for example. The "sdnc/" parameter instructs helm to use that directory to guide the deployment. The "--namespace onap" parameter causes ONAP to be deployed into the kubernetes namespace "onap." The "-f ~/oof-pci/override-onap.yaml -f ~/oof-pci/override-sdnc.yaml" parameters instruct helm to override the parameters in ~/git/oom/kubernetes/onap/values.yaml and ~/git/oom/kubernetes/sdnc/values.yaml file with the values in the files following the "-f" option. There can be a series of override files, and the last file takes precedence.
Commands to update the development image
If there is already an instance SDNC installed, it must be deleted before installing a new version. Use these commands.
helm del demo-sdnc --purge
kubectl get persistentvolumeclaims -n onap | grep demo-sdnc | sed -r 's/(^[^ ]+).*/kubectl delete persistentvolumeclaims -n onap \1/' | bash
kubectl get persistentvolumes      -n onap | grep demo-sdnc | sed -r 's/(^[^ ]+).*/kubectl delete persistentvolumes      -n onap \1/' | bash
kubectl get secrets                -n onap | grep demo-sdnc | sed -r 's/(^[^ ]+).*/kubectl delete secrets                -n onap \1/' | bash
kubectl get clusterrolebindings    -n onap | grep demo-sdnc | sed -r 's/(^[^ ]+).*/kubectl delete clusterrolebindings    -n onap \1/' | bash
The first command deletes SDNC but, despite the "--purge" option, some residual resources remain. The subsequent commands discover and delete those resources. The "helm del..." command takes some time, so be patient. Once SDNC has been deleted, you can install the new version using the commands in the previous section.
Accessing SDNC/SDNR
SDNC/SDNR Browser Interfaces
Now that SDNC/SDNR is deployed, how can you access it? To access the browser interfaces of SDNC/SDNR, you can use this sequence of commands. First:
% kubectl get pods -n onap -o wide | grep NODE && kubectl get pods -n onap -o wide | grep sdnc
NAME                                                   READY     STATUS                  RESTARTS   AGE       IP              NODE
demo-sdnc-controller-blueprints-694b7ff9d-gmrtd        1/1       Running                 0          20h       10.42.42.8      sb4-k8s-1
demo-sdnc-controller-blueprints-db-0                   1/1       Running                 0          20h       10.42.100.157   sb4-k8s-1
demo-sdnc-nengdb-0                                     1/1       Running                 0          20h       10.42.101.202   sb4-k8s-3
demo-sdnc-network-name-gen-7fc56878b6-sz8ps            1/1       Running                 0          20h       10.42.55.243    sb4-k8s-3
demo-sdnc-sdnc-0                                       2/2       Running                 0          20h       10.42.105.225   sb4-k8s-4
demo-sdnc-sdnc-1                                       2/2       Running                 0          20h       10.42.11.48     sb4-k8s-1
demo-sdnc-sdnc-2                                       2/2       Running                 0          20h       10.42.9.208     sb4-k8s-2
demo-sdnc-sdnc-ansible-server-7ddf4c54dd-vq877         1/1       Running                 0          20h       10.42.137.38    sb4-k8s-1
demo-sdnc-sdnc-db-0                                    2/2       Running                 0          20h       10.42.119.112   sb4-k8s-3
demo-sdnc-sdnc-db-1                                    2/2       Running                 0          20h       10.42.26.168    sb4-k8s-4
demo-sdnc-sdnc-dgbuilder-647d9bddb8-b2gxp              1/1       Running                 0          20h       10.42.93.148    sb4-k8s-4
demo-sdnc-sdnc-dmaap-listener-f9c9fd74c-w42rq          0/1       Init:0/1                0          20h       10.42.38.155    sb4-k8s-3
demo-sdnc-sdnc-portal-6fcd6b8445-bhf48                 1/1       Running                 0          20h       10.42.249.112   sb4-k8s-4
demo-sdnc-sdnc-ueb-listener-849d6498b5-mf8pw           0/1       Init:0/1                0          20h       10.42.0.101     sb4-k8s-3
demo-so-so-sdnc-adapter-5b7787596d-bm9xn               1/1       Running                 0          2d        10.42.170.141   sb4-k8s-1
% ping sb4-k8s-4
PING sb4-k8s-4 (10.31.1.79) 56(84) bytes of data.
64 bytes from sb4-k8s-4 (10.31.1.79): icmp_seq=1 ttl=64 time=0.505 ms
We see that there are three instances of SDNC running and two instances of SDNC-DB and that they are deployed in different nodes, as expected. All of the pods have private IP addresses that are not accessible from outside the ONAP deployment, but demo-sdnc-sdnc-0 is installed in NODE sb4-k8s-4, which has IP address 10.31.1.79. If you cannot use ping to determine the IP address of the node, the command "kubectl describe node <node-name> -n <namespace>" will provide the address.
You can now enter this command.
% kubectl get svc -n onap | grep NAME && kubectl get svc -n onap | grep sdnc
NAME                          TYPE           CLUSTER-IP      EXTERNAL-IP                            PORT(S)                                                       AGE
sdnc                          NodePort       10.43.141.133   <none>                                 8282:30202/TCP,8202:30208/TCP,8280:30246/TCP,8443:30267/TCP   20h
sdnc-ansible-server           ClusterIP      10.43.41.91     <none>                                 8000/TCP                                                      20h
sdnc-cluster                  ClusterIP      None            <none>                                 2550/TCP                                                      20h
sdnc-dbhost                   ClusterIP      None            <none>                                 3306/TCP                                                      20h
sdnc-dbhost-read              ClusterIP      10.43.100.184   <none>                                 3306/TCP                                                      20h
sdnc-dgbuilder                NodePort       10.43.16.12     <none>                                 3000:30203/TCP                                                20h
sdnc-dmaap-listener           ClusterIP      None            <none>                                 <none>                                                        20h
sdnc-portal                   NodePort       10.43.40.149    <none>                                 8843:30201/TCP                                                20h
sdnc-sdnctldb01               ClusterIP      None            <none>                                 3306/TCP                                                      20h
sdnc-sdnctldb02               ClusterIP      None            <none>                                 3306/TCP                                                      20h
sdnc-ueb-listener             ClusterIP      None            <none>                                 <none>                                                        20h
so-sdnc-adapter               ClusterIP      10.43.141.124   <none>                                 8086/TCP                                                      2d
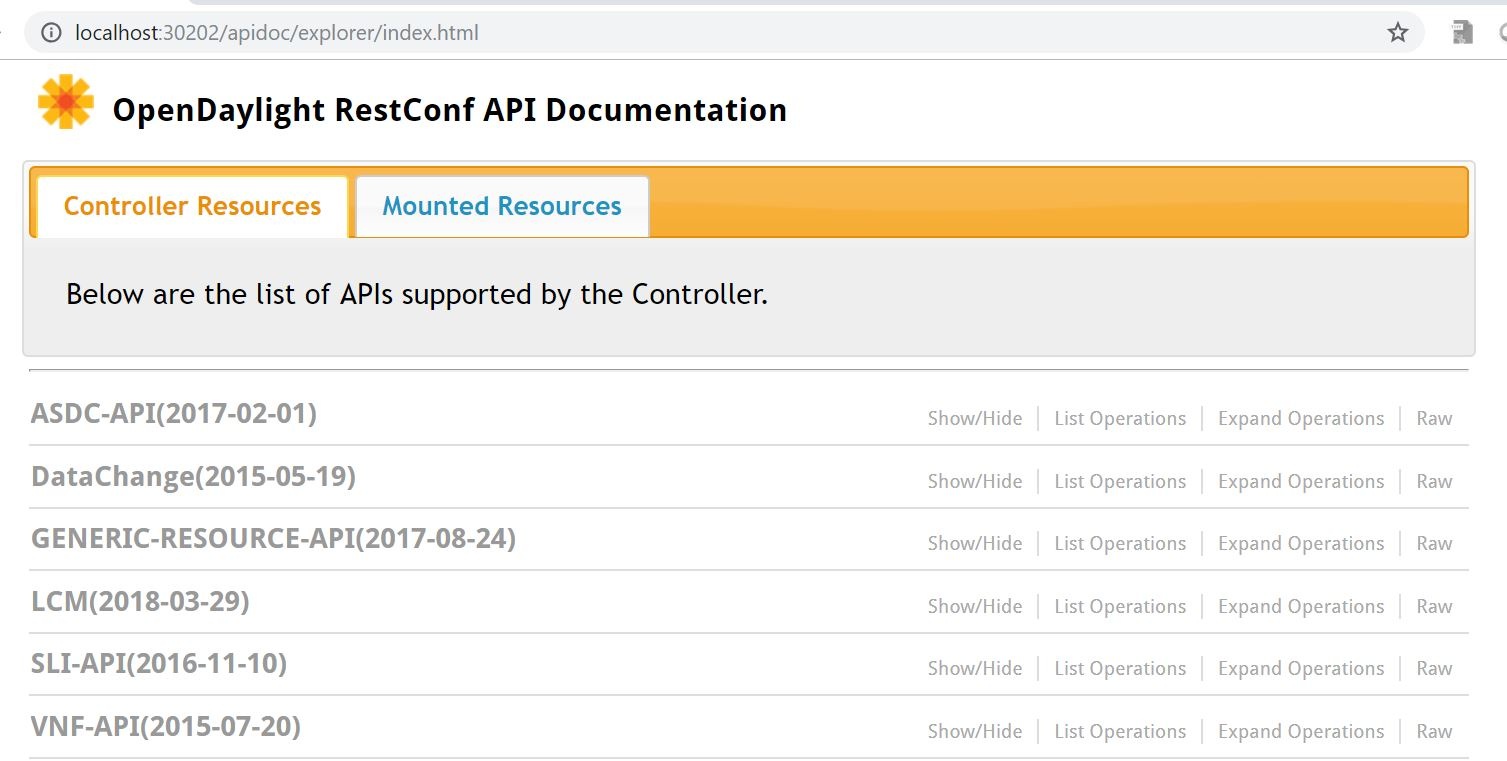
SDNC is presenting a service at a NodePort that is accessible from outside the ONAP installation. PORT 8282:30202 means that port 30202 is accessible externally and maps to internal port 8282 (the Dockerfile that creates the SDNC image maps host port 8282 to container port 8181). Therefore, SDNC is listening at sb4-k8s-4:30202, or 10.31.1.79:30202. By creating a ssh tunnel to sb4-k8s-4 (described here), one can open a browser to localhost:30202/apidoc/explorer/index.html and see this.
SDNC/SDNR Terminal Session
There are (at least) two ways to open a terminal session with SDNC/SDNR. One way is through the command line. To learn the names of the SDNC/SDNR pods:
% kubectl get pods -n onap | grep demo-sdnc-sdnc
demo-sdnc-sdnc-0                                       2/2       Running                 0          20m
demo-sdnc-sdnc-1                                       2/2       Running                 0          3m
demo-sdnc-sdnc-2                                       2/2       Running                 0          3m
demo-sdnc-sdnc-ansible-server-7ddf4c54dd-7t5l5         1/1       Running                 0          20m
demo-sdnc-sdnc-db-0                                    2/2       Running                 0          20m
demo-sdnc-sdnc-db-1                                    2/2       Running                 0          3m
demo-sdnc-sdnc-dgbuilder-647d9bddb8-t8lsh              1/1       Running                 0          20m
demo-sdnc-sdnc-dmaap-listener-f9c9fd74c-vblr7          0/1       Init:0/1                0          20m
demo-sdnc-sdnc-portal-6fcd6b8445-dkxfq                 1/1       Running                 0          20m
demo-sdnc-sdnc-ueb-listener-849d6498b5-q2jhf           0/1       Init:0/1                0          20m
Then, to open a session with demo-sdnc-sdnc-0, for example, enter:
% kubectl exec -it demo-sdnc-sdnc-0 -n onap -- /bin/bash
Defaulting container name to sdnc.
Use 'kubectl describe pod/demo-sdnc-sdnc-0' to see all of the containers in this pod.
root@demo-sdnc-sdnc-0:/#
Another approach is to use the Kubernetes GUI. Browse to the GUI, enter "sdnc" in the "Search" window and then scroll down to "Pods."

Click on "demo-sdnc-sdnc-0," for example, and then on "EXEC" in the new window with details about that pod.

This will open a new window with a terminal session to the SDNC container in that pod.

DMaaP Topics
These DMaaP messages are created and working in OWL.
- DCAE_EVENT_OUTPUT
- PCI-NOTIF-TOPIC-NGHBR-LIST-CHANGE-INFO
- SDNR-CL
- SDNR-CL-RSP
Please let me know if I missed a message. The URL for the DMaaP message router is http://10.31.1.51:30227 (VM sb4-k8s-3). The DMaaP message router doesn’t inspect the contents of a message, so the messages are free-form. Here’s an example of a publish:
POST http://10.31.1.51:30227/events/SDNR-CL
Body
{"name": "value"}
And a subscribe:
GET http://10.31.1.51:30227/events/SDNR-CL/group-id-1/consumer-id-1
You can work from your local machine by setting up a tunnel, e.g.,
ssh -A -t <username>@console.sb10.orbit-lab.org -L 30227:localhost:30227 \
ssh -A -t <username>@node2-1                    -L 30227:localhost:30227 \
ssh -A -t <username>@10.31.1.51                 -L 30227:localhost:30227
With that tunnel, you can access the message router at localhost:30227.
Conclusion
Please feel free to edit this page to make corrections or improvements. Your assistance will be greatly appreciated.
4 Comments
Ramesh Narayana Iyer
Is the any SDN-R (Honolulu) custom image creation steps documentation is available?
Requirement: Working on some custom implementations in SDN-R.
I cloned the ccsdk-features source code from https://github.com/onap/ccsdk-features/tree/honolulu
Compilation:
~/ccsdk-features$ mvn clean install → was successful.
My environment setup:
Ubuntu 18.x
Docker 20.1017
Java: JDK11
Any help will be greatly appreciated.
Ramesh Narayana Iyer
Any update...
Herbert Eiselt
There is no description available. The steps for Honolulu are:
Ramesh Narayana Iyer
Thank you Herbert for the information.