This guide will illustrate setting up an A&AI development environment for R4 Dublin in Ubuntu 16.04.
DRAFT - this guide is in process of being updated - thanks for your patience ![]()
NOTE - If you are updating an older version with a new schema object, it will need to be in the latest oxm. In the Dublin Release, the latest oxm and db edgerules version is v16.
(For alternative setup, see also AAI-2049 - Getting issue details... STATUS and https://gerrit.onap.org/r/gitweb?p=aai%2Ftest-config.git;hb=e64f08ac8242a7db6eb3238ee0ad1a30c8aecf0d;f=local-setup )
For this exercise, I set up a new instance of Ubuntu in Virtualbox and gave it 16G RAM, 200GB dynamically allocated storage, and 3 processors.
- install openjdk 8
- sudo apt install openjdk-8-jdk
- sudo apt install openjdk-8-jdk
- Install single node hadoop/janusgraph
- $ wget http://github.com/JanusGraph/janusgraph/releases/download/v0.2.0/janusgraph-0.2.0-hadoop2.zip
- $ unzip janusgraph-0.2.0-hadoop2.zip
- $ cd janusgraph-0.2.0-hadoop2/
- $ ./bin/janusgraph.sh start, # make sure you are not a root user as elasticsearch cannot be run as root. Response looks like:
Forking Cassandra...
Running `nodetool statusthrift`... OK (returned exit status 0 and printed string "running").
Forking Elasticsearch...
Connecting to Elasticsearch (127.0.0.1:9200)...... OK (connected to 127.0.0.1:9200).
Forking Gremlin-Server...
Connecting to Gremlin-Server (127.0.0.1:8182).... OK (connected to 127.0.0.1:8182).
Run gremlin.sh to connect.
you can verify whether everything is running by executing
./bin/janusgraph.sh statusGremlin-Server (org.apache.tinkerpop.gremlin.server.GremlinServer) is running with pid 9835
Elasticsearch (org.elasticsearch.bootstrap.Elasticsearch) is running with pid 9567
Cassandra (org.apache.cassandra.service.CassandraDaemon) is running with pid 9207
- Install haproxy
- $ sudo apt-get -y install haproxy
- $ <path-to-haproxy>/haproxy -v
HA-Proxy version 1.6.3 2015/12/25
Copyright 2000-2015 Willy Tarreau <willy@haproxy.org> Install the attached haproxy.cfg file in /etc/haproxy
$ wget https://wiki.onap.org/download/attachments/45306687/haproxy.cfg
- $ sudo cp haproxy.cfg /etc/haproxy
- $ sudo mkdir /usr/local/etc/haproxy
Install the attached aai.pem file in /etc/ssl/private
$ wget https://wiki.onap.org/download/attachments/45306687/aai.pem
- $ sudo cp aai.pem /etc/ssl/private/aai.pem
- $ sudo chmod 640 /etc/ssl/private/aai.pem
- $ sudo chown root:ssl-cert /etc/ssl/private/aai.pem
Add these hostnames to the loopback interface in /etc/hosts:
127.0.0.1 localhost aai-traversal.api.simpledemo.openecomp.org aai-resources.api.simpledemo.openecomp.org
- $ sudo service haproxy restart
- follow the initial setup instructions in Setting Up Your Development Environment e.g.
- $ sudo apt-get install git
- $ sudo apt-get install npm
- $ sudo apt-get install maven
- $ sudo apt-get install docker.io
- $ wget https://git.onap.org/oparent/plain/settings.xml
- $ mkdir ~/.m2
- cp settings.xml ~/.m2
- If you get an error on some of the repos saying that oparent is unresolvable, using the example settings.xml file should solve this problem: Setting Up Your Development Environment#MavenExamplesettings.xml
- Set up repos:
- $ mkdir -p ~/src/aai
- $ cd ~/src/aai ; for f in aai-common schema-service resources traversal graphadmin logging-service ; do git clone ssh://<username>@gerrit.onap.org:29418/aai/$f; done
- cd ~/src/aai ; for f in aai-common schema-service resources traversal graphadmin logging-service ; do
(cd $f ; git checkout dublin) done | tee checkoutlog.txt - Janus Setup (part 1)
Modify both janus-cached.properties and janus-realtime.properties to the following (for all MS’s that will connect to the local Cassandra backend)
storage.backend=cassandra
storage.hostname=localhost
storage.cassandra.keyspace=onap # or different keyspace name of your choosing- ~/src/aai/resources/aai-resources/src/main/resources/etc/appprops/janusgraph-cached.properties
- ~/src/aai/resources/aai-resources/src/main/resources/etc/appprops/janusgraph-realtime.properties
- ~/src/aai/traversal/aai-traversal/src/main/resources/etc/appprops/janusgraph-cached.properties
- ~/src/aai/traversal/aai-traversal/src/main/resources/etc/appprops/janusgraph-realtime.properties
- ~/src/aai/graphadmin/src/main/resources/etc/appprops/janusgraph-cached.properties
- ~/src/aai/graphadmin/src/main/resources/etc/appprops/janusgraph-realtime.properties
- Build all the modules:
- $ cd ~/src/aai ; for f in aai-common schema-service resources traversal graphadmin logging-service ; do
(cd $f ; mvn versions:set -DnewVersion=0.0.1-TEST-SNAPSHOT && mvn -DskipTests clean install -Daai.schema.version=0.0.1-TEST-SNAPSHOT) done | tee log.txt 2>&1 - $ grep -e "SUCCESS" -e "FAILURE" log.txt
[INFO] aai-aai-common ..................................... SUCCESS [ 11.543 s]
[INFO] BUILD SUCCESS
[INFO] aai-aai-common ..................................... SUCCESS [ 44.181 s]
[INFO] aai-rest ........................................... SUCCESS [ 26.592 s]
[INFO] aai-schema-ingest .................................. SUCCESS [ 28.671 s]
[INFO] aai-annotations .................................... SUCCESS [ 0.718 s]
[INFO] aai-core ........................................... SUCCESS [ 40.965 s]
[INFO] aai-auth ........................................... SUCCESS [ 1.228 s]
[INFO] aai-utils .......................................... SUCCESS [ 5.942 s]
[INFO] BUILD SUCCESS
[INFO] aai-schema-service ................................. SUCCESS [ 1.422 s]
[INFO] BUILD SUCCESS
[INFO] aai-schema-service ................................. SUCCESS [ 3.070 s]
[INFO] aai-annotations .................................... SUCCESS [ 5.130 s]
[INFO] aai-schema-gen ..................................... SUCCESS [01:46 min]
[INFO] aai-schema ......................................... SUCCESS [ 32.504 s]
[INFO] aai-queries ........................................ SUCCESS [ 6.461 s]
[INFO] aai-schema-service ................................. SUCCESS [02:17 min]
[INFO] BUILD SUCCESS
[INFO] aai-resources ...................................... SUCCESS [ 1.190 s]
[INFO] BUILD SUCCESS
[INFO] aai-resources ...................................... SUCCESS [ 3.210 s]
[INFO] aai-resources ...................................... SUCCESS [ 41.213 s]
[INFO] BUILD SUCCESS
[INFO] aai-traversal ...................................... SUCCESS [ 1.090 s]
[INFO] BUILD SUCCESS
[INFO] aai-traversal ...................................... SUCCESS [ 3.181 s]
[INFO] aai-traversal ...................................... SUCCESS [ 58.001 s]
[INFO] BUILD SUCCESS
[INFO] BUILD SUCCESS
[INFO] BUILD SUCCESS
[INFO] aai-logging-service ................................ SUCCESS [ 1.101 s]
[INFO] BUILD SUCCESS
[INFO] aai-logging-service ................................ SUCCESS [ 5.230 s]
[INFO] Common Logging API ................................. SUCCESS [ 1.995 s]
[INFO] EELF Logging Implementation ........................ SUCCESS [ 4.235 s]
[INFO] Common Logging Distribution ........................ SUCCESS [ 0.530 s]
[INFO] BUILD SUCCESSJanus setup (part 2)
- Run this on the local instance on your first time running AAI and whenever using new keyspace or after wiping the data.
- Download createDbSchemaLocal.sh to your dev machine. Adjust your build version accordingly, as of the casablanca release the version is 1.0.1.
- $ (cd graphadmin/ && mvn -PrunAjsc -Dstart-class=org.onap.aai.schema.GenTester -Daai.schema.version=0.0.1-TEST-SNAPSHOT -Daai.schema.ingest.version=0.0.1-TEST-SNAPSHOT -DskipTests -Dcheckstyle.skip=true -DAJSC_HOME=$HOME/src/aai/graphadmin -DBUNDLECONFIG_DIR=src/main/resources)
- You should see:
---- NOTE --- about to open graph (takes a little while)--------;
-- Loading new schema elements into JanusGraph --
-- graph commit
-- graph shutdown
- $ cd ~/src/aai ; for f in aai-common schema-service resources traversal graphadmin logging-service ; do
- Start the "resources" microservice
- Resources runs on port 8447. Go to the resources directory
$ cd ~/src/aai/resources - Set the debug port to 9447
$ export MAVEN_OPTS="-Xms1024m -Xmx5120m -XX:PermSize=2024m -Xdebug -Xnoagent -Djava.compiler=NONE -Xrunjdwp:transport=dt_socket,address=9447,server=y,suspend=n" - Start the microservice - adjust your build version accordingly
$ mvn -pl aai-resources -PrunAjsc -Daai.schema.version=0.0.1-TEST-SNAPSHOT -Daai.schema.ingest.version=0.0.1-TEST-SNAPSHOT -DskipTests -Dcheckstyle.skip=true
Should see something like this: Resources Microservice Started
- Resources runs on port 8447. Go to the resources directory
- Verify the resources microservice (this example uses curl from commandline)
- $ sudo apt-get install jq # for pretty output
- $ wget https://wiki.onap.org/download/attachments/45306687/test-complex
- $ wget https://wiki.onap.org/download/attachments/45306687/data-complex.json
- $ sh ./test-complex 2>&1 | tee log.txt
Confirm log.txt contains:
> GET /aai/v16/cloud-infrastructure/complexes HTTP/1.1
{
  "requestError": {
    "serviceException": {
      "messageId": "SVC3001",
      "text": "Resource not found for %1 using id %2 (msg=%3) (ec=%4)",
      "variables": [
        "GET",
        "cloud-infrastructure/complexes",
        "Node Not Found:No Node of type complex found at: cloud-infrastructure/complexes",
        "ERR.5.4.6114"
      ]
    }
  }
}
then followed by:
> PUT /aai/v16/cloud-infrastructure/complexes/complex/clli2 HTTP/1.1
> GET /aai/v16/cloud-infrastructure/complexes/complex/clli2 HTTP/1.1
{
  "physical-location-id": "clli2",
  "data-center-code": "example-data-center-code-val-6667",
  "complex-name": "clli2",
  "identity-url": "example-identity-url-val-28399",
  "resource-version": "1543408364646",
  "physical-location-type": "example-physical-location-type-val-28399",
  "street1": "example-street1-val-28399",
  "street2": "example-street2-val-28399",
  "city": "example-city-val-28399",
  "state": "example-state-val-28399",
  "postal-code": "example-postal-code-val-28399",
  "country": "example-country-val-28399",
  "region": "example-region-val-28399",
  "latitude": "1111",
  "longitude": "2222",
  "elevation": "example-elevation-val-28399",
  "lata": "example-lata-val-28399"
}
and finishes with:
> DELETE /aai/v16/cloud-infrastructure/complexes/complex/clli2?resource-version=1543408364646 HTTP/1.1
> GET /aai/v16/cloud-infrastructure/complexes HTTP/1.1
{
  "requestError": {
    "serviceException": {
      "messageId": "SVC3001",
      "text": "Resource not found for %1 using id %2 (msg=%3) (ec=%4)",
      "variables": [
        "GET",
        "cloud-infrastructure/complexes",
        "Node Not Found:No Node of type complex found at: cloud-infrastructure/complexes",
        "ERR.5.4.6114"
      ]
    }
  }
}
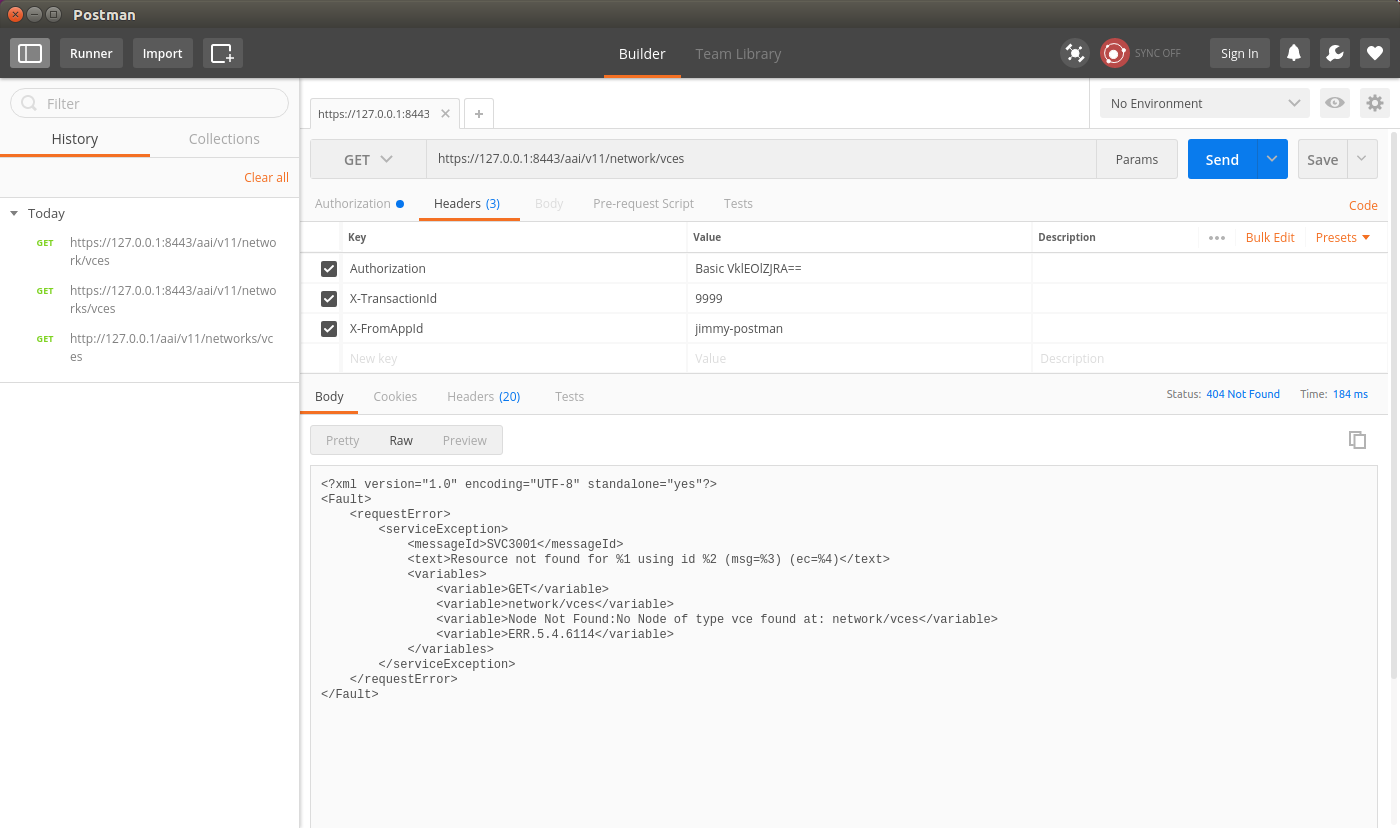
- Alternately, verify the resources microservice (this example uses Postman utility for Google Chrome)
- Use basic auth, user = AAI, pw = AAI
- Set the X-TransactionId header (in the example below, the value is 9999)
- Set the X-FromAppId header (in the example below, the value is jimmy-postman)
- Perform a GET of https://127.0.0.1:8443/aai/v16/network/vces
- You should see an error as below, 404 Not Found, ERR.5.4.6114. This indicates that the service is functioning normally:
- Start the "traversal" microservice
- Traversal runs on port 8446. Go to the traversal directory
$ cd ~/src/aai/traversal - Set the debug port to 9446
$ export MAVEN_OPTS="-Xms1024m -Xmx5120m -XX:PermSize=2024m -Xdebug -Xnoagent -Djava.compiler=NONE -Xrunjdwp:transport=dt_socket,address=9446,server=y,suspend=n" - Start the microservice - adjust your build version accordingly
$ mvn -pl aai-traversal -PrunAjsc -Daai.schema.version=0.0.1-TEST-SNAPSHOT -Daai.schema.ingest.version=0.0.1-TEST-SNAPSHOT -DskipTests -Dcheckstyle.skip=true
Should see something like this: Traversal Microservice Started
- Traversal runs on port 8446. Go to the traversal directory
- Verify the traversal microservice by executing attached postman AAI API calls
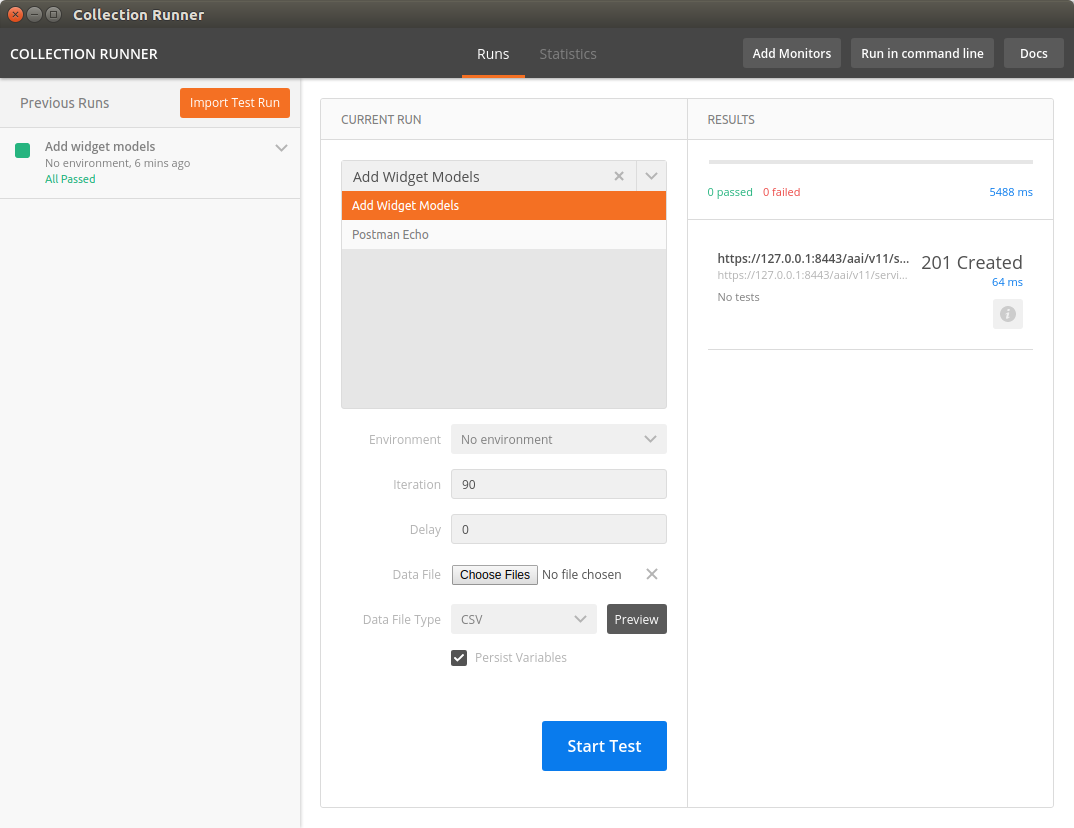
- Set up the widget models
This will set up the postman to add widget models: Add_Widget_Models.postman_collection.json - Create a runner using this file: models.csv
- Run the test runner
- Add a named query called "getComponentList" (this named query is used by VID): NamedQuery.postman_collection.json
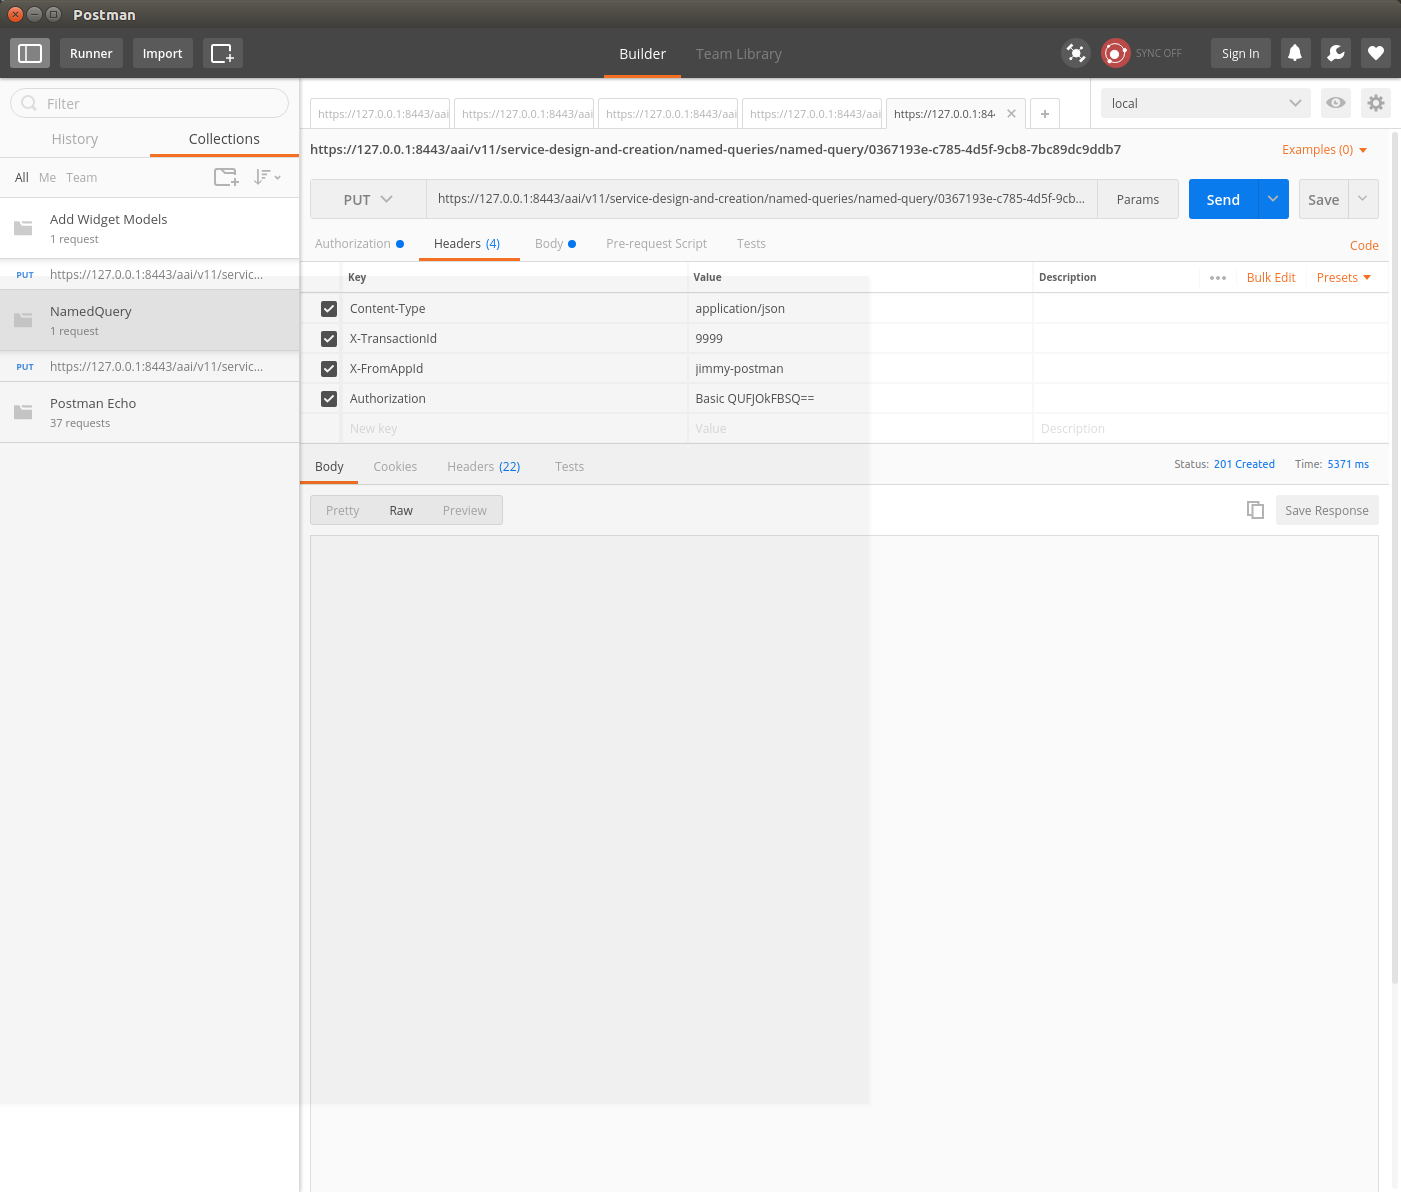
- Add objects: Add_Instanes_for_Named_Query.postman_collection.json (replace the xmlns "http://org.openecomp.aai.inventory/v16" with "http://org.onap.aai.inventory/vXX" in the Body of the PUT request when using version above v11)
- Execute named-query: Execute Named Query.postman_collection.json
You should see something like the following: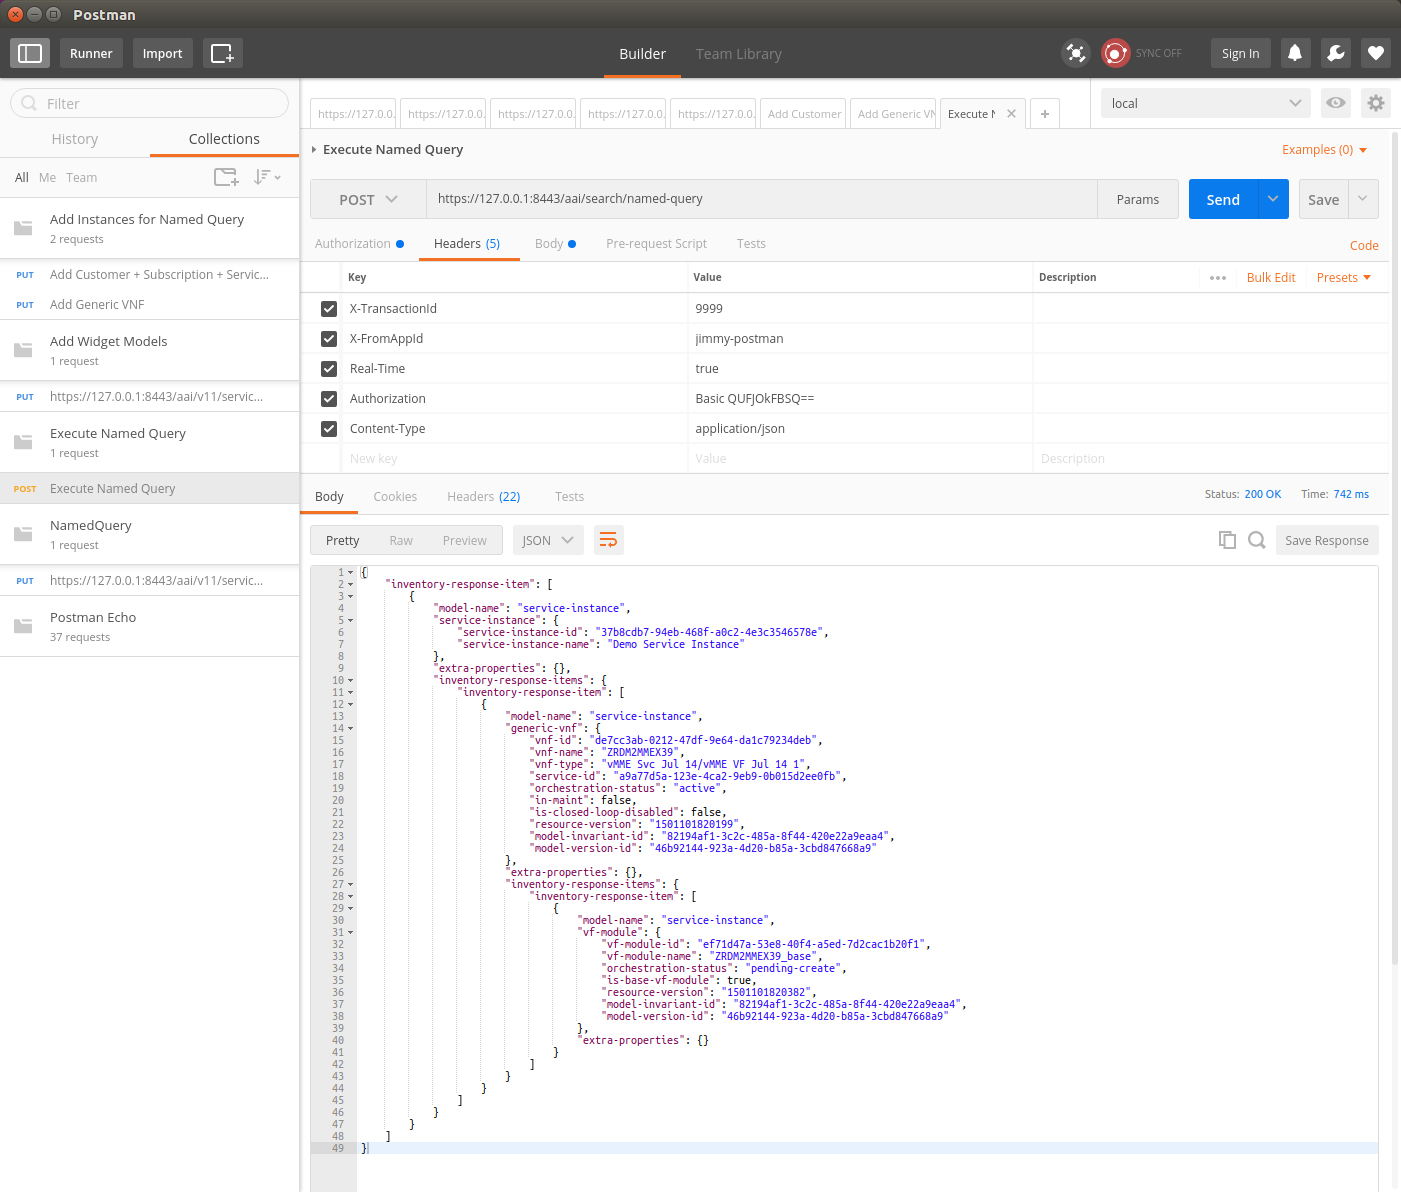
- Set up the widget models
- Your A&AI instance is now running, both the resources and traversal microservices are working properly with a local janus graph.
- Next: AAI Tutorial-Making and Testing a Schema Change - Dublin
Attachments